
Users Overview
The Users page is where you manage everyone who can log in to UPVOIT. This includes your own team (admins and users), clients, client contact persons, sub contractors and sub contractor users. For each user, you set their personal details, what they can see and do in the system, and, for team members, their billing and pay rates.
View the User List
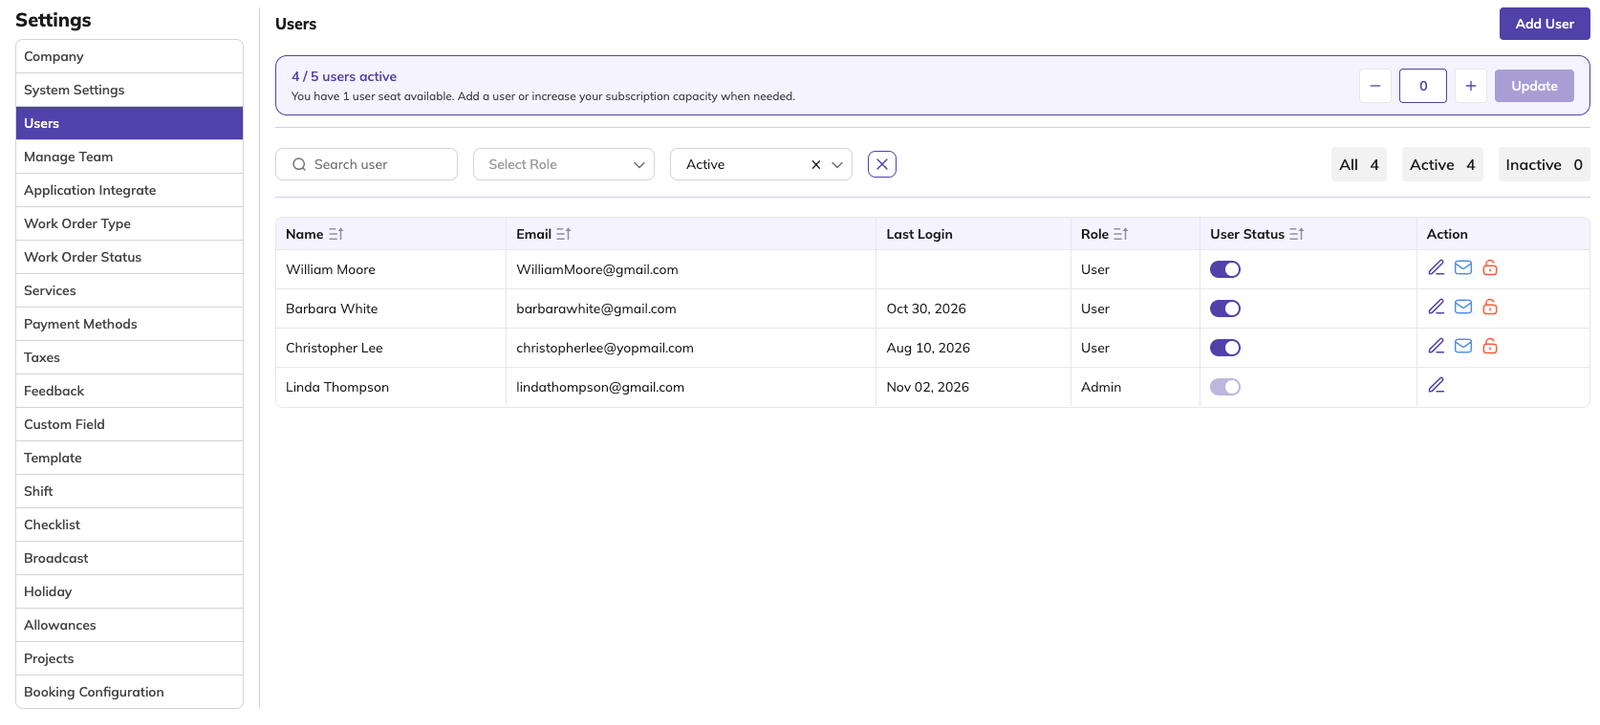
The Users page lists all users. The Add User button is at the top right.
User seats
The box at the top shows how many user seats are in use out of your subscription total (for example, 10 / 100 users active) and how many seats are still available. To buy more user seats:
-
Use – and + on the right to set the number of extra seats you need.
-
Click Update.
-
You are taken to the Stripe payment page to complete the purchase.
Filters
-
Search user – search by name or email.
-
Select Role – show only one type of user, such as Client or User.
User list
Each row shows:
-
Name – the user’s name. Deactivated appears under the name of deactivated users.
-
Email – the user’s login email.
-
Last Login – the date the user last logged in.
-
Role – the type of user: Admin, User, Client, Client Contact Person, Sub Contractor or Sub Contractor User.
-
User Status – a toggle that is on for active users and off for deactivated users.
-
Action – the edit (pencil), email (envelope) and lock icons. Deactivated users have no action icons.
Action icons
-
Edit (pencil) – opens the user so you can change their Basic Details, System Access permissions, Payroll & Billing details, and Notes & Attachments.
-
Email (envelope) – sends the user an activation email, so they can activate their account and log in.
-
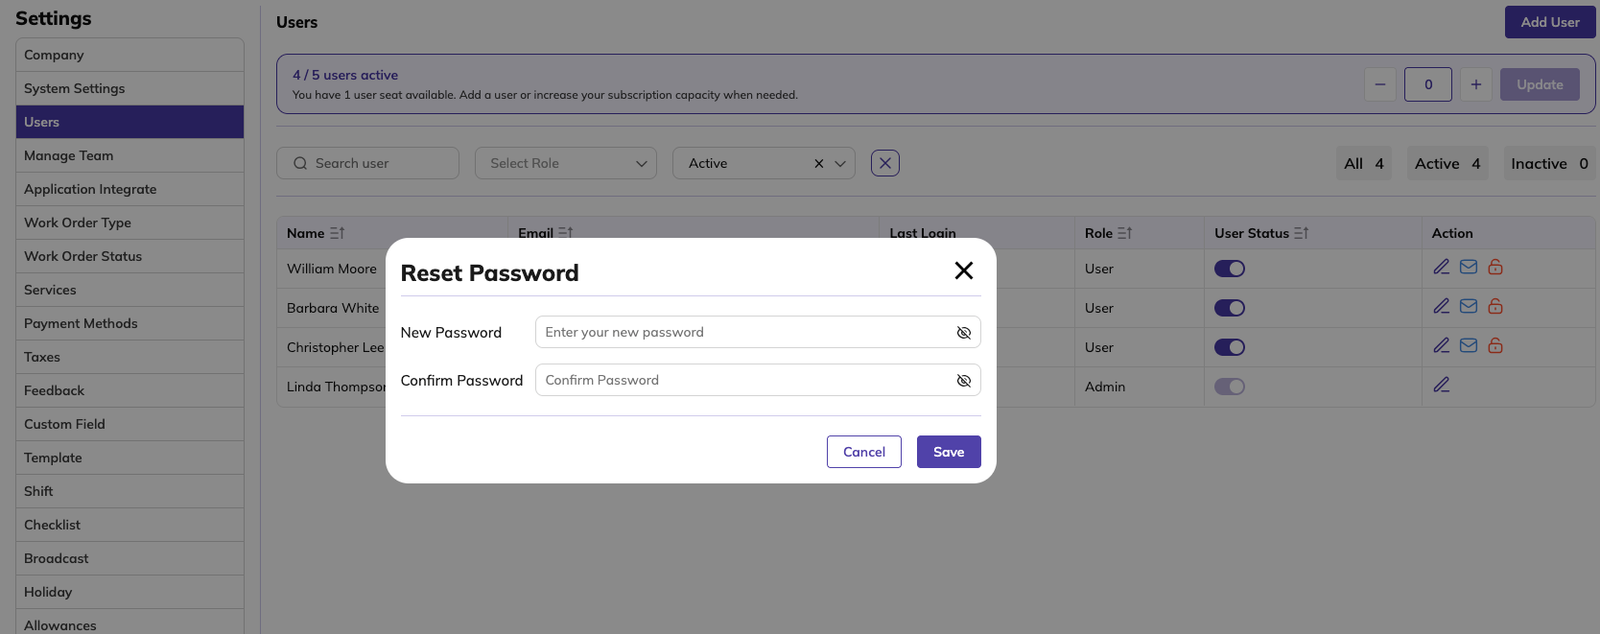
Lock – resets the user’s password.
Add User
To add user, click Add User at the top right of the Users page. The Add User page has four tabs: Basic Details, System Access, Payroll & Billing and Notes & Attachments. Click Next to move from one tab to the next.
Basic Details

This tab holds the user’s personal details. First name and Email address are required (marked *). The email address is used to log in.
The following fields affect how the user works in the system:
-
Profile – the user’s photo. Click Upload Image to add one.
-
Sub Contractor – links the user to a sub contractor company.
-
Shift – the user’s working shift. This is used for shift-based overtime in the Invoice and Payroll settings.
-
Color – the user’s colour on the schedule. It is used when Schedule Color System is set to Technician Wise.
-
Custom Field(s) – extra fields set up for users. Click Add Custom Field to create a new one.
System Access

This tab controls what the user can see and do in UPVOIT.
Make administrator
Tick this to give the user full permissions to everything. Leave it unticked to set permissions yourself.
Preset permission levels
Choose a starting level, then adjust the permissions below if needed:
-
Limited Worker – can view their own schedule, mark work complete and track their time.
-
Worker – can view all clients, quotes and work orders, including pricing details.
-
Dispatcher – can edit work orders, team and client details. Recommended for team leads.
-
Manager – can manage all areas except reports and payroll. Recommended for management.
-
Sub Contractor – for sub contractor users.
-
Custom – set each permission yourself.
Permission areas
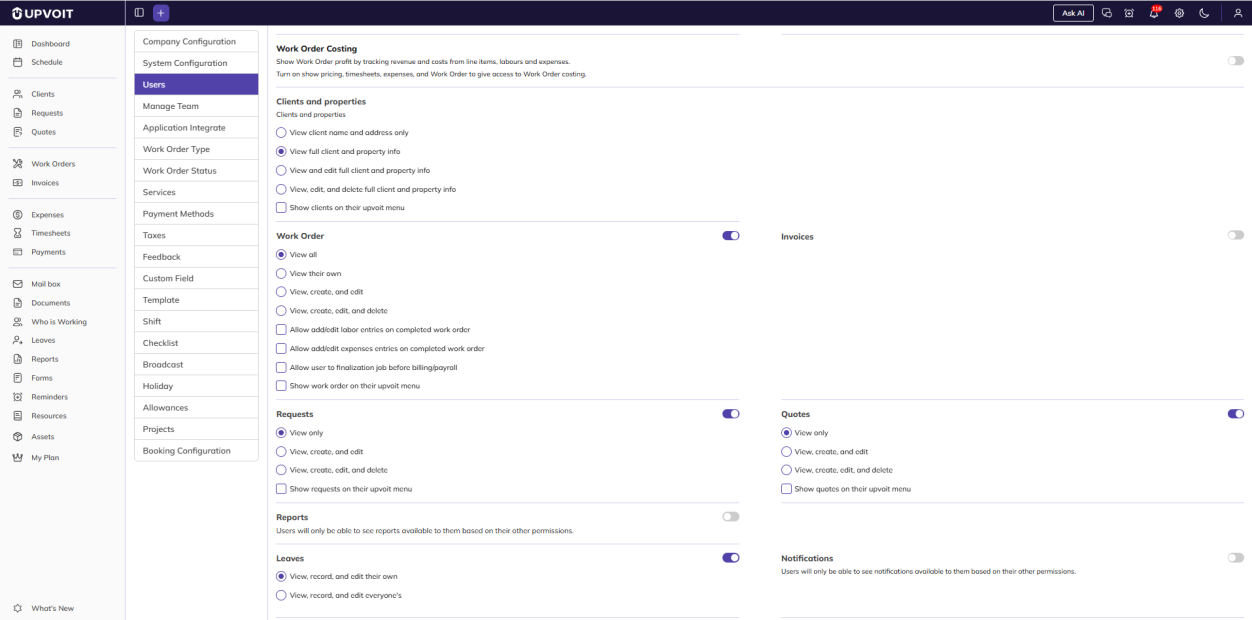
Each area of UPVOIT has its own permissions. Turn an area on or off with its toggle, then choose the access level. Most areas range from viewing only the user’s own records to viewing, creating, editing and deleting everyone’s records.
-
Schedule – access to the schedule, and whether the technician’s next job is shown.
-
Time tracking and timesheets – access to timesheets, and whether the user can Confirm Payroll & Payroll Slip and Approve Timesheet.
-
Notes and Expenses – access to notes and expense entries.
-
Show Pricing – allows editing of quotes, invoices and line items on work orders.
-
Work Order Costing – shows work order profit by tracking revenue and costs. This also needs Show Pricing, timesheets, expenses and work order access.
-
Clients and properties, Work Order, Requests, Quotes and Invoices – access to these records. Work Order also has options for adding or editing labor and expenses on completed work orders, and for finalizing work orders before billing and payroll.
-
Reports, Leaves, Notifications, Custom Form, Reminder, Who is Working, Documents, Resource, Assets and Inbox Chat – access to these areas.
Some areas have a Show … on their upvoit menu option. Tick it to show that menu item to the user.
Payroll & Billing

This tab sets the user’s rates. It is shown only for users and sub contractor users. It is not shown for clients, contractors or sub contractors.
-
Billing – the rates charged to the client for this user’s work: Billing Rate $, Overtime Rate $ and Premium Rate $ (per hour), and Travel Rate $ (per mile).
-
Payroll – how the user is paid. Choose Hourly Pay or Fix Pay, then enter the Employee Cost $, Overtime Rate $ and Premium Rate $ (per hour), and Travel Rate $ (per mile).
-
Allowances – allowances paid to this user. Click Add, choose the allowance, check the Amount and Frequency, and click Save. Allowances are created in Settings → Allowances.
How these are used on work orders
When labor is added to a work order for this user, the Billing and Payroll rates are used to calculate the labor’s Total Billing and Total Cost. The user’s allowances are added automatically to the work order’s Expenses table.
Notes & Attachments

Add internal notes about the user in Internal Notes & Attachments, and upload files such as contracts or certificates. Click Click to Upload or drag files into the upload area. Supported files are PDF, JPEG, PNG and DOC, up to 10MB.
Edit User
To edit user, click the edit (pencil) icon in the user’s row on the Users page. The Edit User page opens.
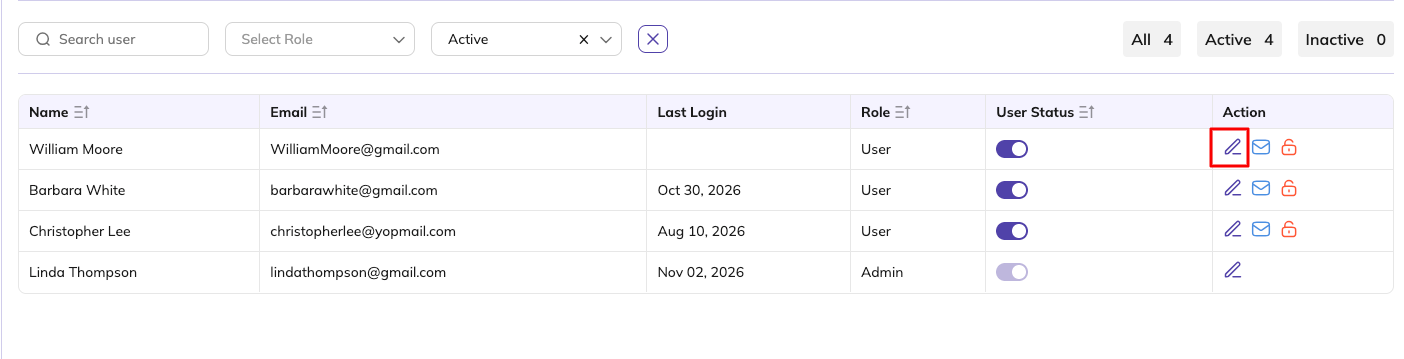
The Edit User page has the same tabs and fields as the Add User page, with the user’s existing details already filled in. Change the details you need, then click Update to save.
The email address is shown greyed out and cannot be changed.
The tabs you see depend on the user’s role. See 3.5 Access by User Role.
Buttons
-
Update – saves your changes.
-
Deactivate – deactivates the user. See 3.4 Activate or Deactivate User.
-
Next – moves to the next tab.
-
Cancel – closes the page without saving.
Activate or Deactivate User
Deactivating a user stops them from logging in to UPVOIT. Their details and records stay in the system.
To deactivate a user, do one of the following:
-
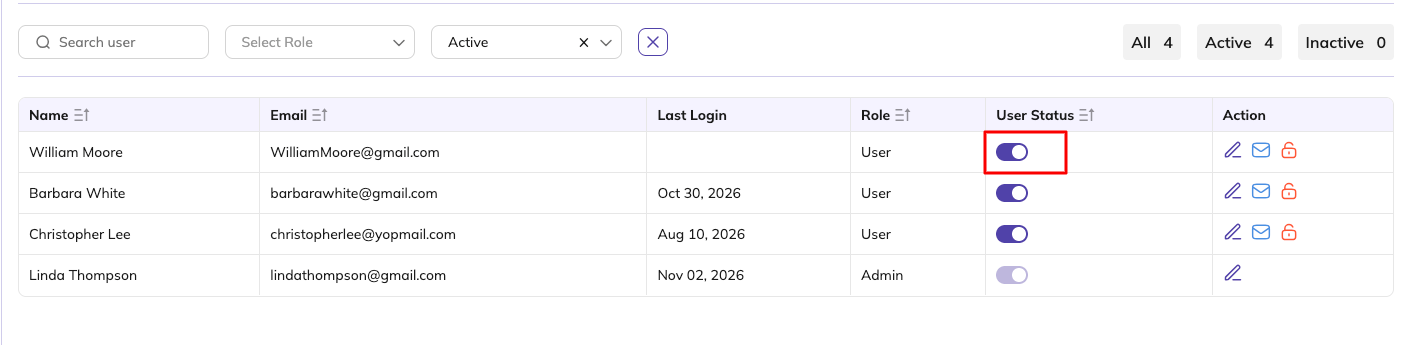
Turn off the User Status toggle in the user’s row on the Users page.
-
Open the user with the edit (pencil) icon and click Deactivate at the top right.

Deactivated appears under the user’s name in the list, and the edit, email and lock icons are no longer shown.
To activate a user again, turn on the User Status toggle in the user’s row.
Send an Activation Email
A new user must activate their account before logging in. Click the Email (envelope) icon in the user’s row, and the activation email is sent straight away to the address in their Basic Details. The user opens the link, sets a password, and can then log in.
Reset User’s Password
If a user can’t log in, click the Lock icon in the user’s row to reset their password.
Access by User Role
The tabs on the Add User and Edit User pages, and the permissions available on the System Access tab, depend on the user’s role.
Users and Sub Contractor Users
These users have all four tabs: Basic Details, System Access, Payroll & Billing and Notes & Attachments. The System Access tab shows the full set of permission areas and the preset permission levels described in 3.2 Add a User.
Clients
Clients have three tabs: Basic Details, System Access and Notes & Attachments. The Payroll & Billing tab is not shown.
The System Access tab for clients shows only the areas a client can use. Turn an area on to let the client access it in UPVOIT:
-
Work Order – view their work orders.
-
Requests – view and submit requests.
-
Quotes – view their quotes.
-
Invoices – view their invoices.
-
Inbox Chat – send and receive messages. The client can only view and send messages in conversations they have permission to access.
Client Contact Persons
Client contact persons have three tabs: Basic Details, System Access and Notes & Attachments. The Payroll & Billing tab is not shown.
The System Access tab for client contact persons shows only two areas. Turn an area on, then choose the access level:
-
Work Order – access to the client’s work orders.
-
View all – see all of the client’s work orders.
-
View their own – see only the work orders they are linked to.
-
-
Invoices – access to the client’s invoices.
-
View all – see all of the client’s invoices.
-
View their own – see only the invoices they are linked to.
-
Did this answer your question?


