
Resource Management Overview
The Resources module is a shared library for your team. It keeps training videos, reference documents, and important phone numbers in one place, so staff can find what they need without leaving Upvoit.
Access to Resources
Users can see the Resources module only if they have the Resource permission. You choose how much each user can do.
To give a user access:
-
Go to Settings → Users.
-
Open the user and go to System Access.
-
Turn on the Resource toggle.
-
Select an access level:
-
View only: The user can browse, search, view, and download resources, but can’t change them.
-
View, create, edit, and delete: The user has full access, including adding, editing, and deleting resources.
-
-
Click Next to continue and save.

Search
Search works the same way in all three tabs.
Search: Enter a name or tag and click Search to filter the list.
Videos
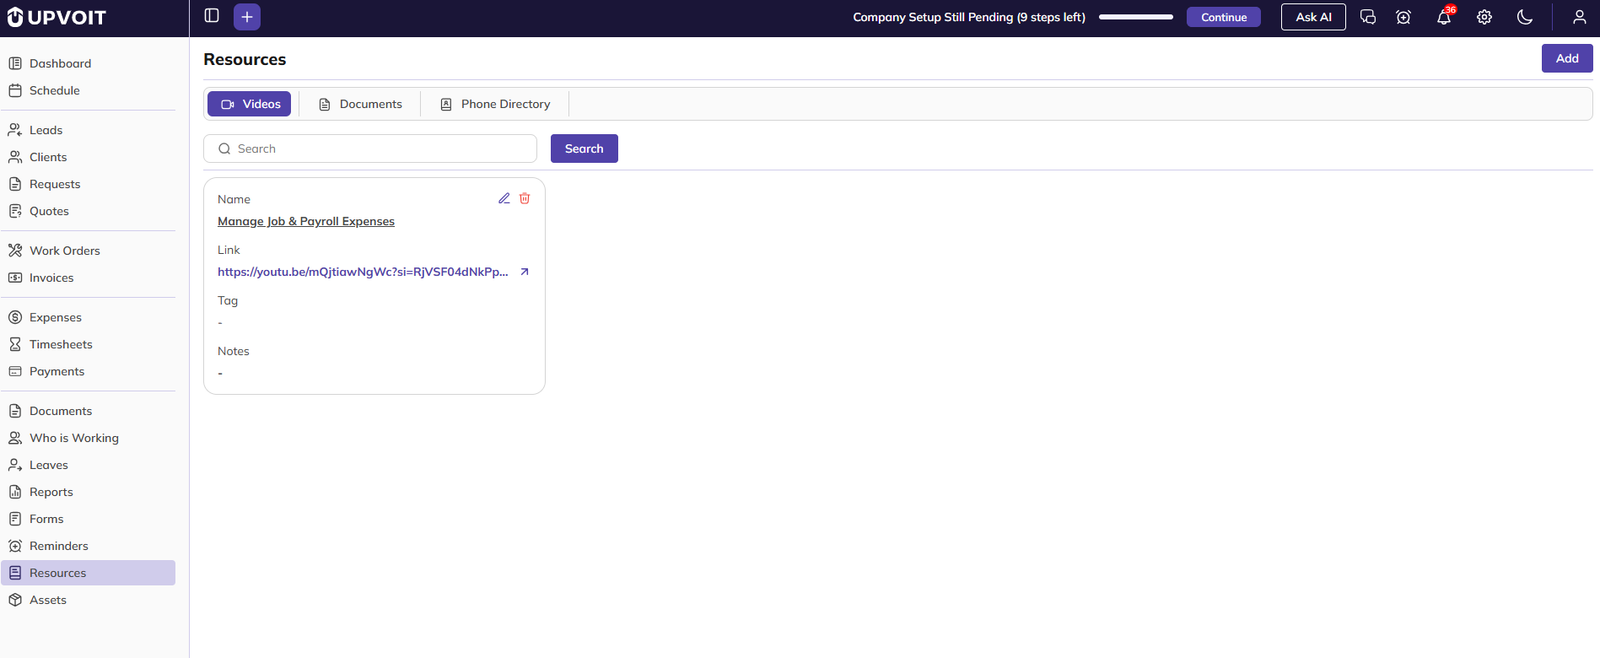
The Videos tab lists links to training or reference videos, such as module walkthroughs. Each video appears as a card.
-
Name: The title of the video. Click it to open the video.
-
Link: The video URL. Click the arrow icon to open it in a new tab.
-
Tag: A label that groups related resources, such as HR or Timesheet.
-
Notes: A short description of what the video covers.
-
Edit / Delete icons: Edit or delete the video, using the icons at the top right of the card.
Documents
The Documents tab stores uploaded files such as policies, reports, and reference sheets. Each document appears as a card.

-
Name: The title of the document.
-
Document: The uploaded file name. Click the download icon to save the file, or the eye icon to preview it.
-
Tag: The group the document belongs to.
-
Notes: Any additional details about the document.
-
Edit / Delete icons: Edit or delete the document.
Phone Directory
The Phone Directory keeps important contact numbers, optionally linked to a client and its contact person.

-
Client: The client this number belongs to.
-
Contact Person: The client’s contact person, if one was selected.
-
Name: The name saved for this entry.
-
Phone Number: The number, with country code.
-
Comments: Any notes about the contact.
-
Last Updated By: The user who last changed the entry.
-
Action: Icons to edit, view, or delete the entry.
Add Resource
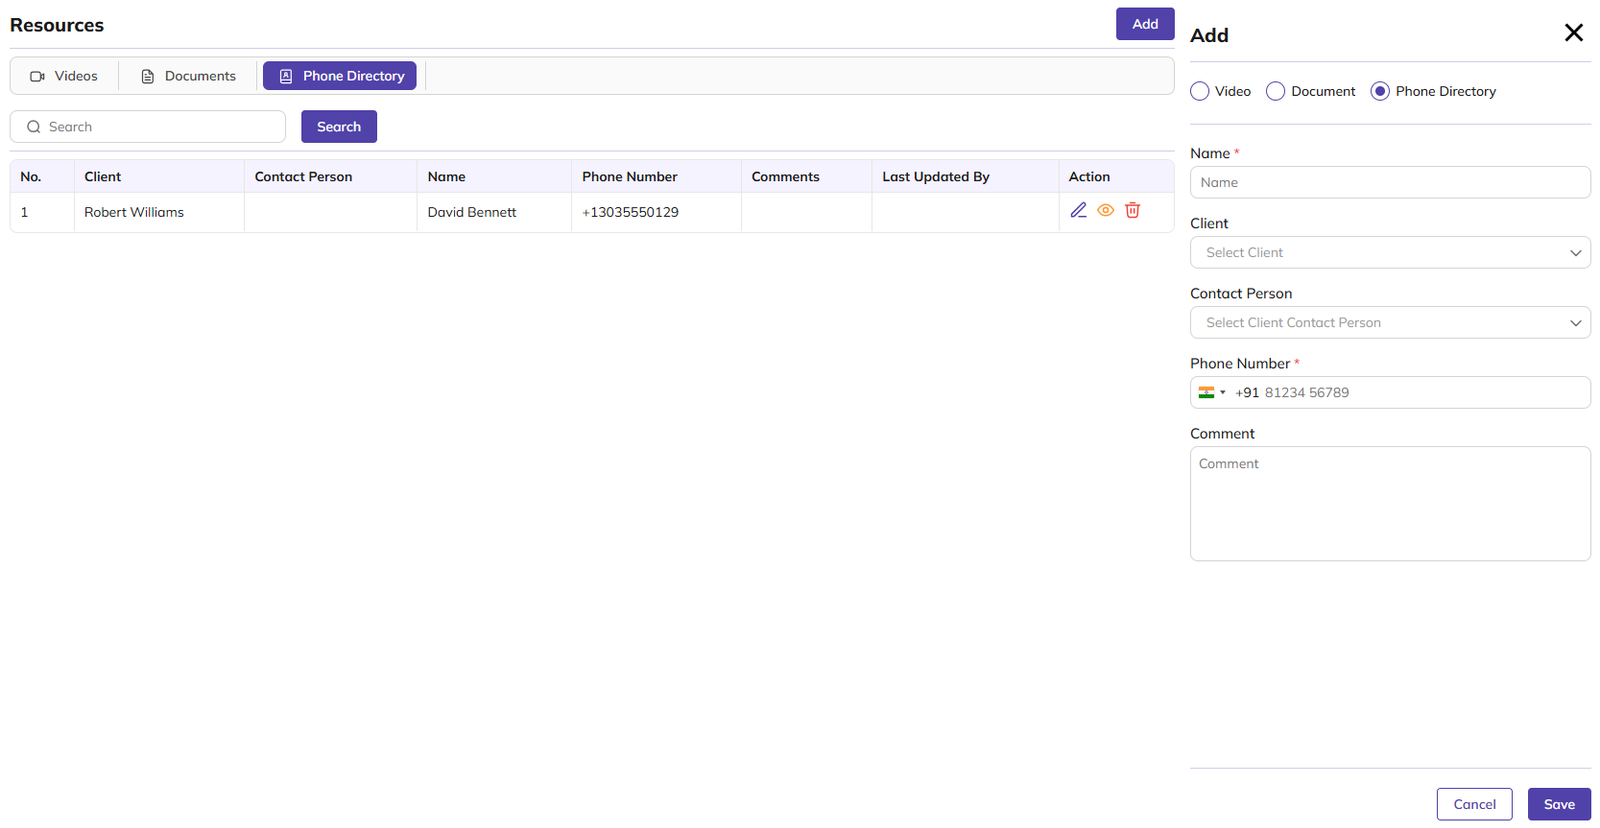
Click Add at the top right of the Resources page to open the Add panel. Choose the type of resource you want to add: Video, Document, or Phone Directory. The fields change based on your choice.
Tag: Select an existing tag from the dropdown. To create a new tag, type its name in the dropdown and click Create New “tag name”. The new tag is saved and can be used for other resources.
Add Video

Add Document

Add Phone Directory Entry
Keep the following in mind:
-
Tag: Select an existing tag, or type a new name and click Create New “tag name” to create one.
-
Link (Video): Any URL is accepted, such as YouTube, Vimeo, or a shared drive link.
-
Upload (Document): Supported formats are PDF, JPEG, PNG, SVG, WEBP, and DOC, up to 10 MB.
-
Contact Person (Phone Directory): Select a client first. The list then shows only that client’s contacts.
Edit Resource
-
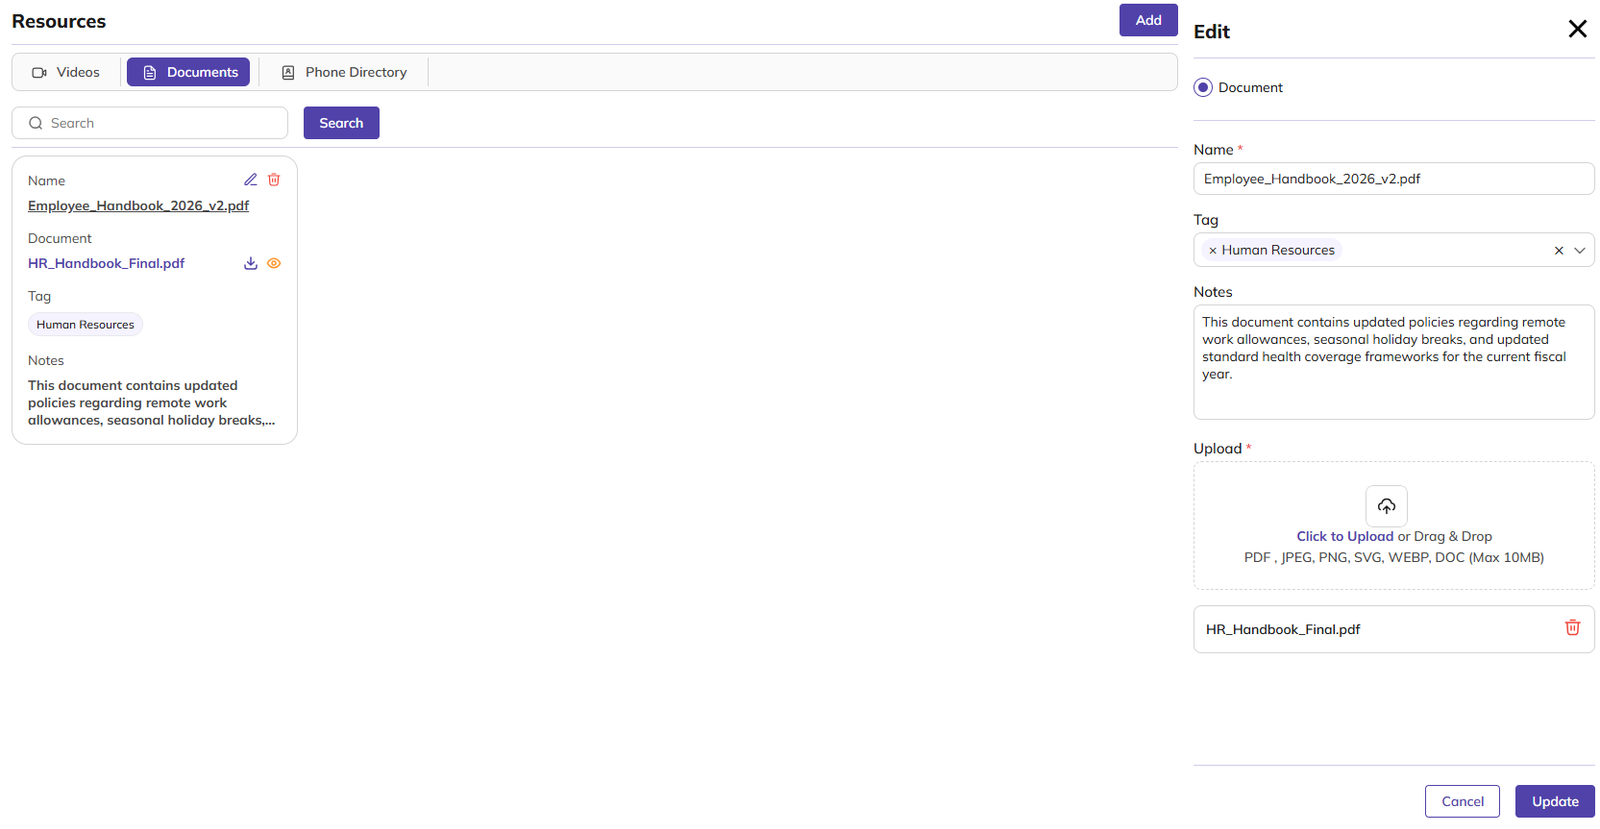
Click the Edit (pencil) icon on the video card, document card, or directory entry.
-
Update the details in the Edit panel. You can’t change the resource type while editing.
-
Documents: You can also replace the uploaded file with a new one, using the same formats and 10 MB limit.
-
-
Click Update to save your changes.
View Phone Directory Entry
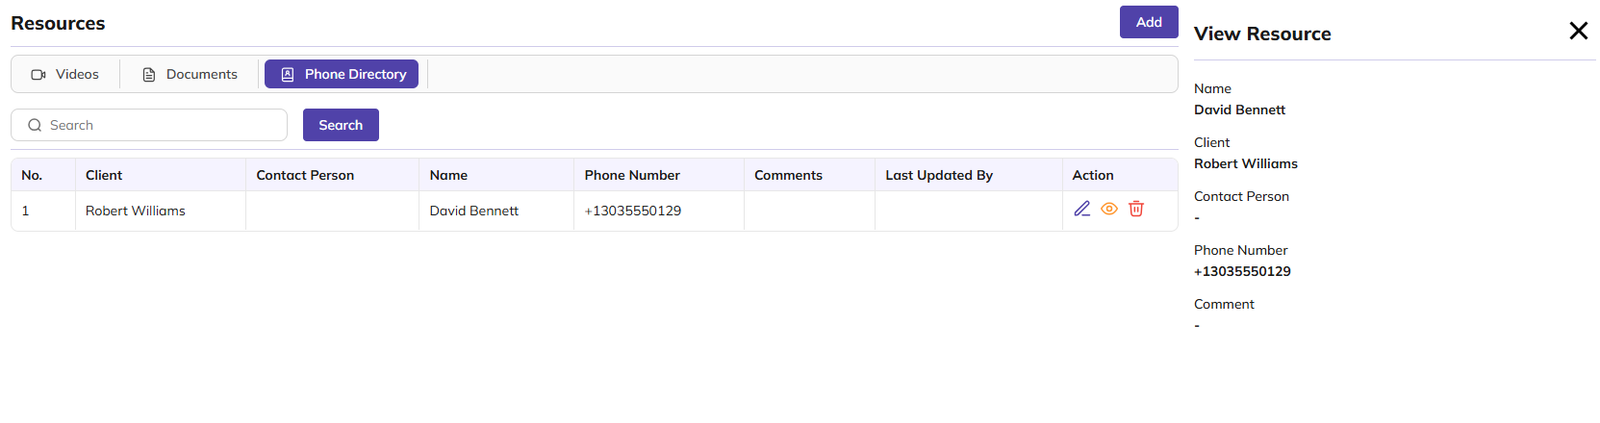
Click the View (eye) icon to open the View Resource panel. It shows the entry’s Name, Client, Contact Person, Phone Number, and Comment. Fields with no value show a dash (–).
Delete Resource
-
Click the Delete (bin) icon on the video card, document card, or directory entry.
-
In the confirmation box, click Yes to delete it, or Cancel to keep it.
Note: Deleting a resource removes it permanently. It can’t be recovered.

Did this answer your question?


