
Broadcast Overview
Broadcast lets you send one message to many people at once, such as a new policy announcement, a holiday notice or a service update. You can send it to technicians, by email or as an in-app notification, or to clients by email.
View Broadcasts
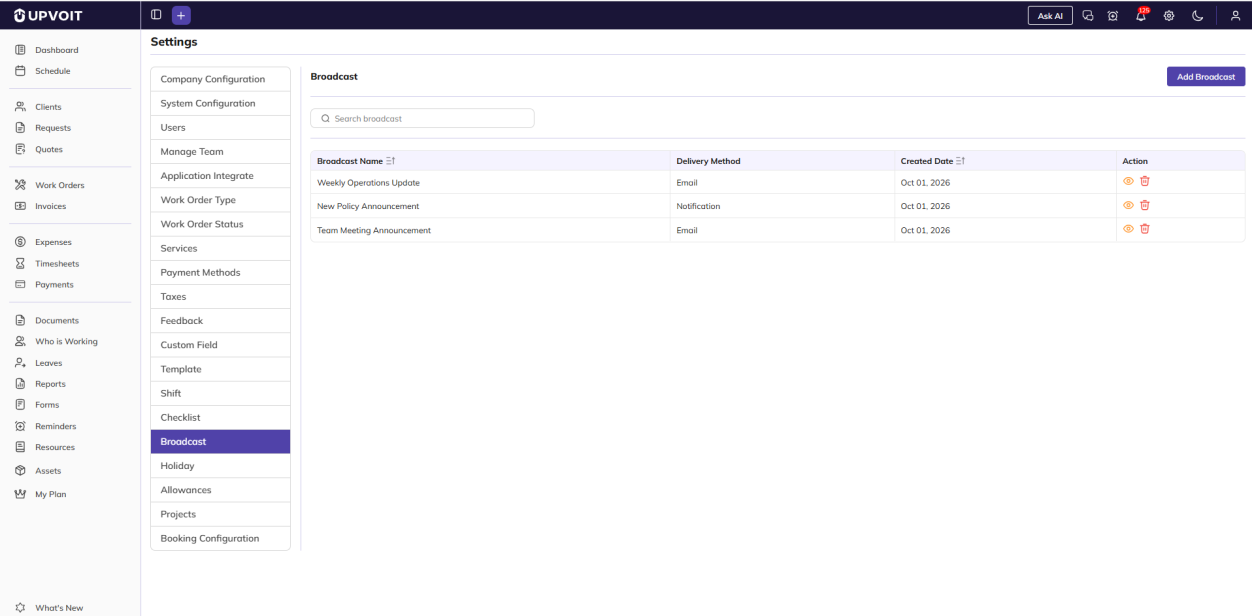
The Broadcast page lists all your broadcasts, with each one’s Delivery Method (for example, Email) and the date it was created. Use Add Broadcast at the top right to create a new one.
-
Search broadcast: find a broadcast by name.
-
Sort: click the sort icons next to Broadcast Name or Created Date to reorder the list.
-
Action icons: view (eye) and delete (red bin).
Broadcasts cannot be edited once they are saved, so there is no edit icon.
Add Broadcast
The Add Broadcast page has three parts:
-
Recipient: choose who receives the broadcast, Technician or Client. The options below change depending on your choice.
-
Delivery Method: how the broadcast is sent, Email or Notification.
-
Broadcast Name (required, marked *): a name for the broadcast, for example New Policy Announcement. Use it to find the broadcast later.
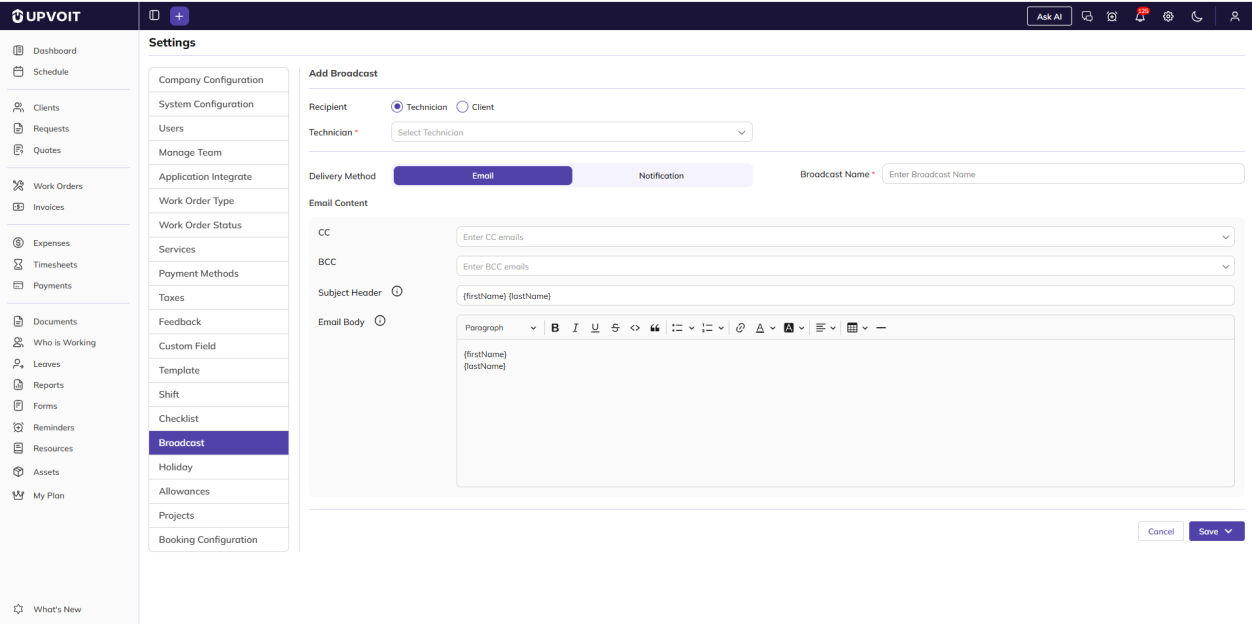
Words in curly brackets, such as {firstName}, {lastName} or {companyName}, are replaced with each recipient’s details when the broadcast is sent. This way, every message is personalised.
Send Broadcast to Technicians
When Recipient is set to Technician, choose the technicians in Technician (required). You can then send the broadcast by Email or by Notification.
By email
By notification
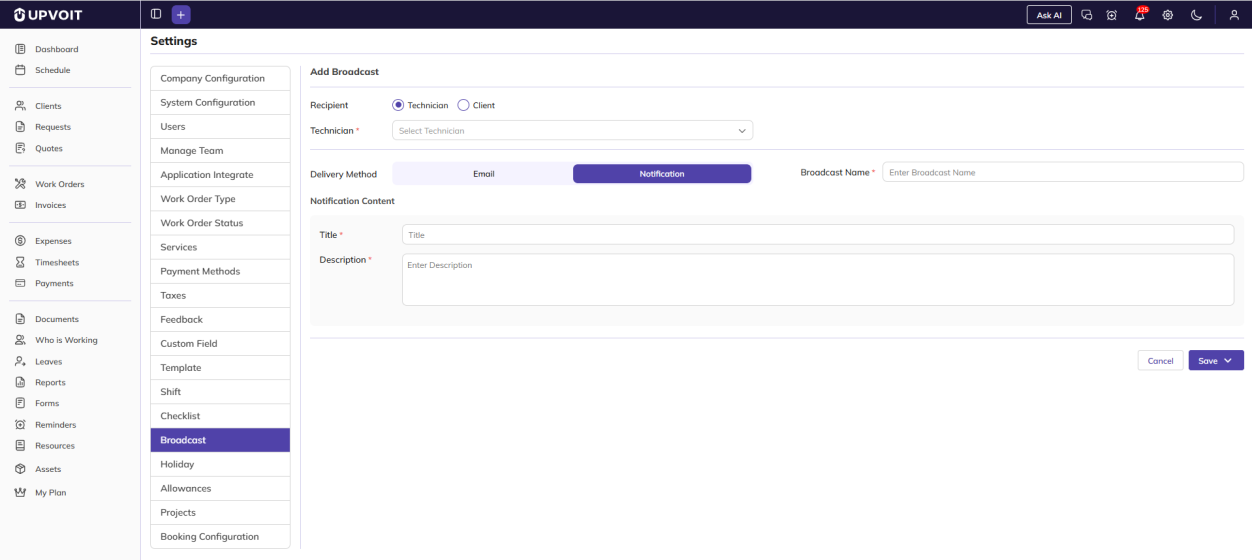
Under Notification Content, enter the notification Title and Description. Both are required. Technicians see the notification in UPVOIT.
Send Broadcast to Clients
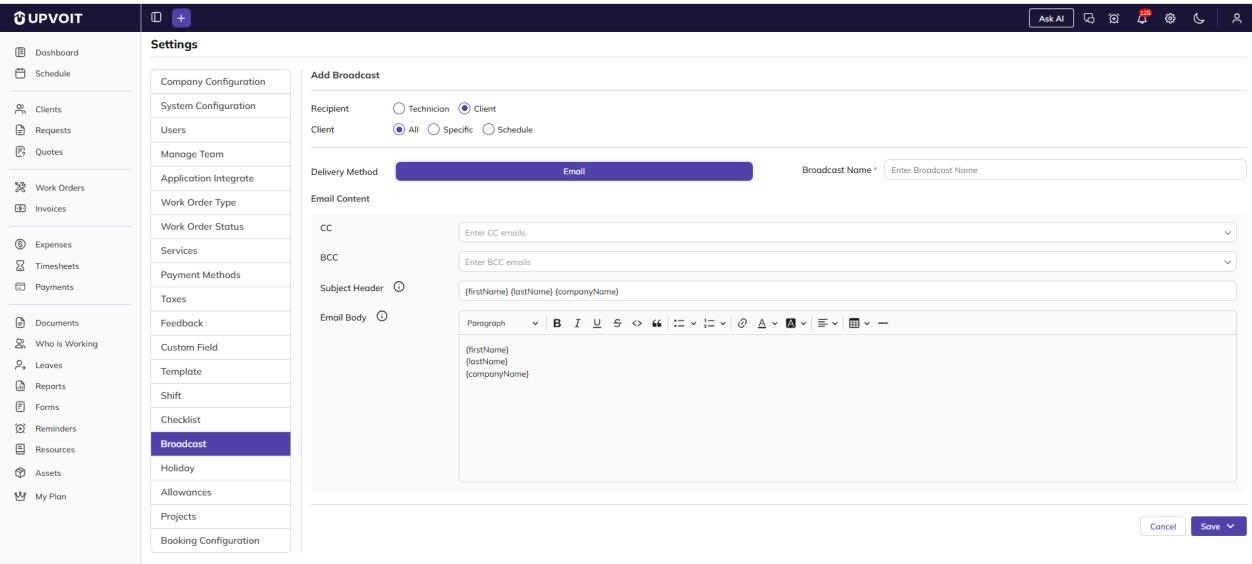
When Recipient is set to Client, a Client row appears with three options. For clients, broadcasts can be sent by Email only. There is no Notification option.
-
All: send to all your clients.
-
Specific: send to the clients you choose. A Select Client dropdown (required) lists your clients.
-
Schedule: send to clients based on a Scheduled Date Range (required). Choose the start and end dates in the date picker.


Under Email Content, set the CC, BCC, Subject Header and Email Body in the same way as for technicians.
Save or Send Broadcast
Click the arrow on Save at the bottom right to choose one of two options:
-
Save Broadcast: saves the broadcast without sending it.
-
Save & Send: saves the broadcast and sends it straight away.
View Broadcast

Clicking the view (eye) icon opens the View Broadcast page. It shows the saved broadcast exactly as it was set up: the recipients, delivery method, broadcast name and the email or notification content. All details are read-only. Click Cancel to return to the list.
Delete Broadcast
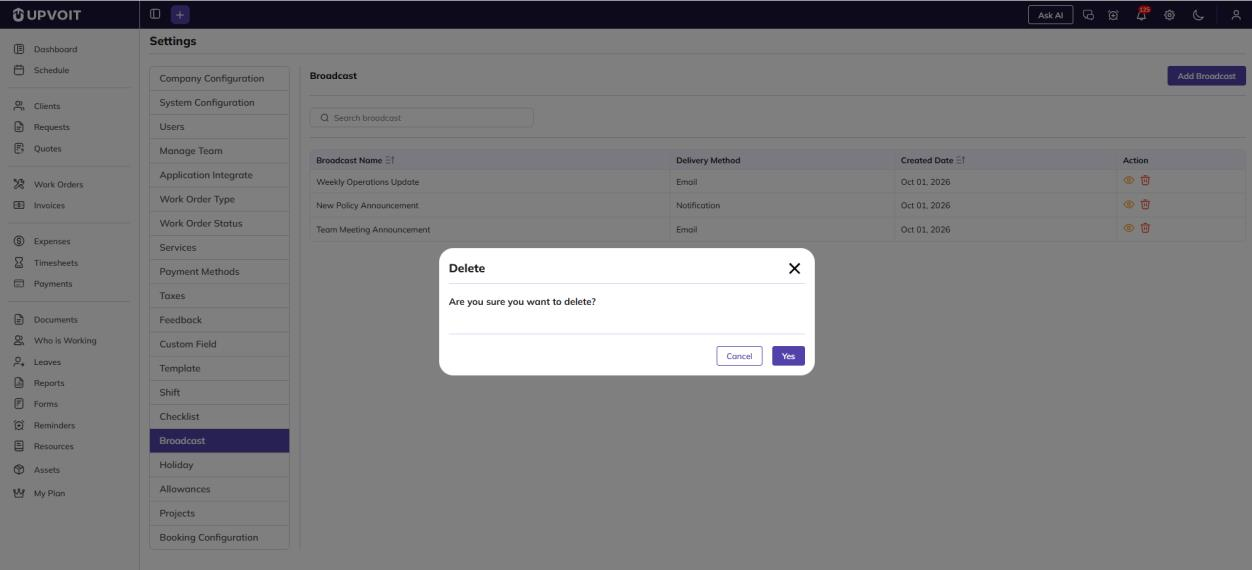
Clicking the delete (red bin) icon opens a Delete confirmation message: Are you sure you want to delete?
Did this answer your question?


