
Custom Field Overview
Custom Field lets you add your own extra fields to UPVOIT, so you can record information that isn’t included as standard, such as a gate code, parts used or booking details. Each custom field is shown in the modules you choose: Request, Quote, Work Order, Invoice, Client or User.
View Custom Fields
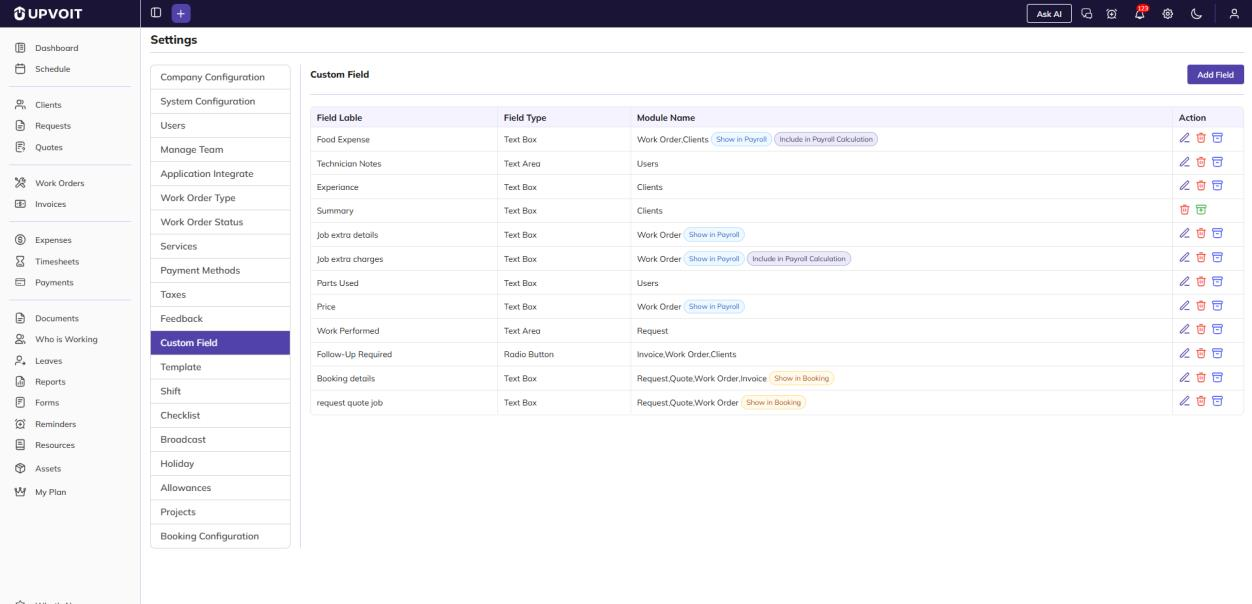
The Custom Field page lists all your custom fields. Use Add Field at the top right to create a new one.
Each row shows:
-
Field Lable – the name of the field.
-
Field Type – the kind of field, for example Text Box or Radio Button.
-
Module Name – the modules where the field is shown. Some fields also have tags:
-
Show in Payroll – the field is shown in payroll.
-
Include in Payroll Calculation – the field’s value is included when payroll is calculated.
-
Show in Booking – the field is shown in bookings.
-
-
Action – the edit (pencil), delete (red bin) and archive icons.
Add a Custom Field
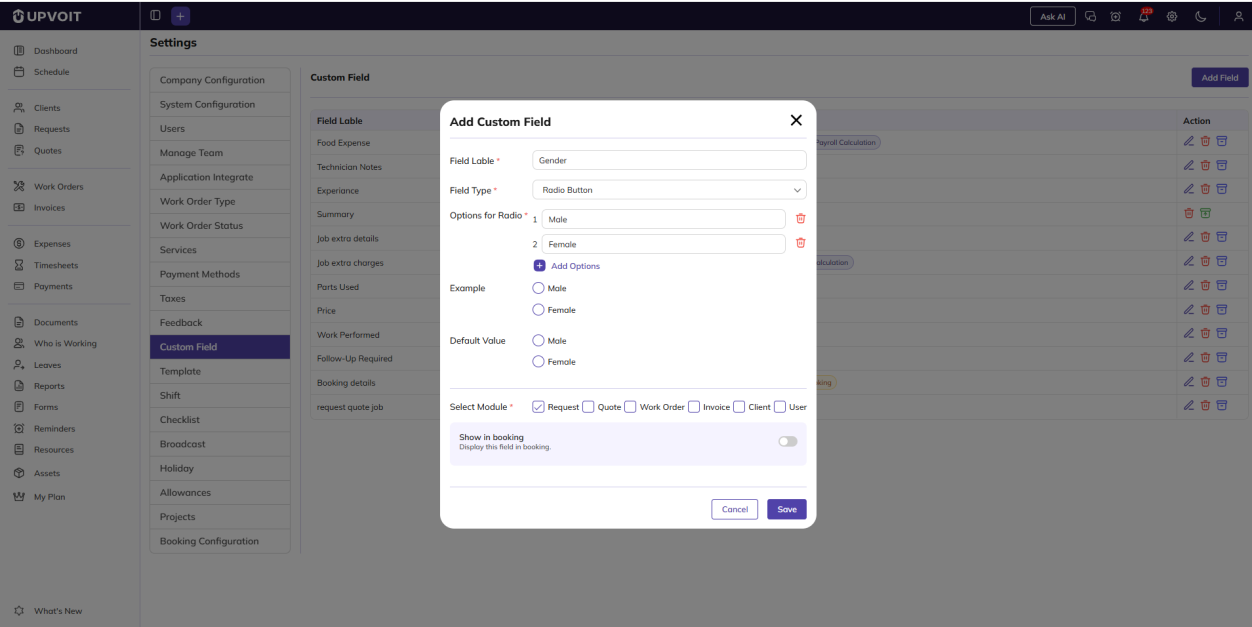
Clicking Add Field opens the Add Custom Field window. Every custom field has these settings:
-
Field Lable (required, marked *) – the name of the field.
-
Field Type (required) – the kind of field (see below).
-
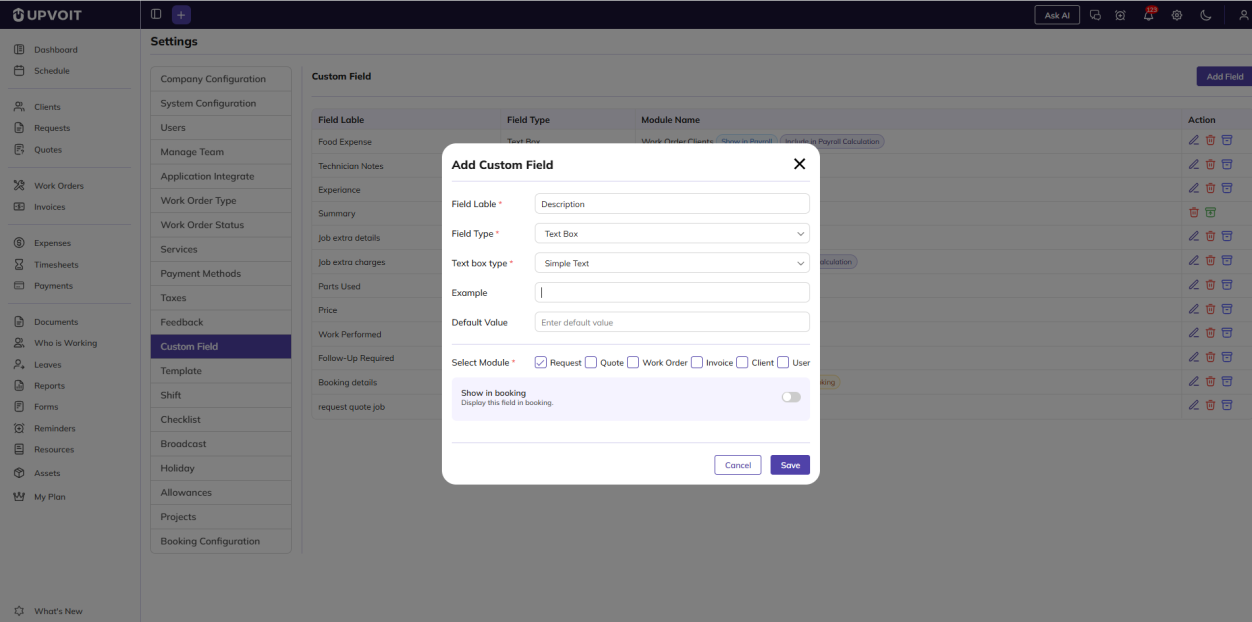
Example – a preview of how the field will look to users.
-
Default Value – the value filled in automatically. Users can change it.
-
Select Module (required) – tick the modules where the field should appear: Request, Quote, Work Order, Invoice, Client or User. You can tick more than one.
Extra options for Request and Work Order
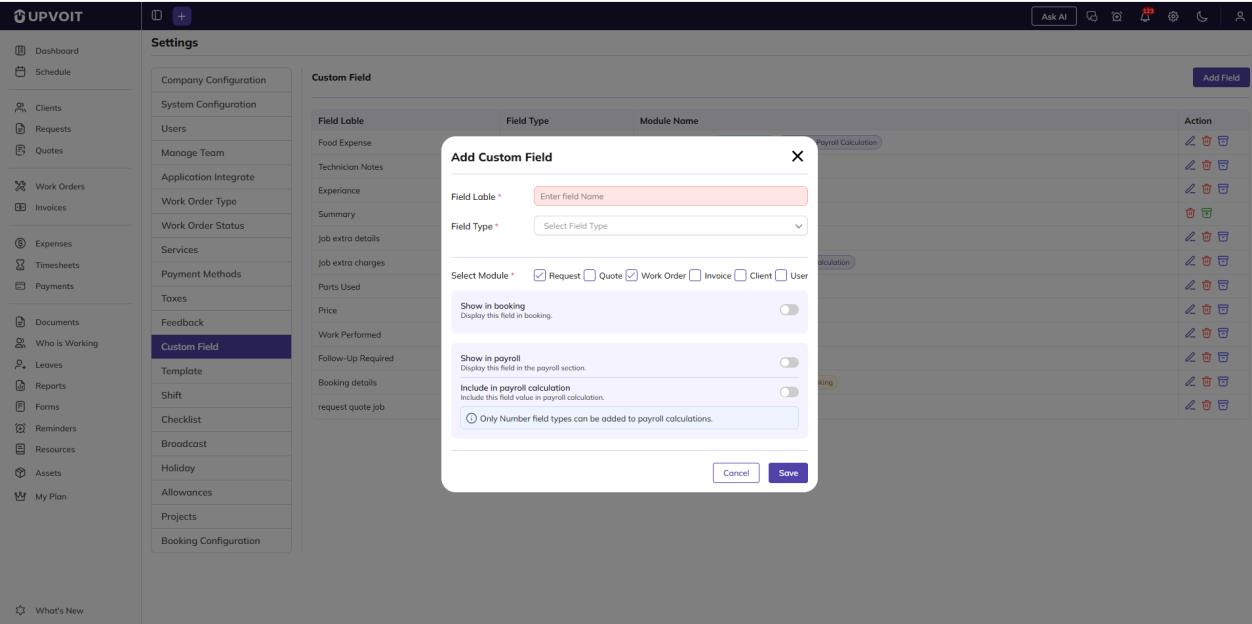
More options appear depending on the modules you tick:
-
When Request is ticked:
-
Show in booking – switch this on to also show the field in bookings.
-
-
When Work Order is ticked:
-
Show in Payroll – shows the field in payroll.
-
Include in Payroll Calculation – includes the field’s value when payroll is calculated. For example, a Food Expense field can be added to the technician’s pay.
-
These options appear as tags next to the field in the Module Name column of the Custom Field list.
Field types
The settings change slightly depending on the Field Type you choose.
-
Text Box – a single line of text, such as a gate code. Choose the Text box type (required), for example Simple Text.

-
Text Area – several lines of text, such as notes or a description.

-
Dropdown – the user chooses one option from a list.
-
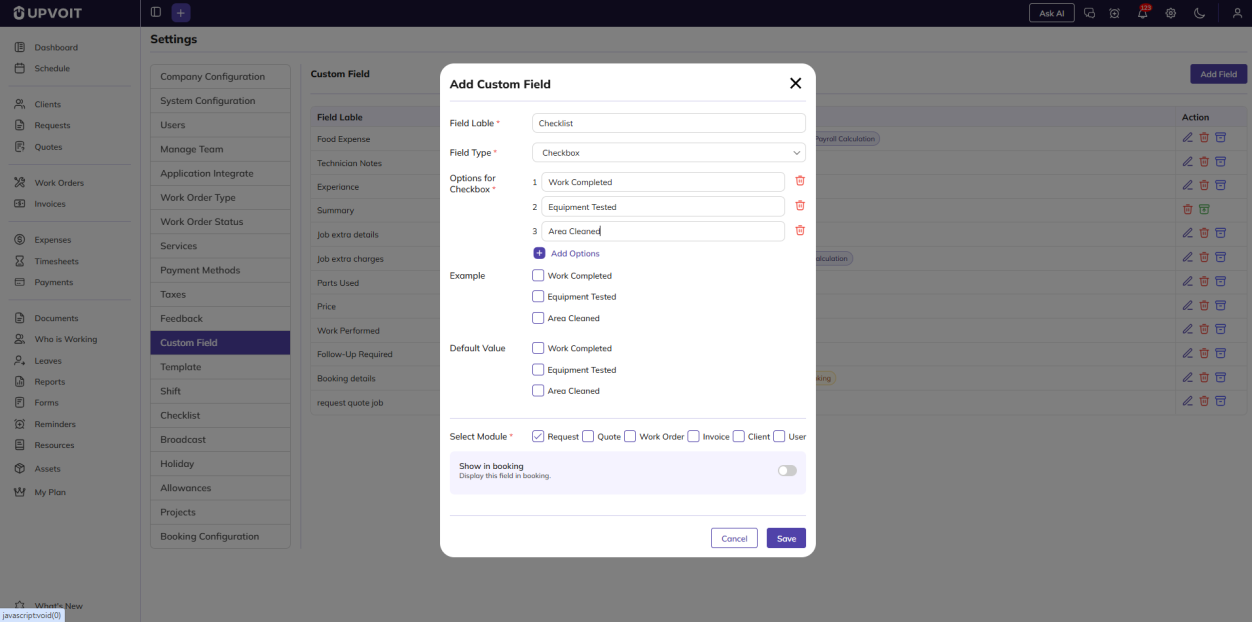
Checkbox – the user can tick one or more options.
-
Radio Button – the user chooses one option from a set of buttons.

-
Date Picker – the user picks a date from a calendar.
Adding options (Dropdown, Checkbox and Radio Button)
For these types, enter the choices in Options for Dropdown, Options for Checkbox or Options for Radio (required):
-
Type each option in its own numbered box.
-
Click Add Options to add another option.
-
Click the red bin icon next to an option to remove it.
The Example shows the options as they will appear, and Default Value lets you choose which option is selected by default.
Edit a Custom Field
Clicking the edit (pencil) icon opens the Edit Custom Field window, filled in with the field’s saved details. It has the same settings as Add Custom Field, so you can change the label, type, options, default value or modules.
Archived fields cannot be edited, so they have no edit icon.
Archive a Custom Field
Archive a field when you no longer want to use it but don’t want to delete it permanently.
-
Click the archive icon next to the field to archive it.
-
An archived field shows a green restore icon instead. Click it to make the field active again.
While a field is archived, it cannot be edited.
Delete a Custom Field

Clicking the delete (red bin) icon opens a Delete message. It warns that deleting the field will permanently remove it from the modules it is used in. Click Yes to delete the field, or Cancel to keep it.
Where Custom Fields Are Used

Custom fields are shown in the Custom Field(s) section when creating or editing a record in each module selected in Select Module:
-
Requests
-
Quotes
-
Work Orders
-
Invoices
-
Clients
-
Users
Fill them in there, just like the standard fields. If a field has a Default Value, it is filled in automatically, and you can change it. For example, the request quote job field in the screenshot shows its default value RQJ.
Custom fields can also be added directly from those pages using Add Custom Field, without going to Settings.
Did this answer your question?


