
A request is the first record created when a client asks for work. It records the client, the property, the work needed and the client’s preferred times for a visit. If needed, it also books an on-site assessment by a technician. A request can later be converted into a quote or a work order.
To open the module, click Requests in the left main menu.
Overview & Listing
The Request module allows users to manage customer requests, schedule on-site assessments, track request progress and convert requests into jobs.

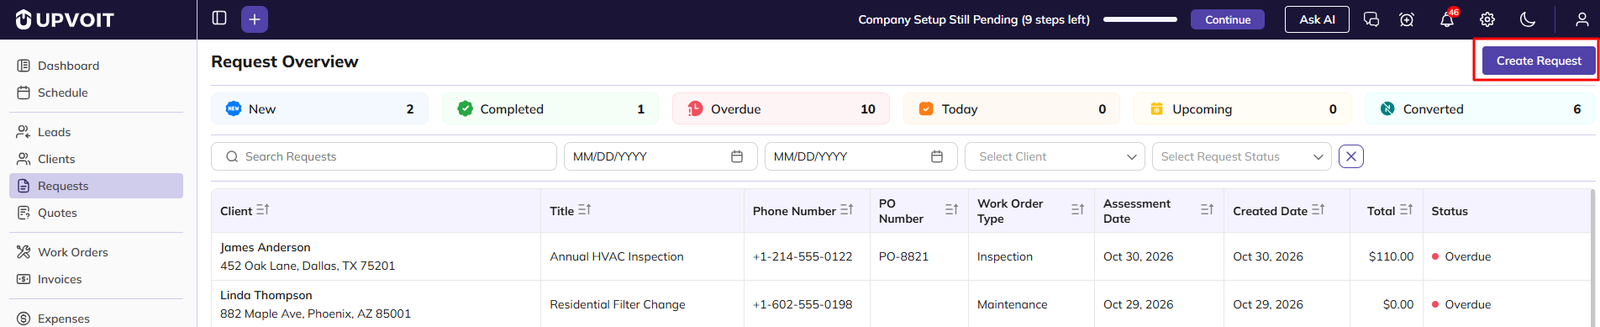
Clicking Requests opens the Request Overview page. The Create Request button is at the top right.
Status cards across the top show how many requests are in each status: New, Completed, Overdue, Today, Upcoming and Converted.
Request statuses
Request statuses are predefined and change automatically as the request moves forward. The only status a user sets directly is On The Way, which the technician sets with a button.
-
New: the request has been created without an on-site assessment.
-
Upcoming: an on-site assessment has been scheduled for a future date.
-
Today: the assessment is scheduled for today.
-
On The Way: the technician has clicked On The Way and is travelling to the property.
-
Assessment Completed: the on-site assessment is complete.
-
Overdue: the assessment date has passed and the assessment is not yet complete.
-
Converted: the request has been converted into a quote or a work order.
A request with an assessment usually moves through Upcoming → Today → On The Way → Assessment Completed → Converted. If the assessment date passes before it is complete, the status becomes Overdue.
Request List: Search, Filter and Sort
Below the status cards is the list of all requests. Each row shows the Client (with the property address below the name), Title, Phone Number, PO Number, Work Order Type, Created Date and:
-
Assessment Date: the date of the on-site assessment. It is empty if no assessment is booked.
-
Total: the total of the products and services on the request.
-
Status: the request’s current status (see 1.1).
-
To find a request, use the search and filters above the list:
-
Search Requests: search by keyword.
-
MM/DD/YYYY (two boxes): show requests within a date range.
-
Select Client: show one client’s requests.
-
Select Request Status: show requests in one status.
To sort the list, click the sort icon next to any column heading except Status.
To open a request, click it in the list. The request details page opens (see 4.1).
Ways to create a request
A request can be created in four ways: from the Requests menu, from a client’s Overview, from the online booking page, or from a magic link.
Create from the Requests Menu
-
Click Requests in the left main menu.
-
Click Create Request at the top right.
-
Fill in the details and click Save (see 3).
Create from Client’s Overview
-
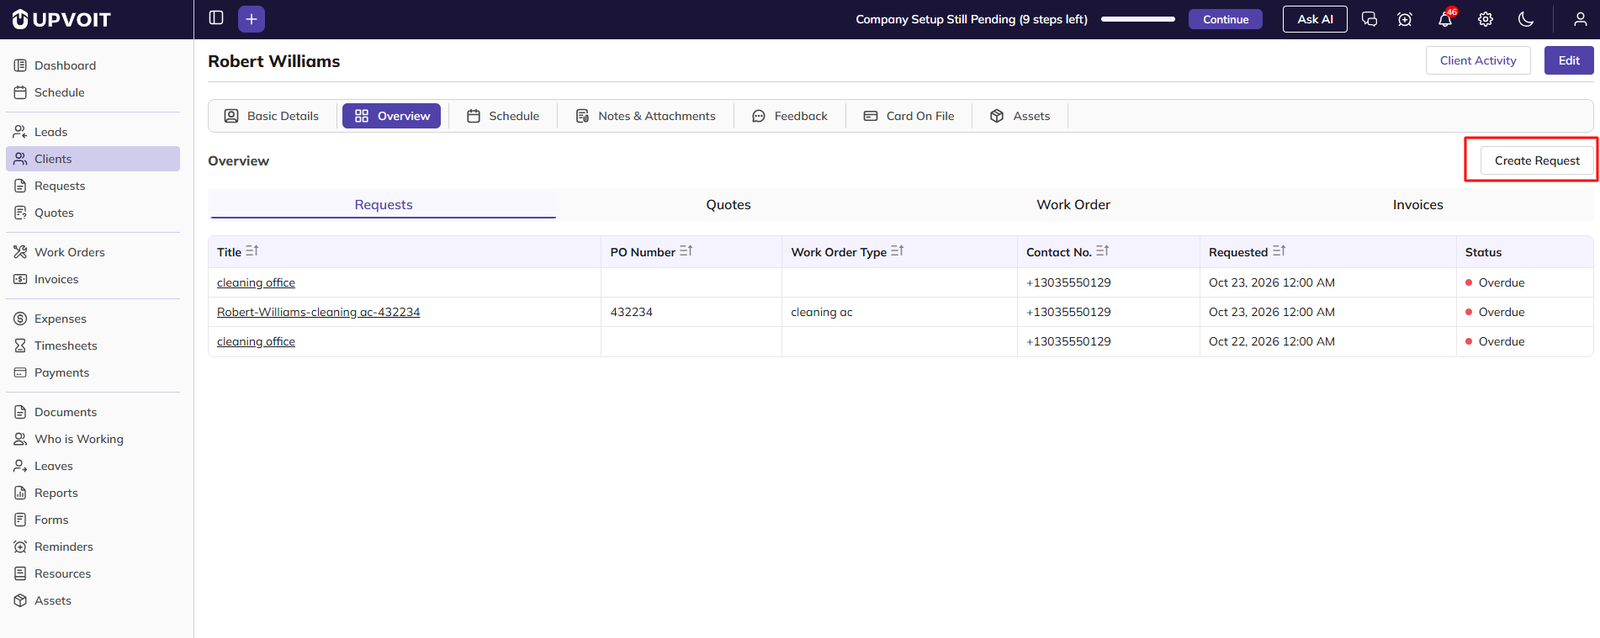
Click Clients and open the client.
-
Click Overview, then Create Request at the top right.
-
Fill in the details and click Save (see 3).
-
The Requests tab on the Overview page lists all of that client’s requests.
Create from the Booking Page
-
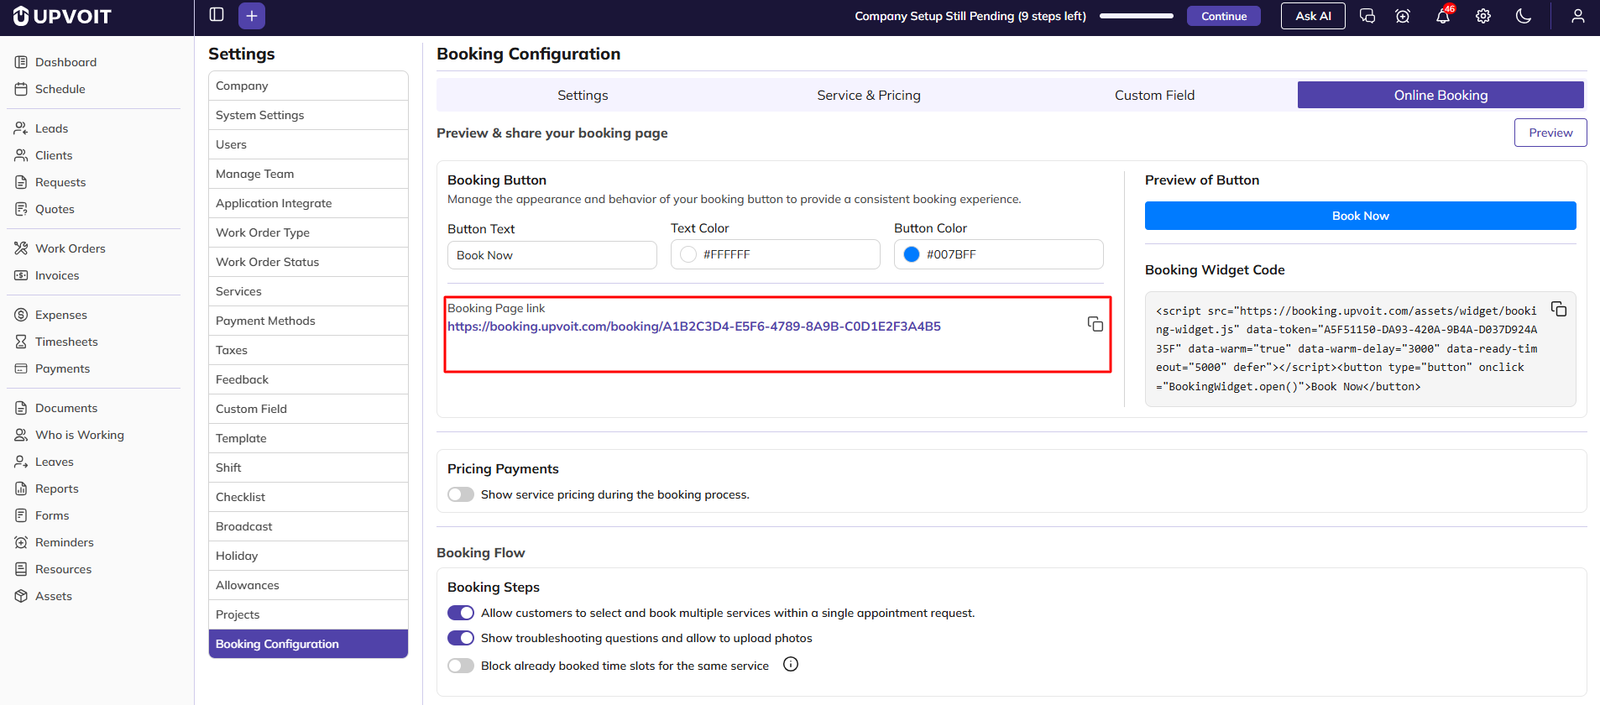
Clients can send a request themselves through your online booking page. The request is created with the title Booking – [client name], and a new client is created automatically if needed.
-
To share the booking page, go to Settings → Booking Configuration → Online Booking and copy the Booking Page link. To add a Book Now button to your website instead, copy the Booking Widget Code from the same tab.
Create from Magic Link
-
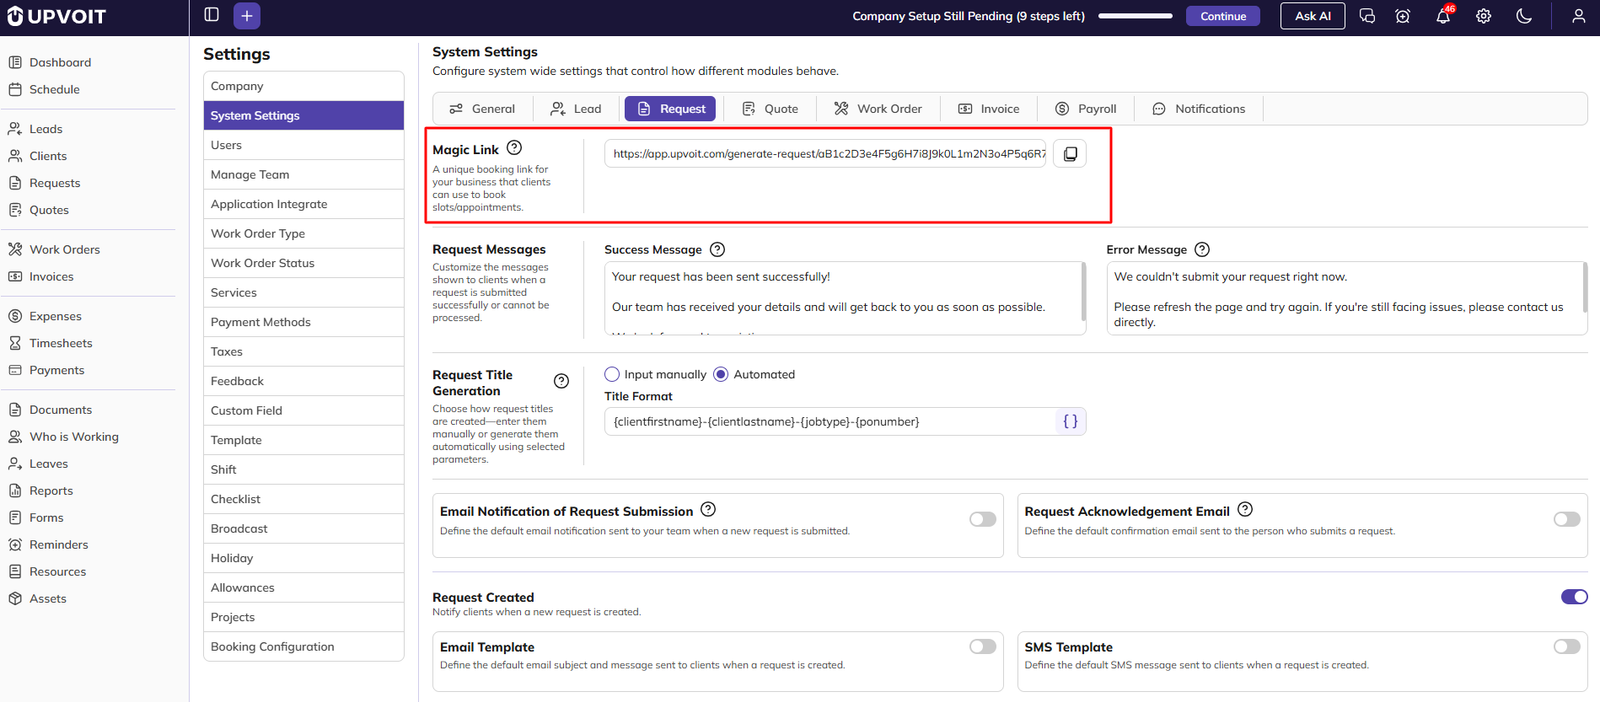
A magic link opens a request form that anyone with the link can submit. To share it, go to Settings → System Configuration → Request and copy the Magic Link. The Success Message and Error Message set there are shown after the form is submitted.
Create Request
Request Details
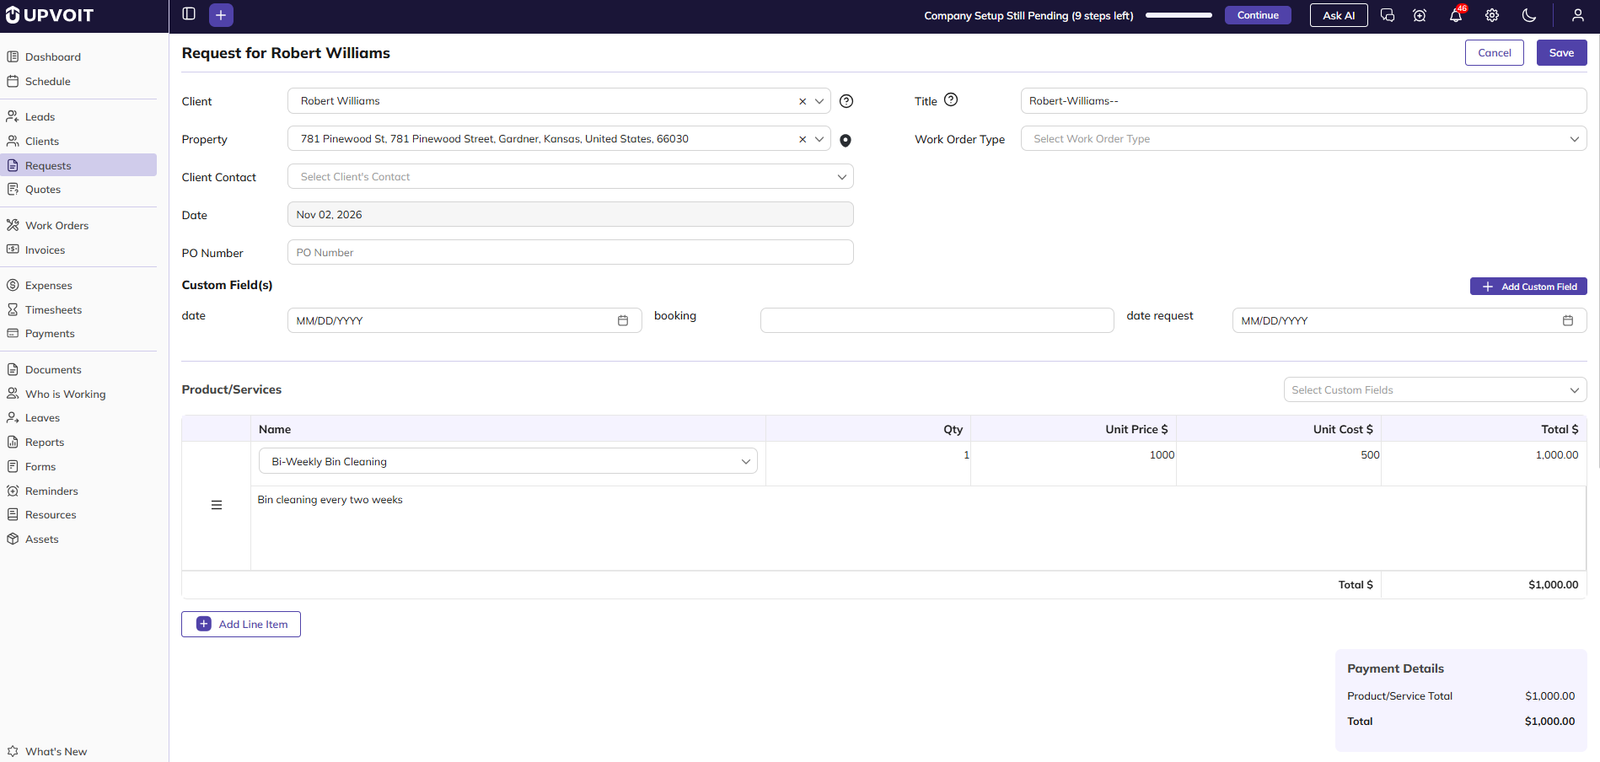
The page title shows Create Request. After you choose a client it changes to Request for [client name].
-
Client: the client the request is for. Type in Search or Create Client to find an existing client or create a new one. Point to the ? icon next to Client to see the client’s Phone Number and Email Id.
-
Property: the address where the work is needed. Choose one of the client’s saved properties, or enter a new address. After you choose a property, click the location pin icon next to it to open the address on the map.
-
Date: today’s date, filled in automatically. It cannot be changed.
-
PO Number: the client’s purchase order number, if they have one.
-
Title: the name of the request (see 3.2).
-
Work Order Type: the type of work requested. The options come from Settings → Work Order Type.
Request Title
The title can be entered by hand or generated automatically, depending on Settings → System Configuration → Request:
-
Manual: type the title in the Title box.
-
Automatic: the title is built from details on the request, using the title format set in settings. In the example, the format uses the client’s first name and the PO number, so the title becomes Michael : PO-777.
An automatic title can still be changed by typing in the Title box. Point to the ? icon next to Title to see how the title format works.
Custom Fields
The Custom Field(s) section shows the extra fields set up for requests in Settings → Custom Fields. The fields shown depend on your account’s setup. The Add Custom Field button opens the Add Custom Field window (see Client Management, 8.5).
Products and Services
The Product/Services section lists the work or items the client is asking for. Items are chosen from the list set up in Settings → Services. The Payment Details box below the section shows the Product/Service Total and the request Total.
To add a product or service
-
In Name, type in Search or create… and choose the item.
-
Enter the Qty. The default is 1.
-
Enter the Unit Price $, the price the client pays for one unit.
-
Enter the Unit Cost $, what one unit costs your business.
-
Enter the Markup, and choose its type from the dropdown next to it (for example, %). In the example, a Unit Cost of 10 with a 200% markup gives a Unit Price of 30.
-
Check the Total $ for the line.
-
To add details about the item, type in the description box below the line.
-
To add another item, click Add Line Item.
Service Details and Your Availability
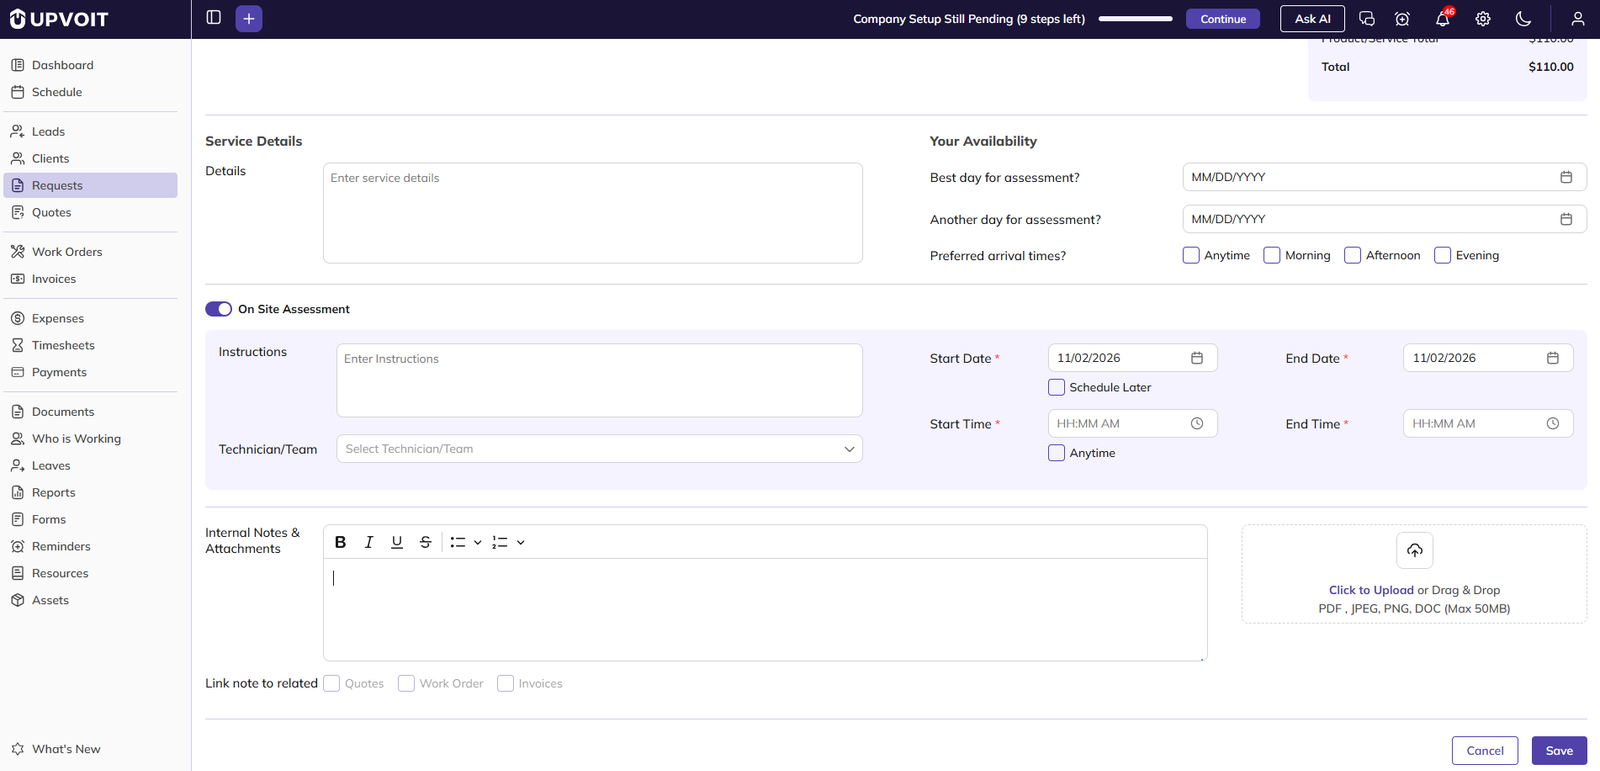
-
Service Details → Details: a description of the service the client needs.
-
Your Availability: the client’s preferred times for the assessment visit:
-
Best day for assessment?: the client’s first-choice date.
-
Another day for assessment?: a second-choice date.
-
Preferred arrival times?: tick Anytime, Morning, Afternoon or Evening.
-
On Site Assessment
Switch on On Site Assessment when a technician needs to visit the property before the job is quoted. The assessment fields appear only when the toggle is on:
-
Instructions: notes for the technician.
-
Technician/Team: who will do the assessment.
-
Start Date and End Date (required, *): default to today’s date.
-
Schedule Later: tick this to book the assessment without fixing a date now.
-
Start Time and End Time (required, *).
-
Anytime: tick this if the visit can be at any time of day.
Once these details are filled in and the request is saved, the assessment is added to the schedule.
Internal Notes & Attachments
The Internal Notes & Attachments box holds internal notes about the request. It supports bold, italic, underline, strikethrough and lists. You can upload PDF, JPEG, PNG or DOC files up to 50MB.
Link note to related has tick boxes for Quotes, Work Order and Invoices. Tick a module to show this note in that module as well.
Save the Request
Cancel and Save are at the top right and bottom right of the page. Save appears once a client is chosen.
View Request
Request Details Page
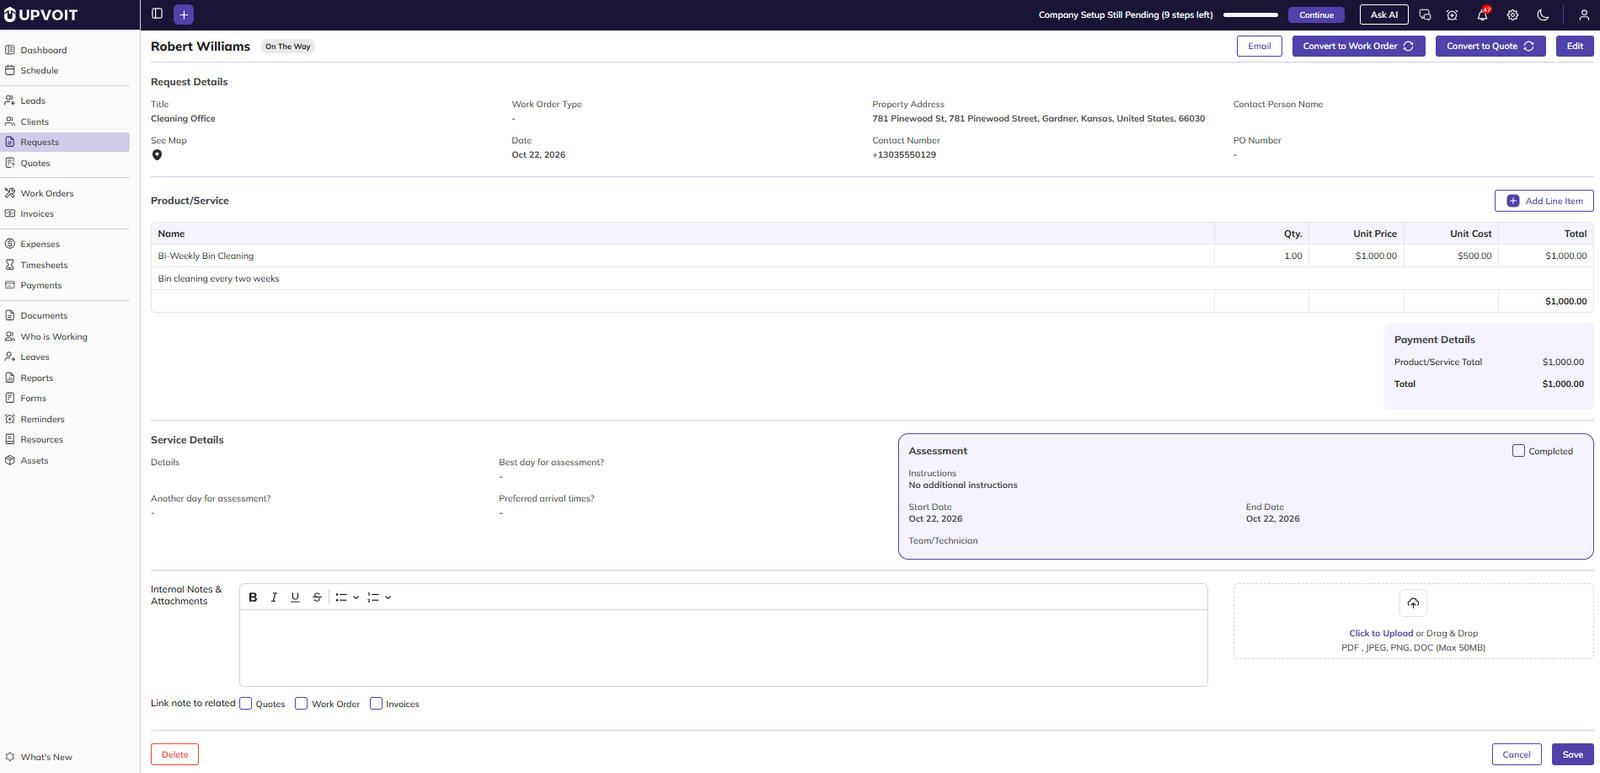
The page shows the client’s name with the request status beside it (for example, Overdue). The buttons at the top right are On The Way, Email, Convert to Work Order, Convert to Quote and Edit.
The page has these sections:
-
Request Details: Title, Work Order Type, Property Address with a See Map pin, Date, Contact Number and PO Number.
-
Product/Service: the items on the request, with Add Line Item to add more, and the Payment Details totals.
-
Service Details: the service details and the client’s availability.
-
Assessment: the instructions, start and end date, and assigned team or technician. It has a Completed tick box.
-
Internal Notes & Attachments: notes and files, which can be updated here, with the Link note to related tick boxes.
Delete is at the bottom left. Cancel and Save are at the bottom right, for saving changes made on this page.
Mark as On The Way

The technician clicks On The Way when leaving for the assessment visit. The request status changes to On The Way (in the example, from Overdue), and the On The Way button is no longer shown.
Email Request Details
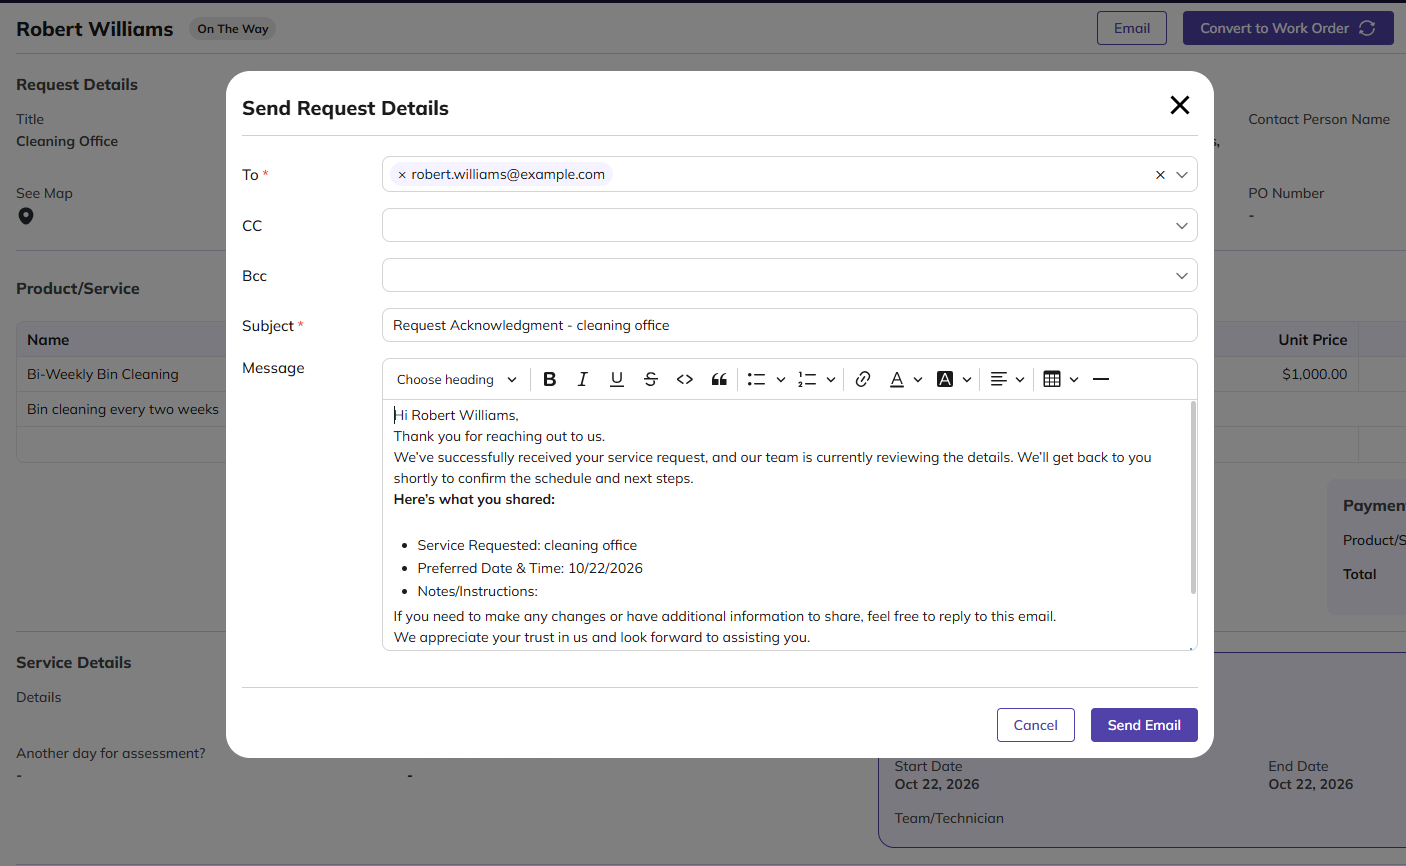
Click Email to send the request details to the client. The Send Request Details window opens already filled in: the client’s email in To, the request title in Subject, and the request details in Message. Check the email, make any changes, and click Send Email.
Changes made here apply to this email only. To change the default wording for all request emails, edit the template in Settings → System configuration -> Request.
Edit Request

The edit page has the same fields as Create Request, filled in with the request’s saved details. The button changes from Save to Update.
Delete Request

Delete is at the bottom left of the request details page.
Convert Request
Convert to Quote

Clicking Convert to Quote opens the Create Quote page with details from the request already filled in: client, property, work order type, products and services, and matching custom fields. The quote is created only when it is saved.
Convert to Work Order
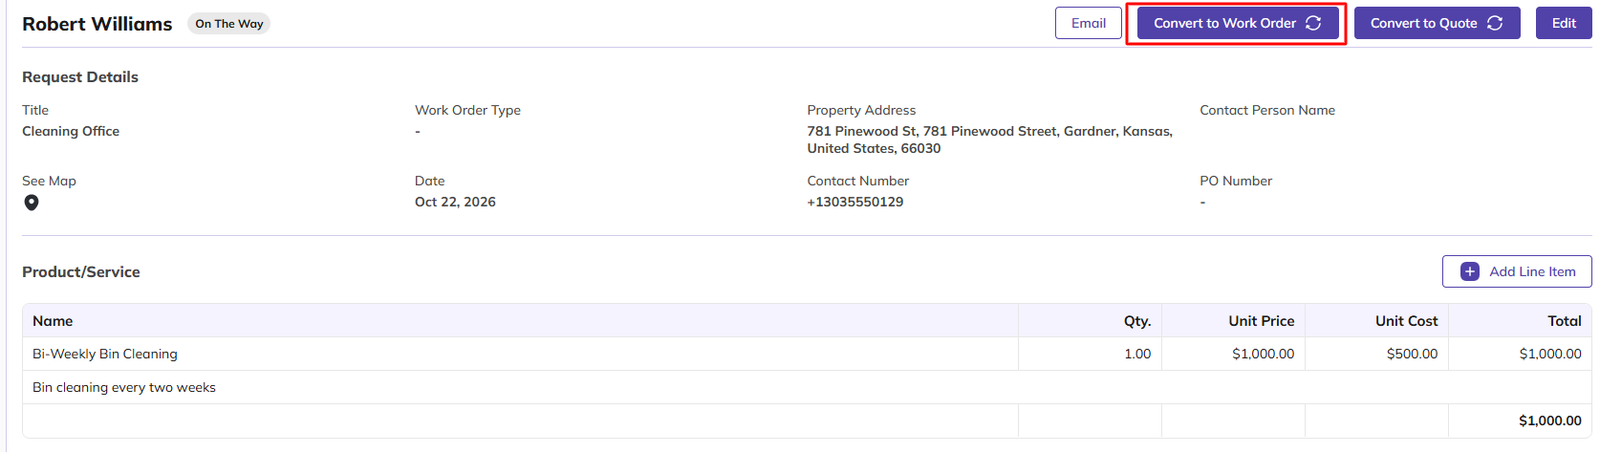
Clicking Convert to Work Order opens the Create Work Order page with details from the request already filled in: client, property, work order type, PO number, and the start and end date and time from the assessment. The work order is created only when it is saved.
Request Settings
Several parts of a request are controlled from Settings:
-
Settings → System Configuration → Request: request settings, including whether the title is manual or automatic, and the title format.
-
Settings → Work Order Type: the options in Work Order Type.
-
Settings → Custom Fields: the fields in Custom Field(s).
-
Settings → Services: the products and services available on a request.
Did this answer your question?


