
Expense Management Overview
The Expense Management module is where you record and track the expenses linked to your jobs, such as materials, parts and travel costs. For each expense you keep the job, item, amount, client and the person to be reimbursed in one place.
To open the module, click Expenses in the left main menu.
Expense List
The Expenses page lists all your expenses. For each expense it shows the job, item, amount, the person to be reimbursed and the job status.

At the top right is the Create Expense button, which opens the Create Expense page.
Columns in the list
-
Job No.: the number of the job the expense belongs to.
-
Item: the name of the expense item.
-
Reimburse To: the person who paid for the expense and should be paid back. This can be a user, an admin, a subcontractor or a subcontractor user. A dash (-) means no one is set.
-
Status: the status of the linked job, shown with a coloured dot. You can’t change the status from this list.
-
Actions: buttons to edit, delete or download attachments (see 1.2).
PO Number, Description, Client Name, Date and Amount are self-explanatory. You can sort every column except Status and Actions.
Search or Filter Expenses
Use the search box and filters above the expense list to find expenses quickly. You can combine several filters at once.
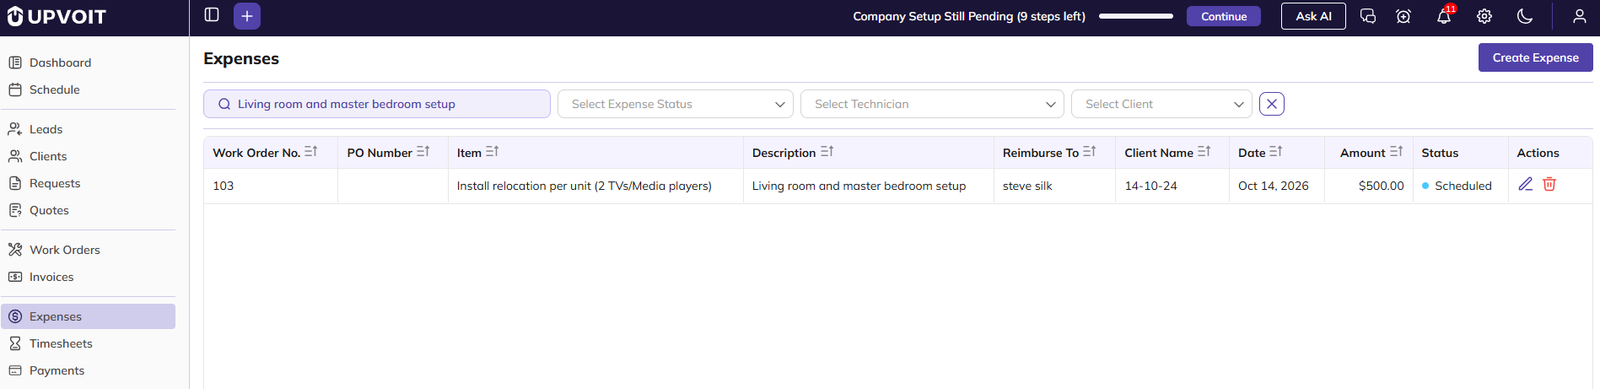
-
Search expenses: type to search by job number, PO number, item, description or client name.
-
Select Expense Status: a dropdown to show expenses whose job is in one status.
-
Select Technician: a dropdown to show expenses for one technician.
-
Select Client: a dropdown to show expenses for one client.
Click the X button to clear all filters.
Expense Actions
Use the buttons in the Actions column to manage an expense. Clicking a row does not open the expense.

-
Edit (pencil icon): change the expense details (see 3).
-
Delete (bin icon): delete the expense (see 4).
-
Download Attachment (document icon): download the file attached to the expense. This button appears only when the expense has an attachment.
Create Expense
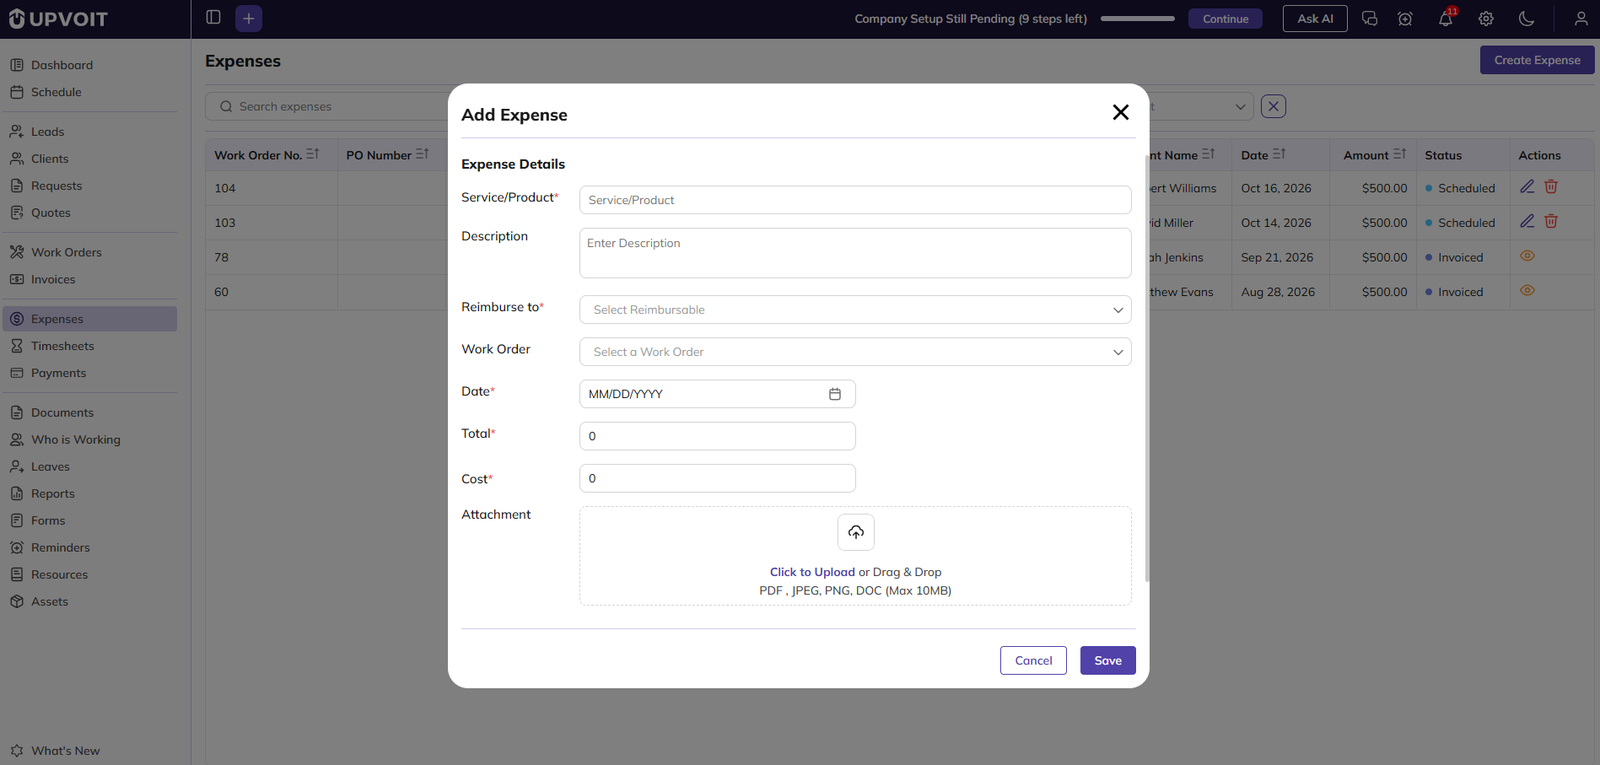
Use the Add Expense pop-up to record a new expense. Fields marked with a red asterisk (*) are required.
-
On the Expenses page, click Create Expense. The Add Expense pop-up opens.
-
Fill in the expense details:
-
Service/Product:* choose the item the expense is for from your Products and Services list.
-
Reimburse to:* the person who paid for the expense and should be paid back. You can choose a user, an admin, a subcontractor or a subcontractor user. The Cost amount is added to this person’s payroll.
-
Job: the job the expense belongs to. When a job is selected, the Total amount is shown on that job’s invoice.
-
Total: the amount you charge the client for this expense.
-
Cost: the amount you pay the person in Reimburse to.
-
Attachment: click Click to Upload or drag and drop one file, such as a receipt. You can upload a PDF, JPEG, PNG or DOC file up to 10 MB.
-
Billable: tick this to include the expense’s Total in the invoice total.
-
Description and Date are self-explanatory.
-
Click Save to add the expense to the list, or Cancel to close without saving.
Expenses on the job page
When you create an expense and select a job, the expense also appears in the Expenses table on that job’s details page. You can find the job by the number in the Job No. column of the expense list.
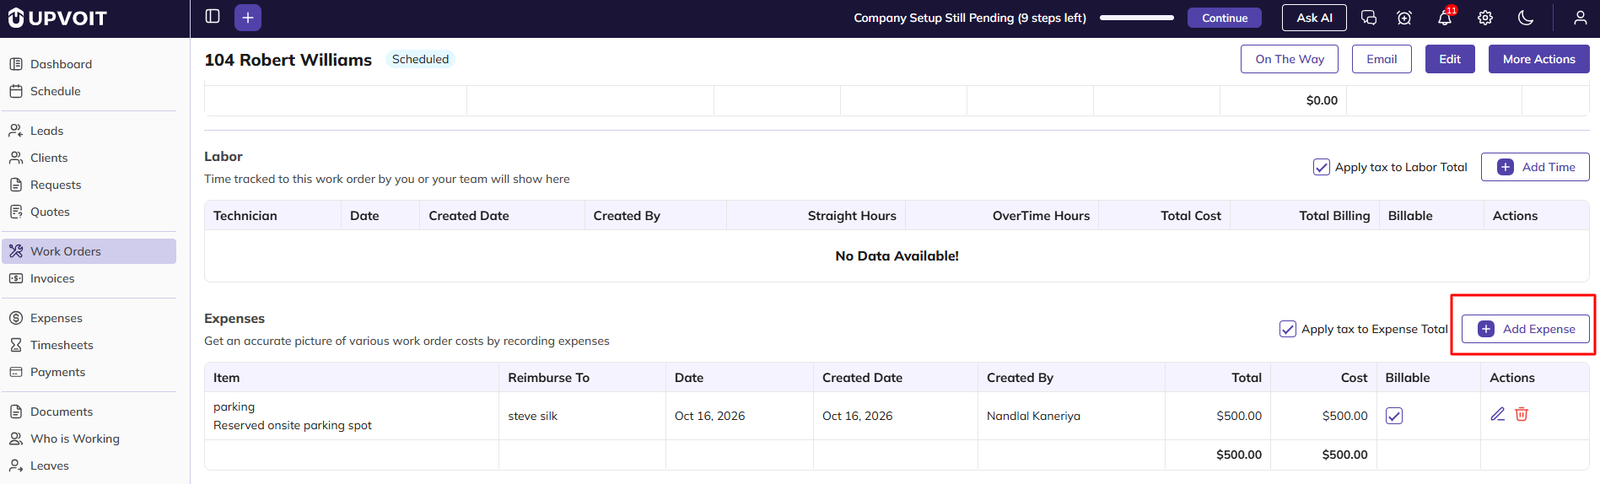
The Expenses table on the job page shows the item and description, the person to reimburse, the date, the created date, who created it, the Total, the Cost and whether it is billable. The expense appears there whether or not Billable is ticked.
The Expenses card at the top of the job page sums up the job’s expenses:
-
Cost: the total Cost of all expenses on the job.
-
Billed: the total of the billable expenses only.
-
Profit: Billed minus Cost, with the profit percentage.
You can also manage expenses from the job page. Click Add Expense above the Expenses table to add an expense to the job, or use the Edit (pencil) and Delete (bin) icons in an expense’s row to change or delete it. These work the same way as on the Expenses page (see 2, 3 and 4).
Edit Expense
-
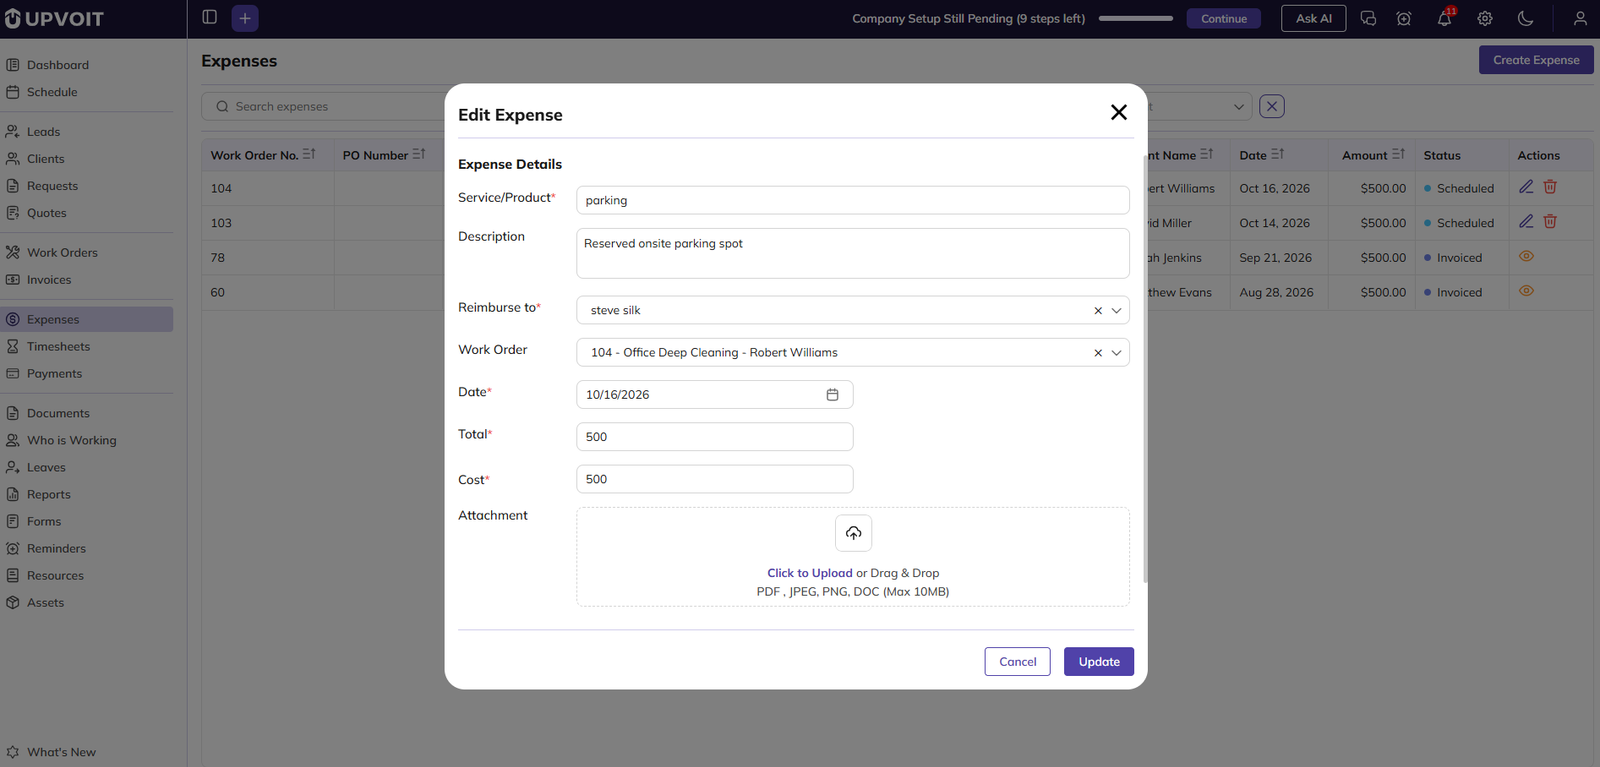
In the expense list, click the Edit (pencil) icon in the expense’s row. The [Edit Expense] pop-up opens with the expense’s current details.
-
Change the details you need. The fields are the same as in Create an Expense.
-
Click Save to update the expense, or Cancel to close without changes.
Delete Expense
-
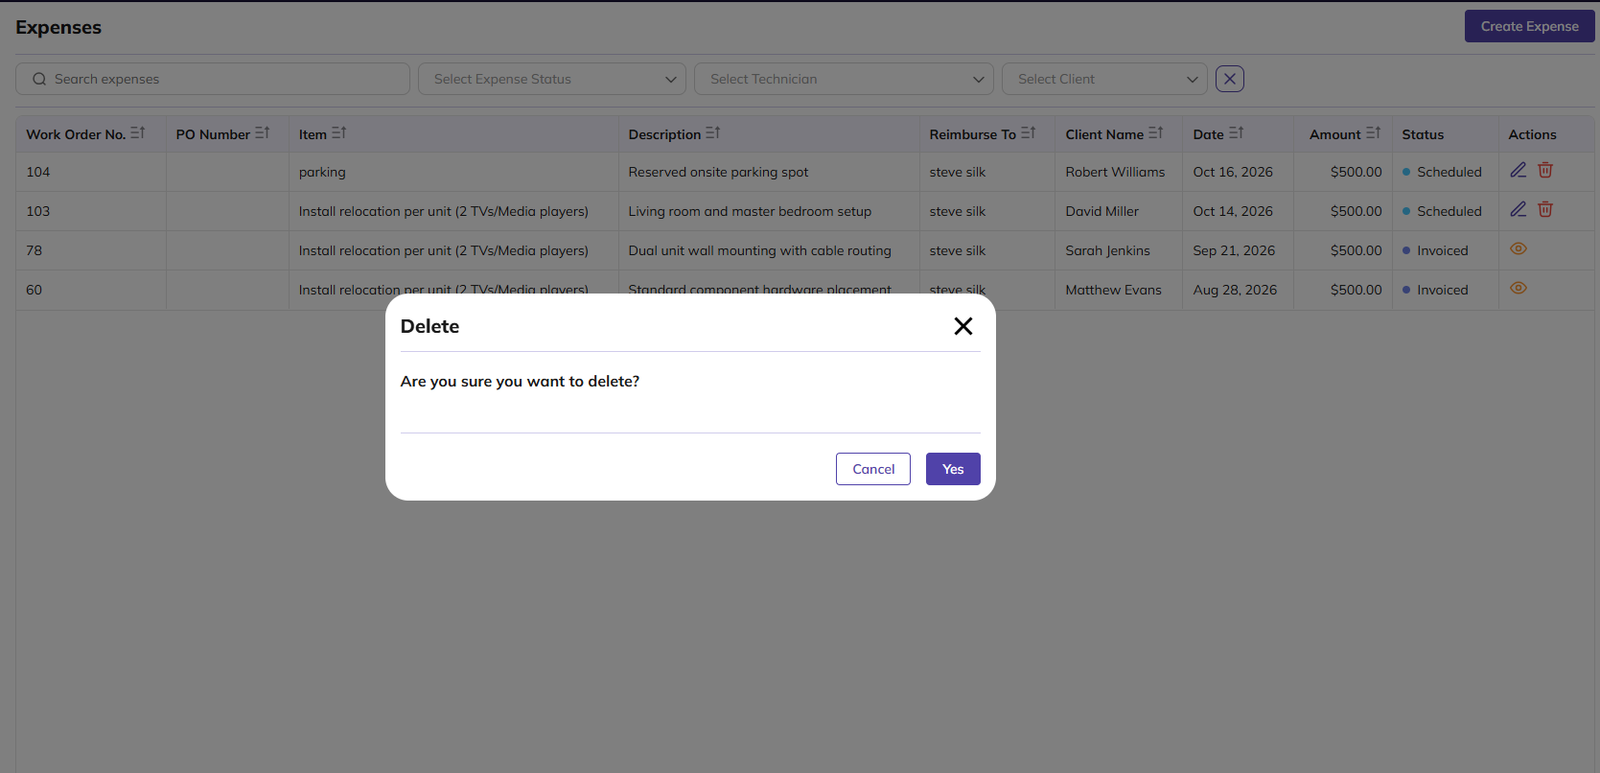
In the expense list, click the Delete (bin) icon in the expense’s row. A confirmation pop-up opens.
-
Click [Yes / Delete] to delete the expense, or [Cancel] to keep it.
Did this answer your question?


