
Client Management Overview
The Client Management module is where you add and manage your clients. For each client you keep their contact and payment details, properties, contact persons, requests, quotes, work orders, invoices, scheduled visits, notes, saved payment cards and assets in one place.
To open the module, click Clients in the left main menu.
Client List

The Clients page lists all your clients. For each client it shows contact details, payment settings, outstanding balance, a summary of activity, and status.
Columns in the list
-
Client: the client name, with the property address below it.
-
Email: the client’s email address.
-
Phone Number: the client’s phone number.
-
Payment Method: the client’s payment method (for example, Square). A dash (-) means none is set.
-
Payment Term: for example, Due on Receipt or Net 7 Days.
-
Outstanding Balance: the amount the client still owes.
-
Activity Summary: badges for Request, Quote, Work Order and Invoice, each with a count of that client’s records. Clicking a badge takes you to that menu (Requests, Quotes, Work Orders or Invoices).
-
Status: a toggle that shows whether the client is active.
Columns with the sort icon (Client, Email, Phone Number, Payment Method, Payment Term, Outstanding Balance) can be sorted.
Search or Filter Client
Use the search box and filters above the client list to find clients quickly.
-
Search: type to search the client list by name.
-
Select Client: a dropdown to choose one client by name.
-
Select Status: a dropdown to show clients by status (Active/ Inactive)
Open a Client’s Details
Click any client row in the list to go to that client’s View Client details page.
Create Client

Use the Create Client form to add a new client. The form has six parts: Client Details, Contact Details, Status and Notification, Property Address, Billing Address, and Contact Person Details. Cancel and Save buttons appear at both the top and the bottom of the form.
Client Details

-
Name * (required): enter the First Name and Last Name.
-
Company Name: the client’s company. This field is optional by default.
-
Name Preference: the checkbox Use company name as the primary name. shows the company name as the client’s primary name.
Important: when Use company name as the primary name. is selected, Company Name becomes a required field and is marked with *.
Contact Details and Payment Method
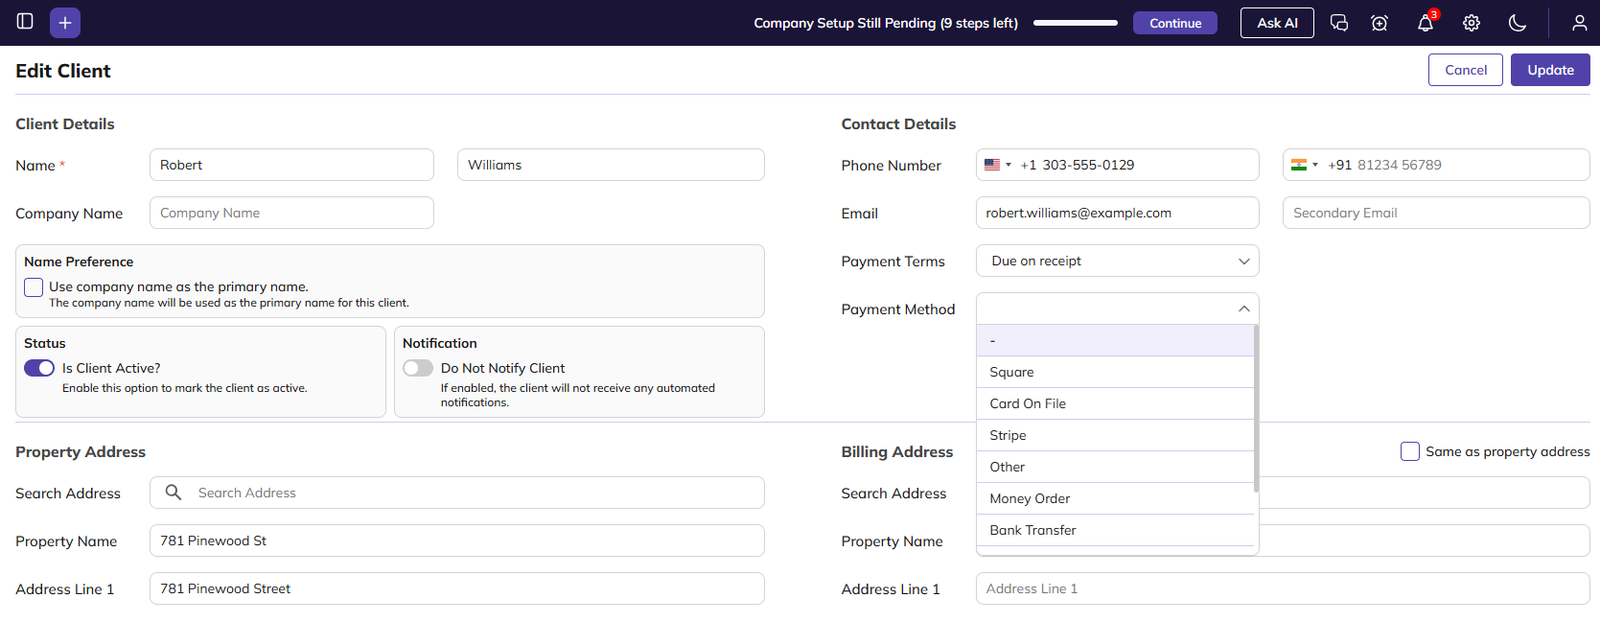
-
Phone Number: two phone fields, each with a country code selector.
-
Email: Primary Email and Secondary Email.
-
Payment Terms: a dropdown, for example Due on receipt.
-
Payment Method: a dropdown. Its options come from Settings → Payment Method.
Client Portal Login
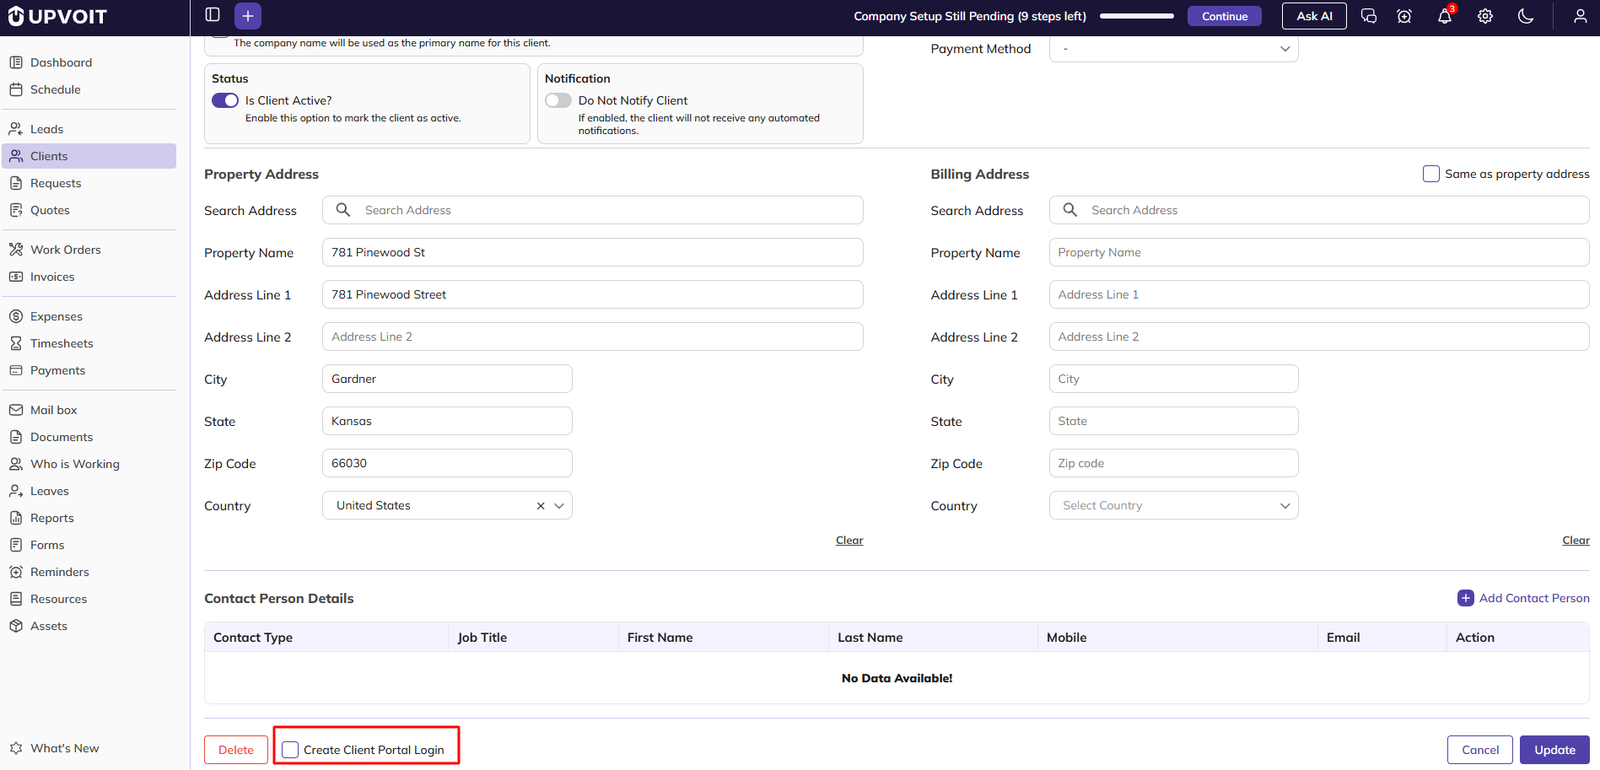
When a Primary Email is entered, a Create Client Portal Login checkbox appears at the bottom of the form.
If this option is selected, the client receives a client portal activation email to set a password. Once the password is set, the client can log in to their portal.
Status and Notification

-
Status → Is Client Active?: switch this on to mark the client as active. It is on by default.
-
Notification → Do Not Notify Client: when this is on, the client will not receive any automated notifications. It is off by default.
Property Address and Billing Address

Enter the client’s property address and billing address. Use Search Address to find the property. Once you select it, the other address fields are filled in automatically. Click Clear to empty the fields in that section.
If the billing address is the same as the property address, select Same as property address in the Billing Address section.
Property Map and Geofence

The Property Map and Geofence appear only when Enable Automatic Clock In & Clock Out is turned on in Settings → System Configuration → Work Order. When this setting is off, the property section works as described above, without the map.
A geofence is the boundary around the property. It is used to clock technicians in automatically when they arrive at the work order location and clock them out when they leave.
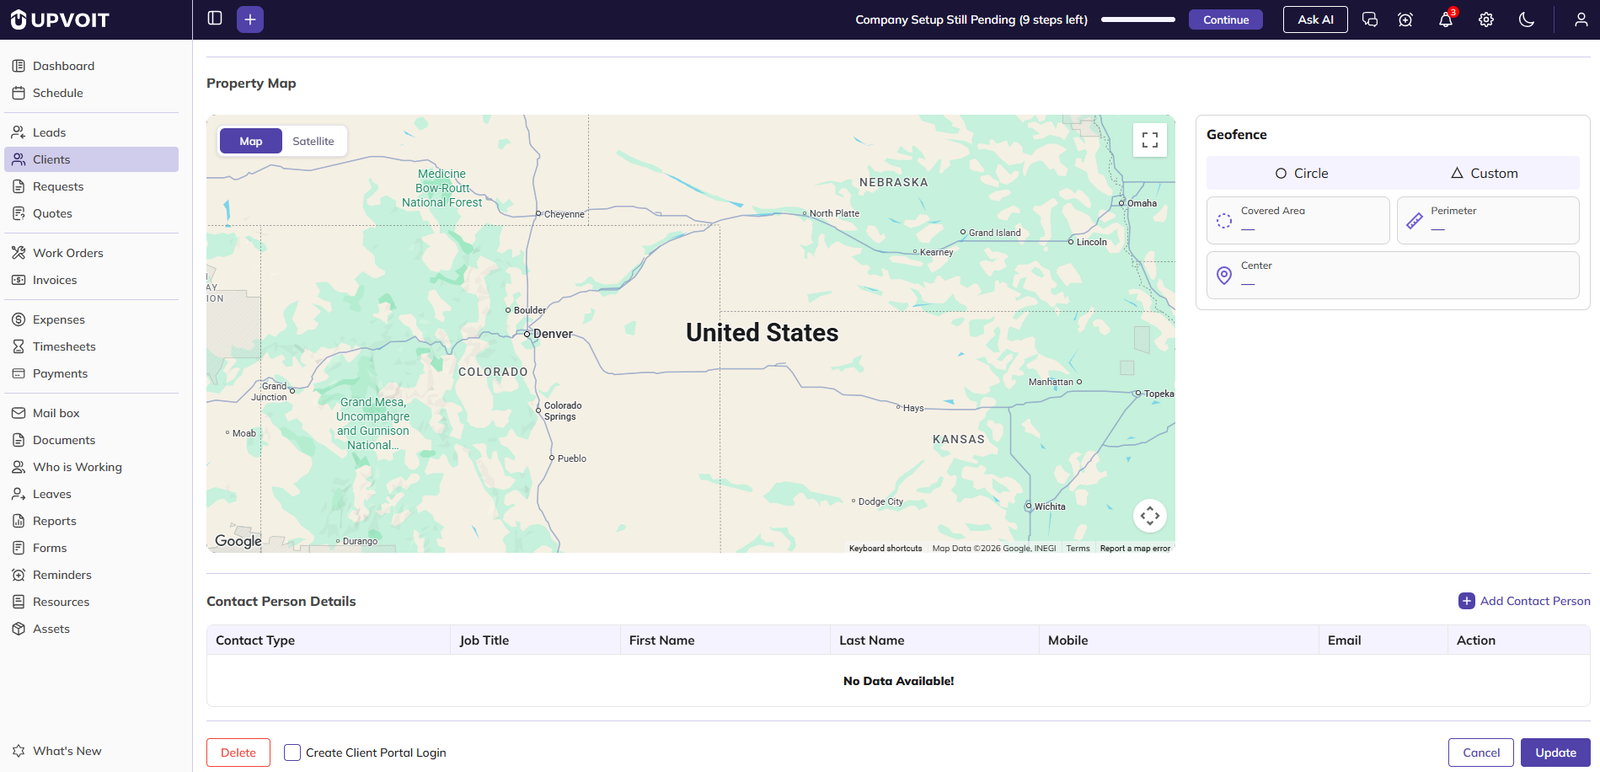
Property Map: shows the property’s location. Switch between Map and Satellite view, use the full-screen icon to enlarge the map, and use Clear to remove the boundary you drew.
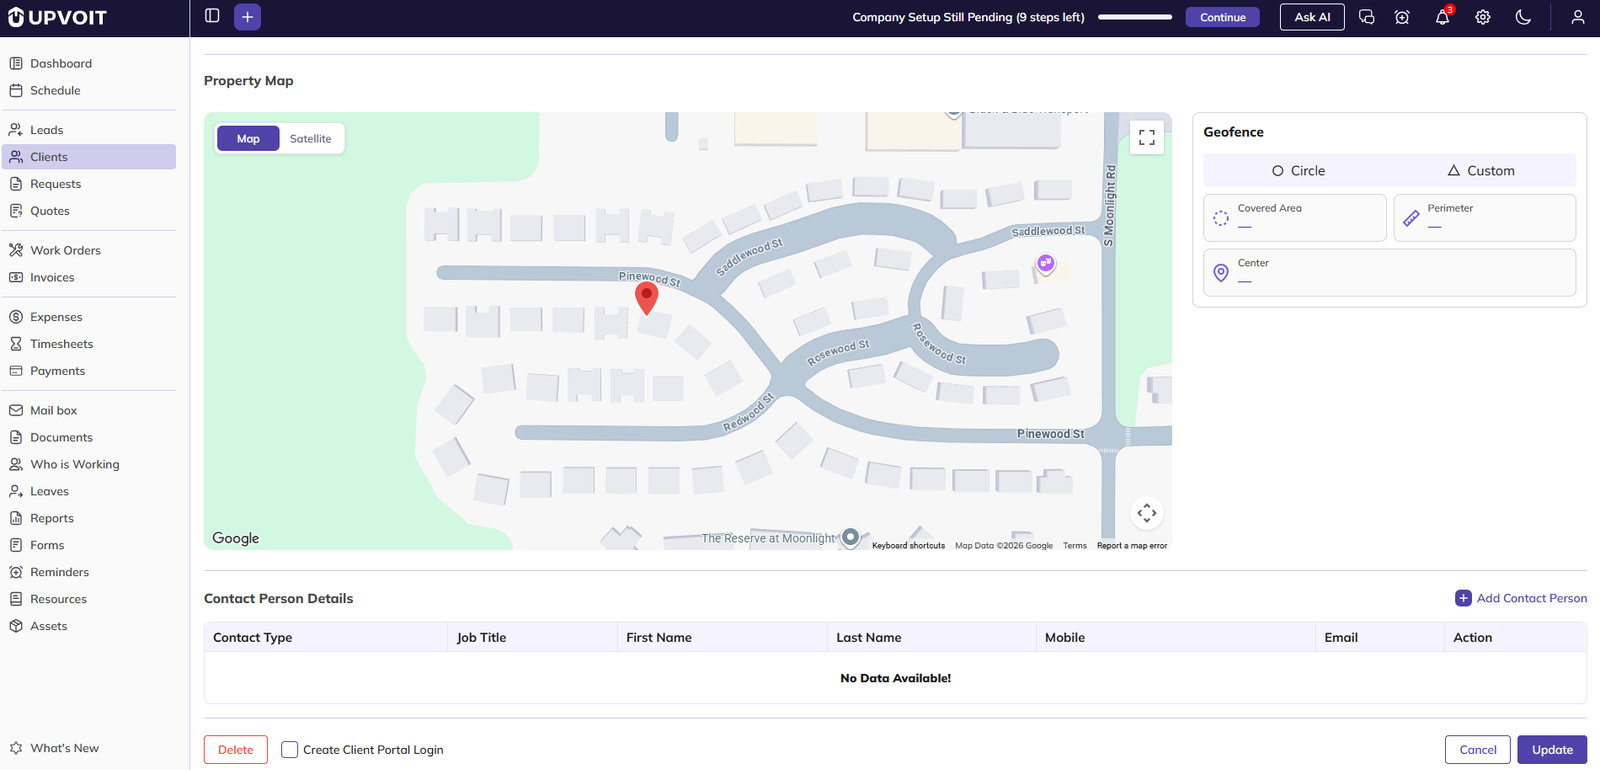
When a property address is selected, the map moves to that location and shows a pin.
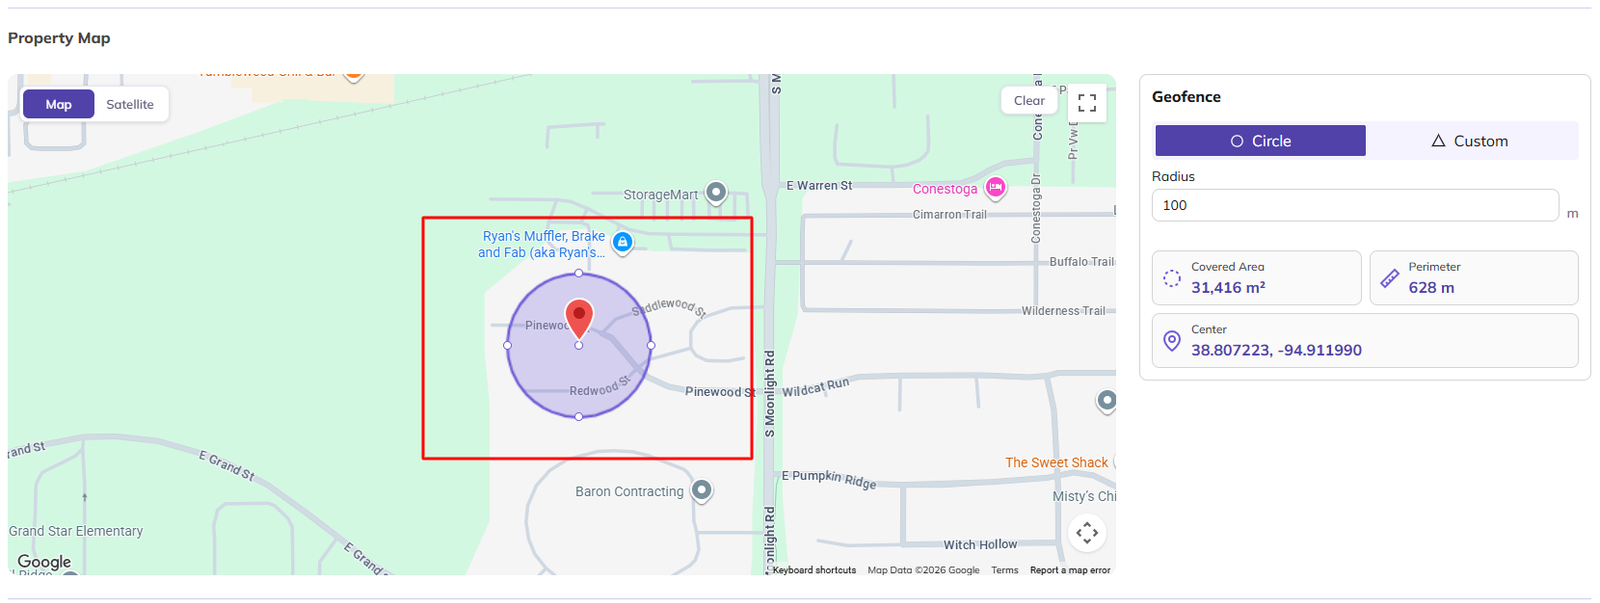
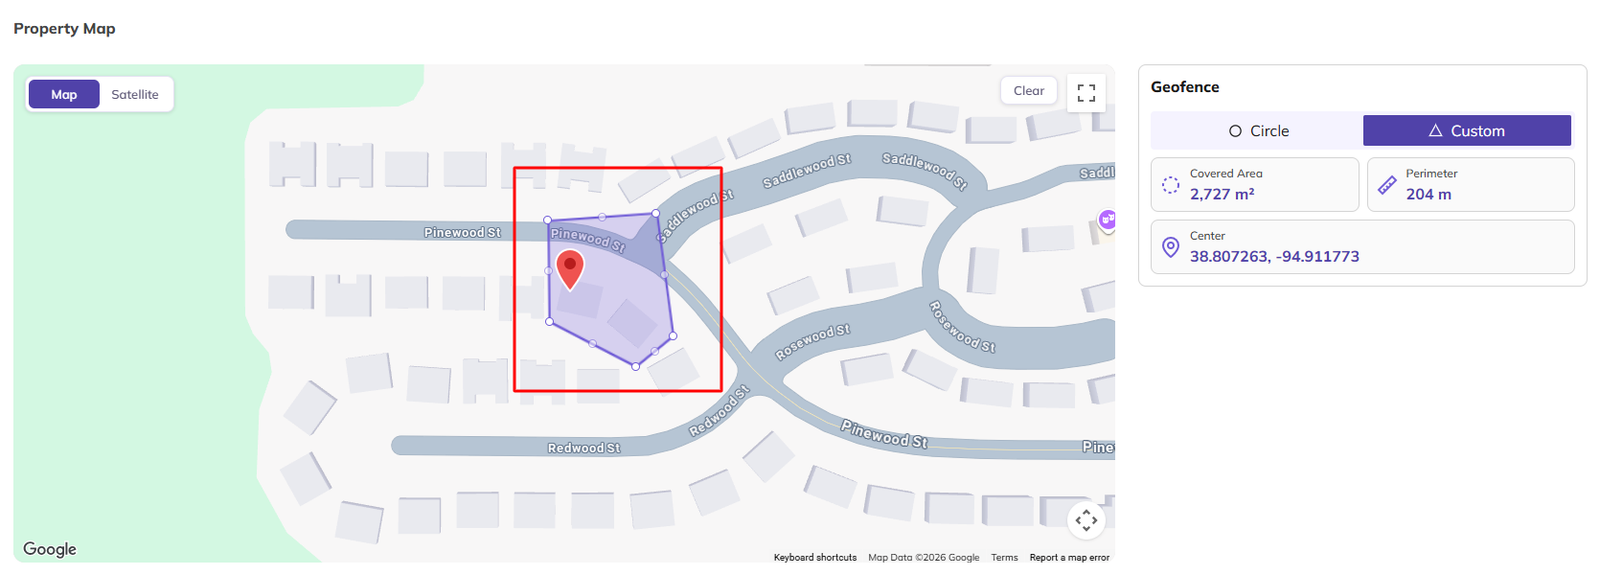
Geofence: choose how to set the boundary:
-
Circle: draws a circle around the property. Enter the Radius in metres (for example, 100) to set its size.
-
Custom: draw your own boundary shape around the property on the map.
After the boundary is set, the Geofence panel shows:
-
Covered Area: the size of the area inside the boundary (m²).
-
Perimeter: the length of the boundary (m).
-
Center: the latitude and longitude of the centre of the boundary.
The property section on the Edit Client page works the same way.
Contact Person Details
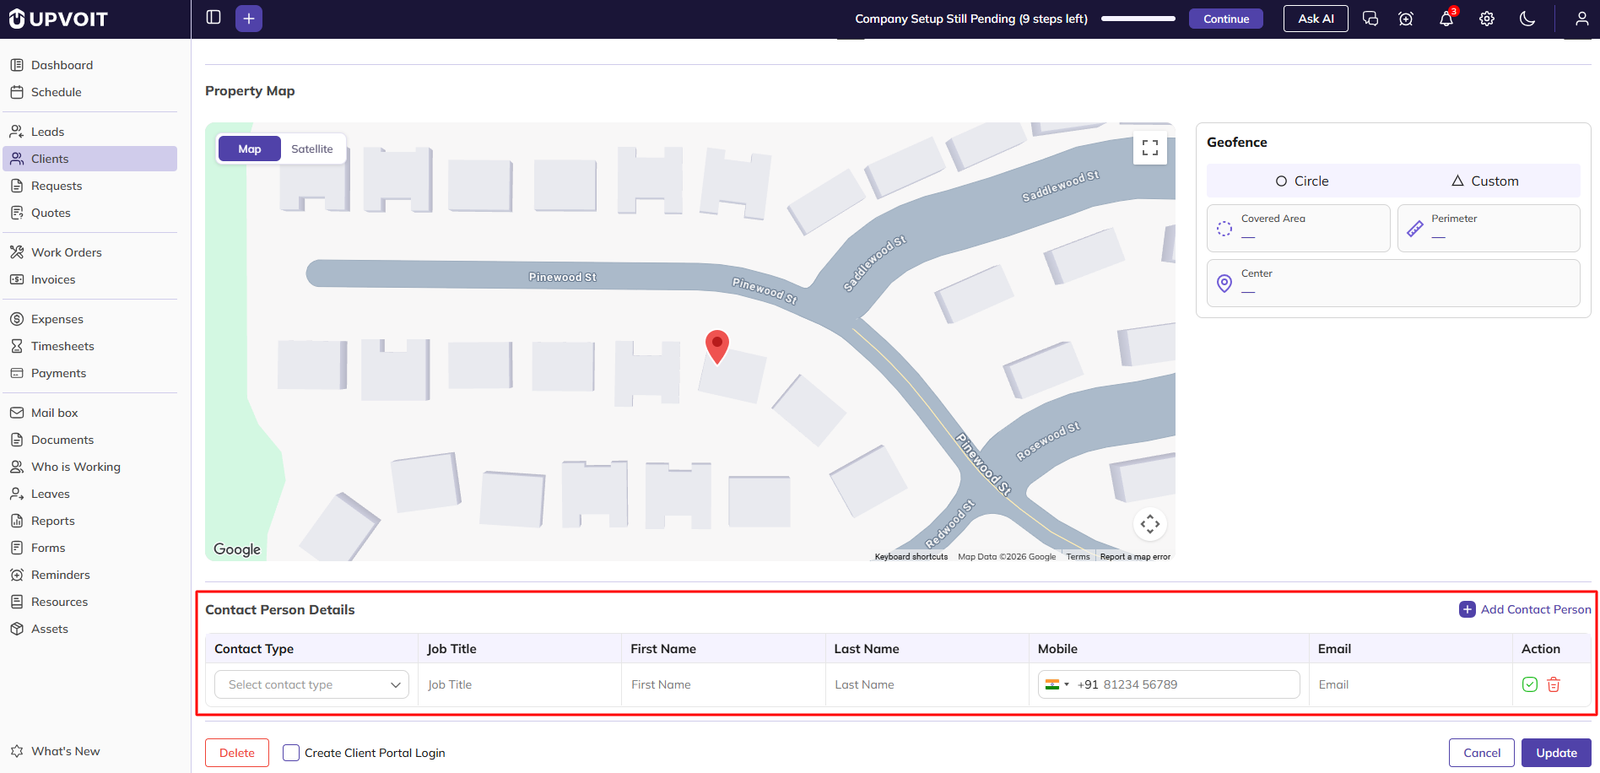
To add a contact person for the client, click Add Contact Person. A new row is added where you enter the contact’s details. Contact Type and First Name are required.
-
Allow Login: select this to give the contact person their own login. They will receive an email to set up their login.
-
Action: ✓ saves the row; the bin icon deletes the row.
View Client
The View Client page shows all the information about one client. The client name appears at the top, with an Edit button at the top right. Use the tabs on the left to move between the sections.
Basic Details

Basic Details opens by default. On the left it shows the client’s saved information, such as company name, primary contact, primary email, billing address (with See on Map), client portal login access, payment term, payment method, active status and notification setting.
On the right are three sections:
-
Properties: the client’s properties. Click Add Property to add one, or the pencil icon under Action to edit one. A property cannot be deleted.
-
Transaction Details: the client’s invoices and payments, with the balance shown at the bottom. Click Create Invoice to create an invoice for this client.
-
Contacts: the client’s contact persons. Click Add Contact Person to add one. Use the pencil icon to edit a contact or the bin icon to delete one.
Add Property
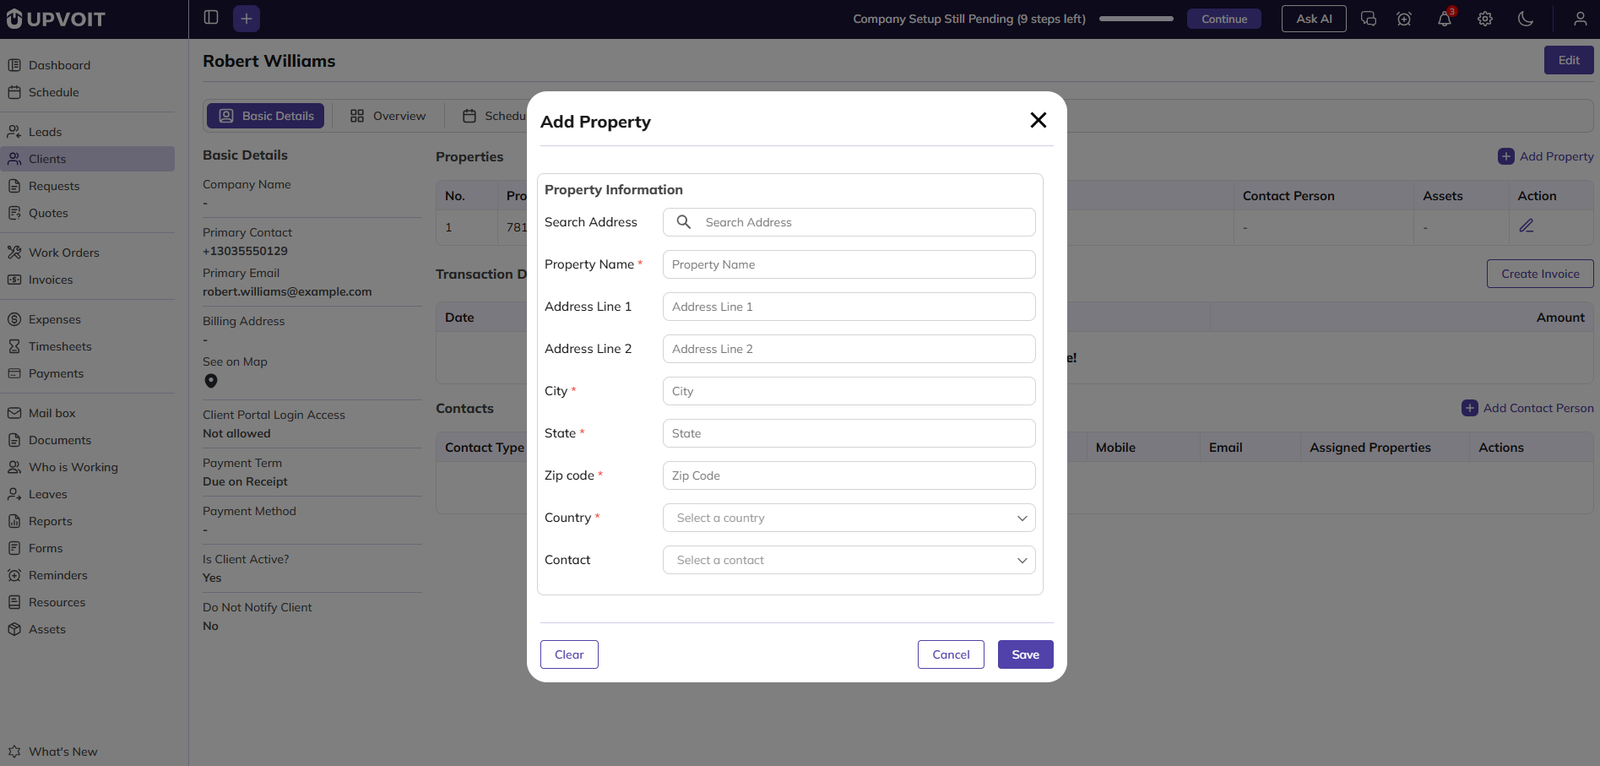
Click Add Property in the Properties section to open the Add Property window. Use Search Address to find the property. Once you select it, the other address fields are filled in automatically.
Property Name, City, State, Zip code and Country are required.
-
Open the client and go to Basic Details.
-
In Properties, click Add Property.
-
Search for the address, or enter the details manually.
-
Click Save. Click Clear to empty the fields, or Cancel to close without saving.
Edit Property

Click the pencil icon under Action in the Properties section to open the Edit Property window. It shows the property’s existing details, which you can change.
-
In Properties, click the pencil icon for the property.
-
Change the details as needed.
-
Click Update. Click Clear to empty the fields, or Cancel to close without saving.
Add Property with Geo-Fencing
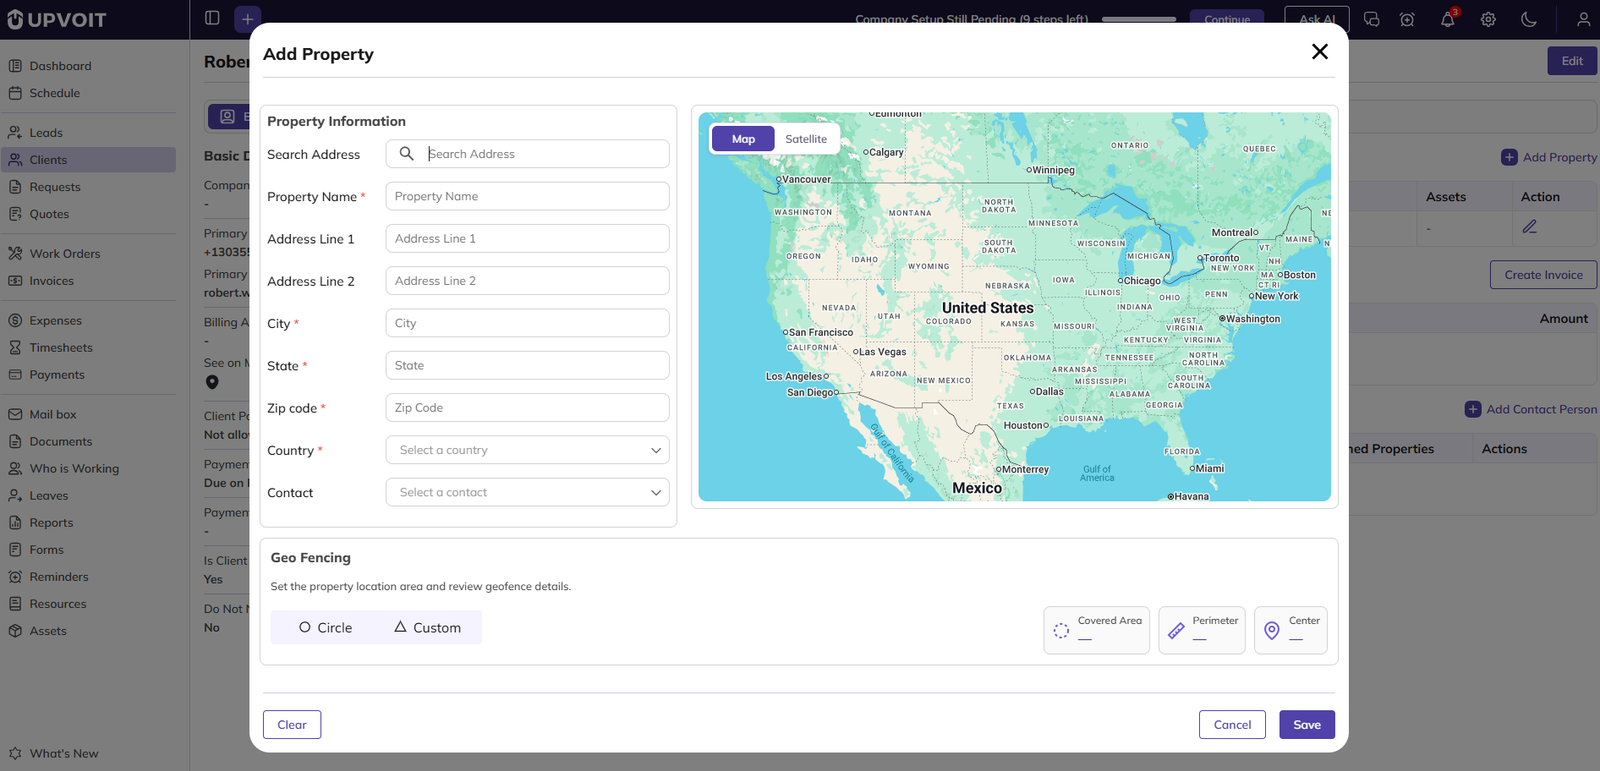
When Enable Automatic Clock In & Clock Out is turned on in Settings → System Configuration → Work Order, the Add Property window has three parts:
-
Property Information: the same address fields as in 3.1.1.
-
Map: shows the property’s location. Switch between Map and Satellite, use the full-screen icon to enlarge the map, and use Clear to remove the boundary.
-
Geo Fencing: set the boundary around the property. Select Circle and enter the Radius in metres, or select Custom to draw your own boundary shape on the map. The Covered Area, Perimeter and Center are shown once the boundary is set.
Edit Property with Geo-Fencing
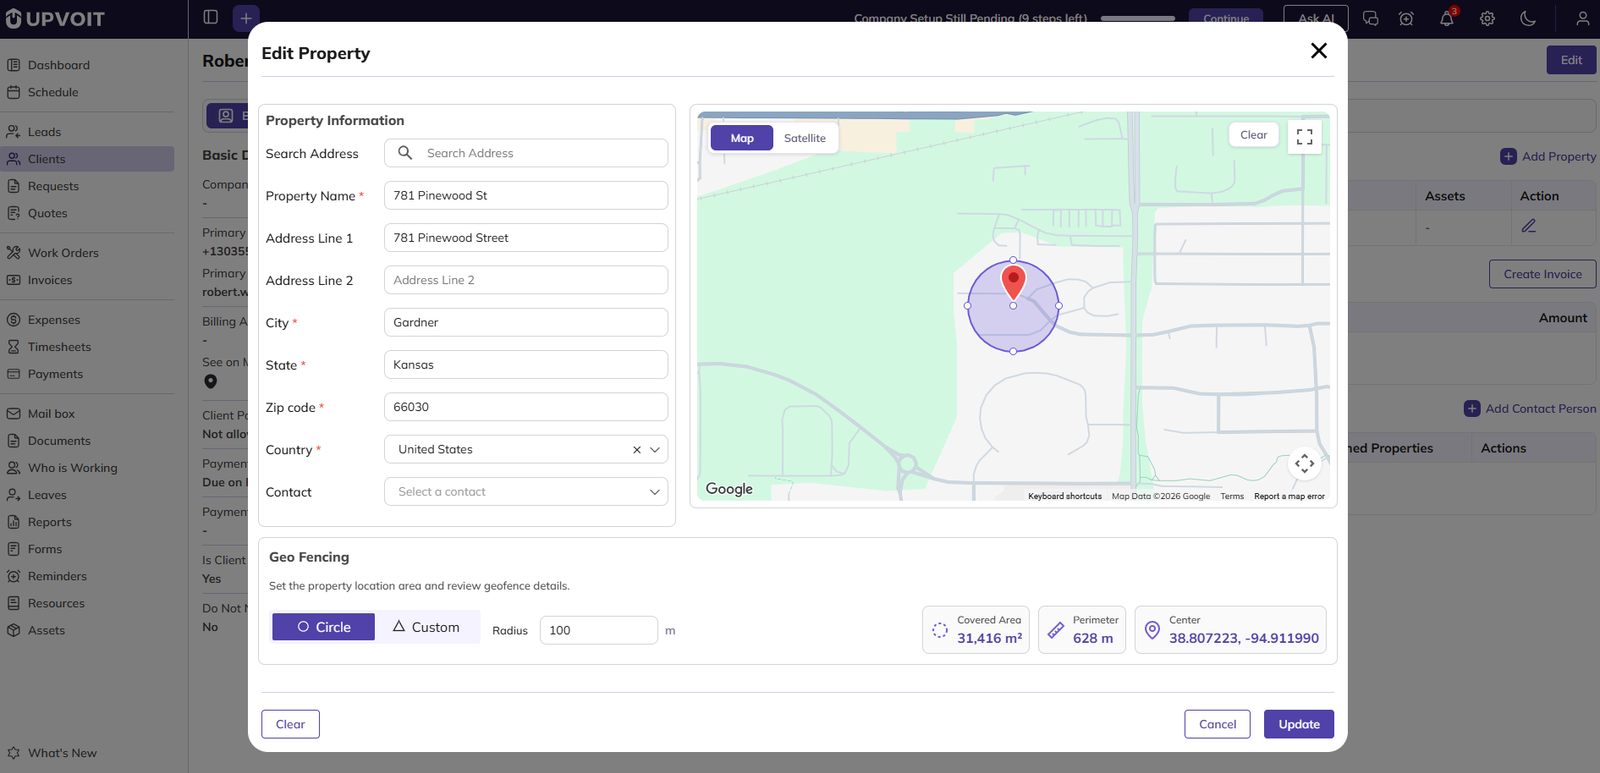
When Enable Automatic Clock In & Clock Out is turned on, the Edit Property window shows the property’s existing details, its location on the map and its current boundary. You can change the address or the boundary. The Covered Area, Perimeter and Center update to match.
Overview
The Overview tab shows all the records created for this client, in four sub-tabs: Requests, Quotes, Work Order and Invoices. The create button at the top right changes to match the selected sub-tab. Clicking it takes you to that module (Requests, Quotes, Work Orders or Invoices), with this client already filled in on the form. Each of these modules has its own section in this manual.
To view, update or delete a record, click its title or number to open it.
Requests

Shows the client’s requests with title, PO number, work order type, contact number, requested date and status (for example, Overdue). Clicking Create Request takes you to the Requests module to create a new request.
Quotes

Shows the client’s quotes with quote number, work order type, date, title, rating, total and status (for example, Created). Clicking Create Quote takes you to the Quotes module to create a new quote.
Work Order

Shows the client’s work orders with number, title, work order type, PO number, project, scheduled date and time, total and status (for example, Scheduled or In Progress). Clicking Create Work Order takes you to the Work Orders module to create a new work order.
Invoices
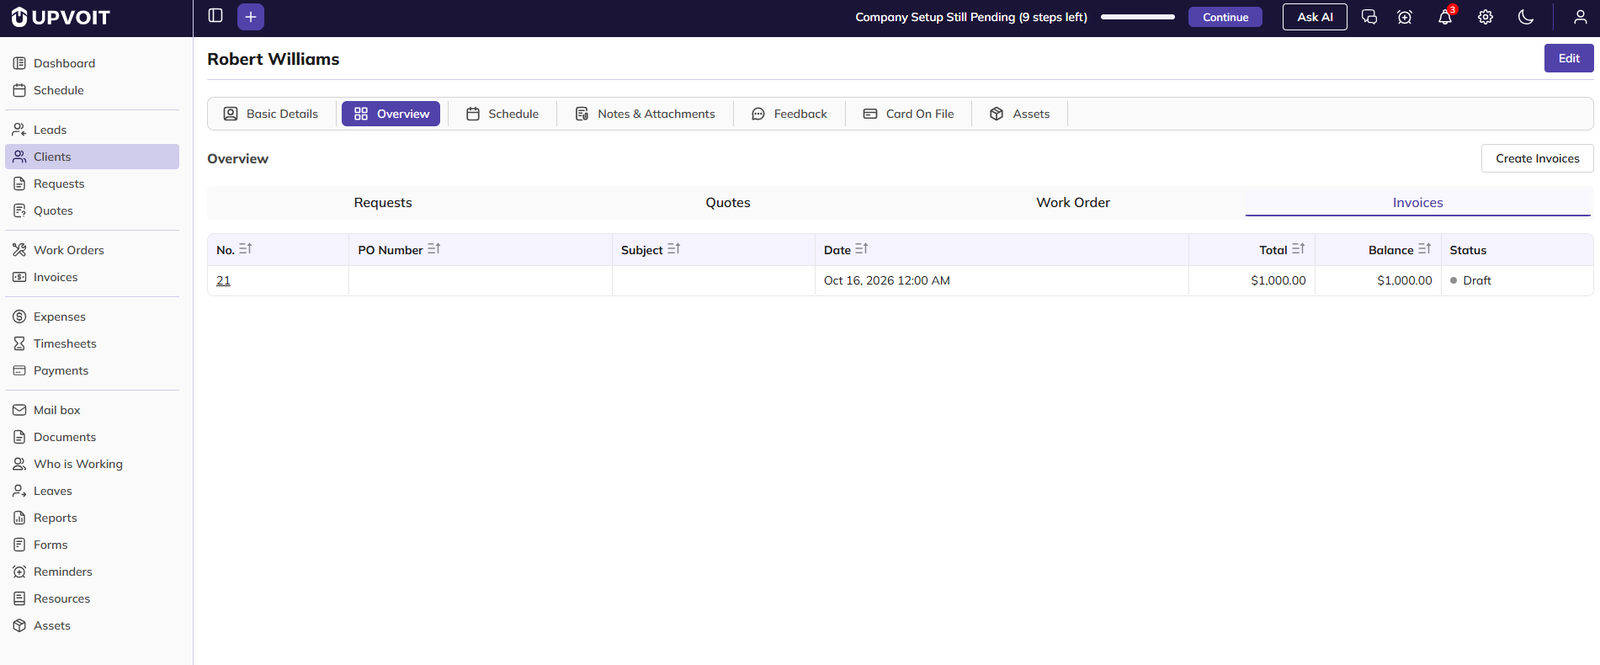
Shows the client’s invoices with invoice number, PO number, subject, date, total, balance and status (for example, Draft, Not Yet Due or Paid). Clicking Create Invoices takes you to the Invoices module to create a new invoice.
Schedule
The Schedule tab shows when the client’s requests and visits are scheduled and who they are assigned to. It has three sub-tabs. Click a title or number to open the record.
Request

Shows the client’s scheduled requests with the assigned team members, date and time, and status.
Visit (One Off Work Order)
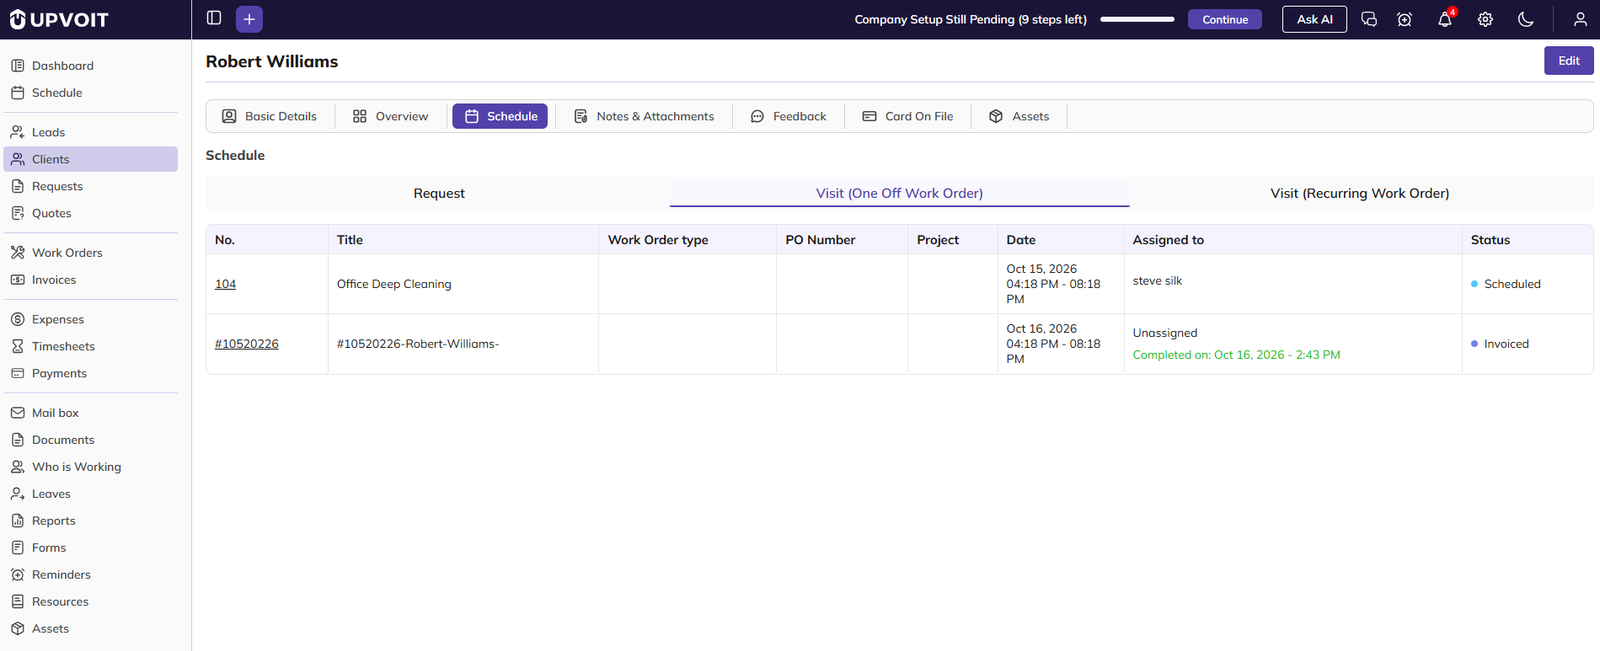
Shows the visits for one-off work orders, with the work order number, date and time, assigned team members and status.
Visit (Recurring Work Order)
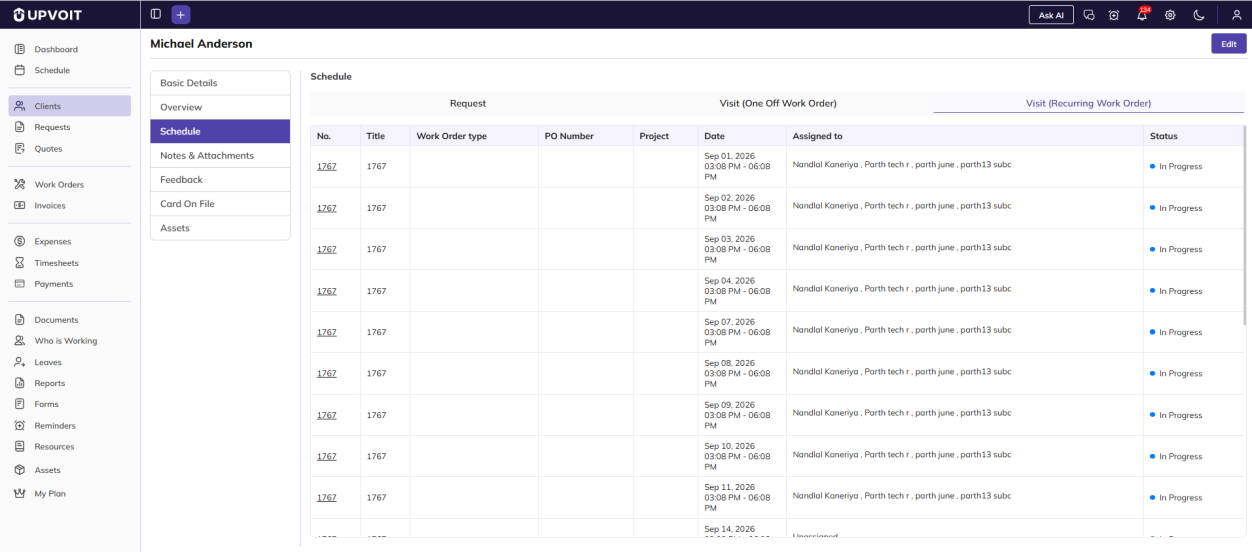
Shows every visit of the client’s recurring work orders. Each visit appears as a separate row with its own date, assigned team members and status.
Notes & Attachments

Use this tab to keep notes, files, instructions and extra information for the client.
-
Notes & Attachment: write notes and upload files (PDF, JPEG, PNG, DOC, max 10MB). Uploaded files are listed below with download and delete icons.
-
Link note to related: select Request, Quotes, Job or Invoices. The note will also be shown in the selected module.
-
Delivery & Job Instructions: write instructions for the team.
-
Image Gallery: upload images (JPEG, JPG, PNG, max 10MB). Uploaded images are shown as thumbnails with download and delete icons.
-
Custom Field(s): fill in extra client information. Click Add Custom Field to add a new field.
Feedback

The Feedback tab lists the feedback forms for the client, with name and created date. Use Search feedback to find a form.
Each form has these actions:
-
Pencil icon: edit the form.
-
Eye icon: view the form.
-
Email icon: send a feedback email for the client.
-
Bin icon: delete the form.
Click Create Feedback to create a new feedback form. Creating a feedback form will be documented separately.
Send a feedback form by email
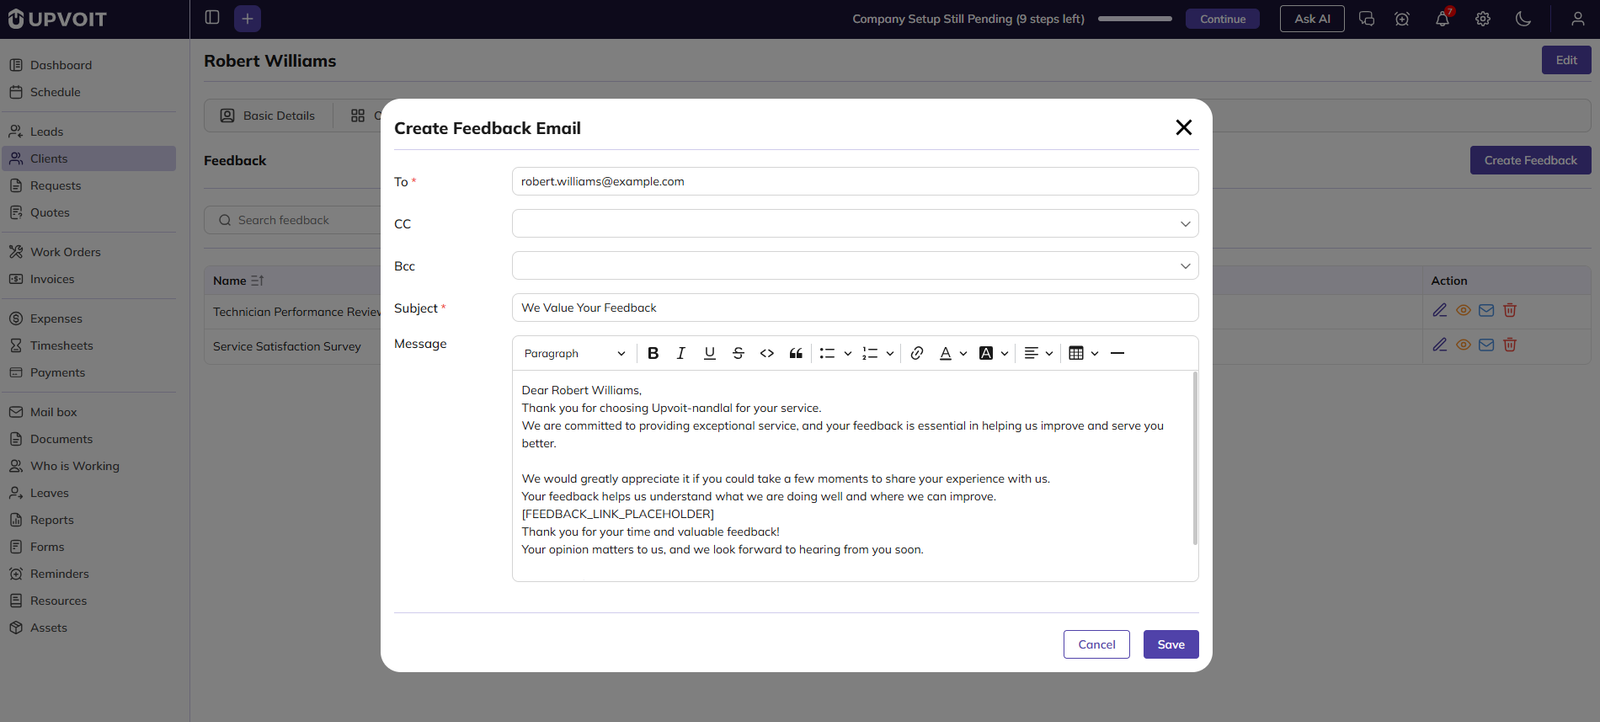
Clicking the email icon opens the Create Feedback Email window. The client’s email is filled in To, and the Subject and Message are filled in with a ready-made feedback request. You can change them before saving. To and Subject are required, and CC and Bcc are optional.
Card On File
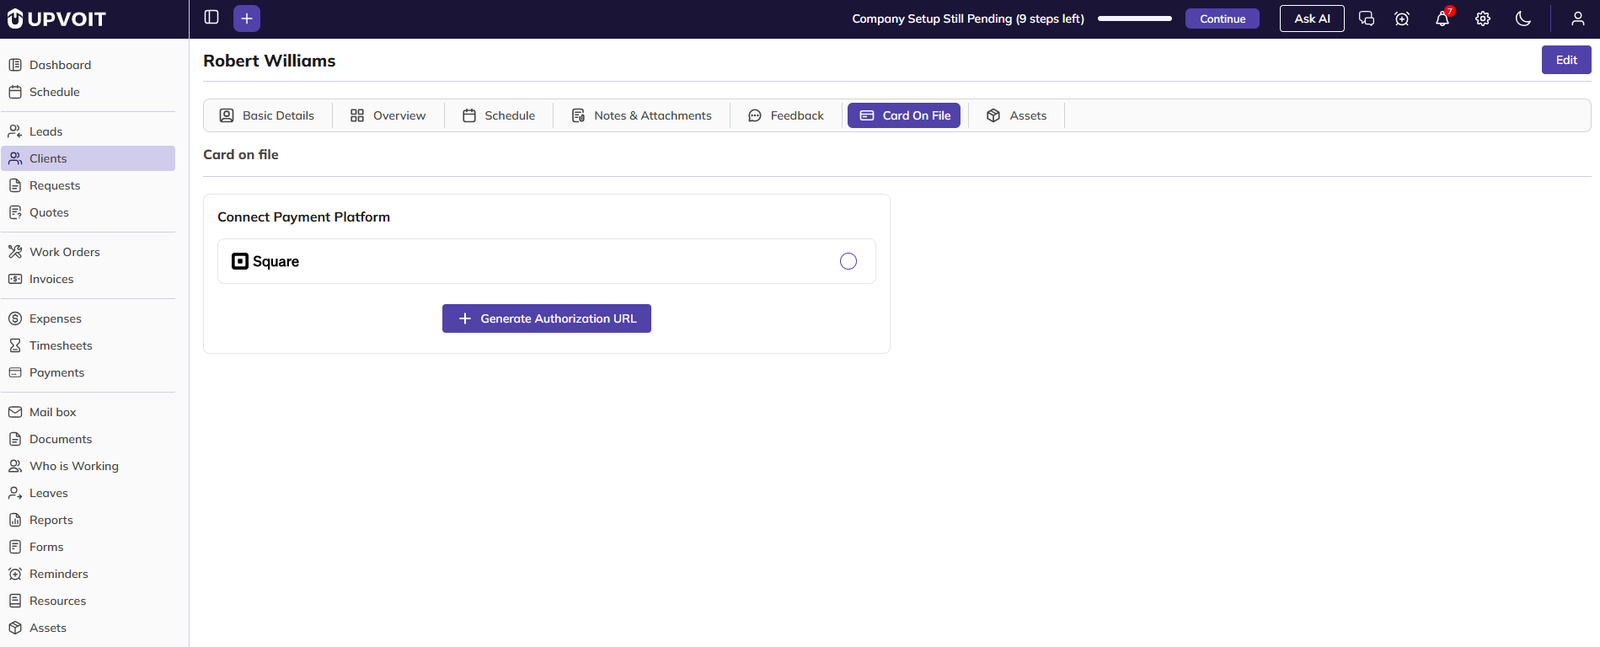
Use Card On File to collect and save the client’s card through a payment platform.

When you click Generate Authorization URL, the Send Authorization Link window opens. It shows the Authorization Link, which you can copy with the copy icon. You can also send it to the client by email or SMS. The client’s email and phone number are filled in automatically.
Assets

The Assets tab shows all the assets added to this client’s work orders, with the work order number, asset title, status, type, serial number and other details. Assets are added through work orders, not from this page. If no assets have been added, the list shows No Data Available!!
Edit Client

Click Edit at the top right of the View Client page to open the Edit Client page. It has the same form as Create Client, with the client’s existing details already filled in. See 2. Create Client for details on each part.
The differences from Create Client are:
-
Update: saves your changes, in place of Save.
-
Delete: deletes the client. See 3.8.1 Delete Client.
Delete Client

A client can be deleted only from the Edit Client page. Click Delete at the bottom left of the page to open a confirmation message.
The message lists the items linked to the client, such as properties and requests. These items and their information are deleted along with the client.
Did this answer your question?


