
Lead Management Overview
The Leads module lets you record and track potential customers before they become clients. You can store a lead’s contact details and address, log calls and emails, note the services they’re interested in, send them messages, and convert the lead into a client when they’re ready to do business.
Lead List
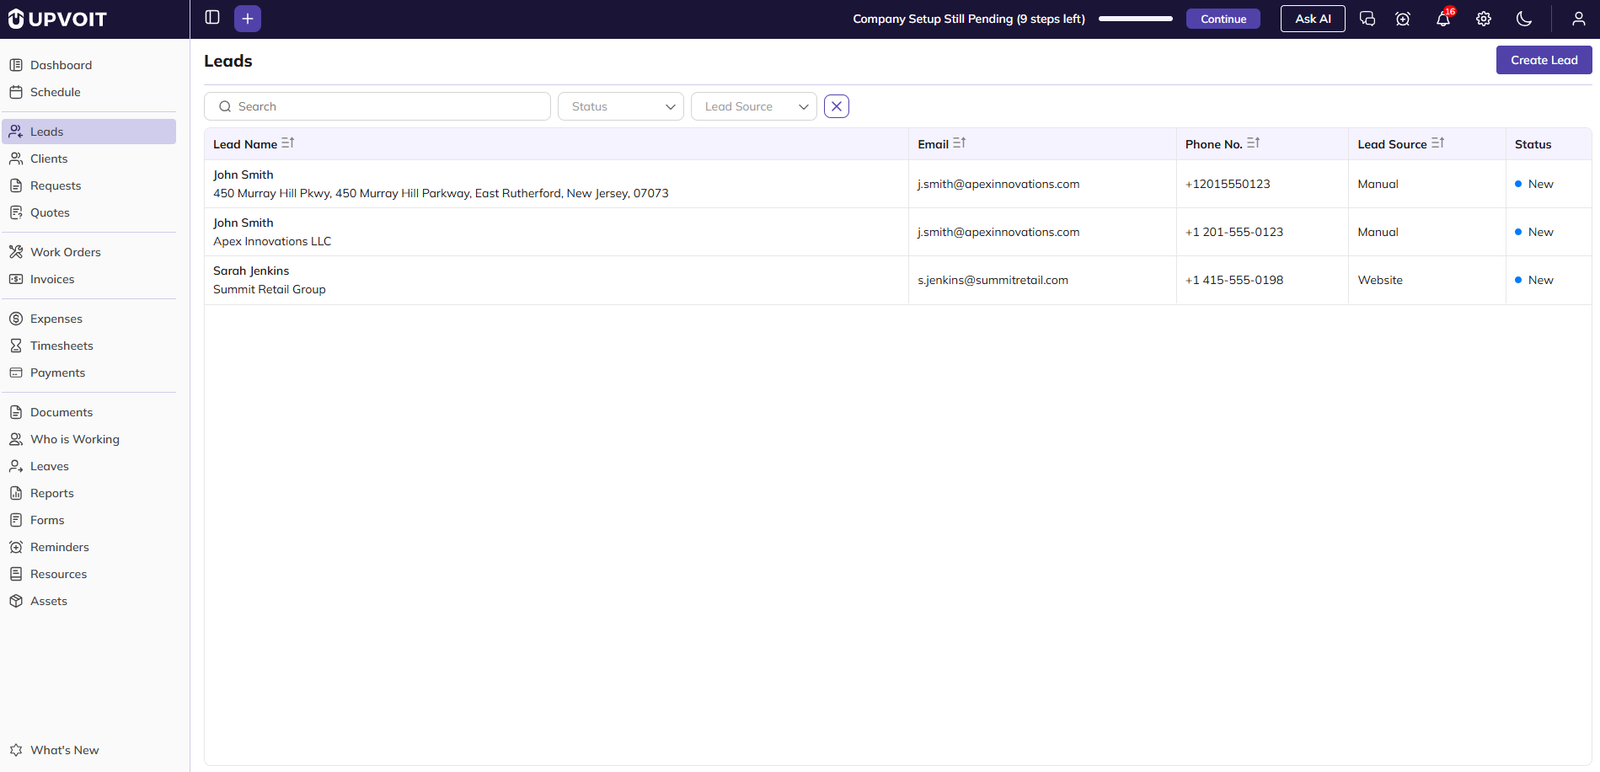
Click Leads in the left menu to see all your leads.
-
Search: Find a lead by name or other details.
-
Status: Show only leads with the selected status.
-
Lead Source: Show only leads from the selected source.
-
Clear (X): Remove all applied filters.
Create Lead
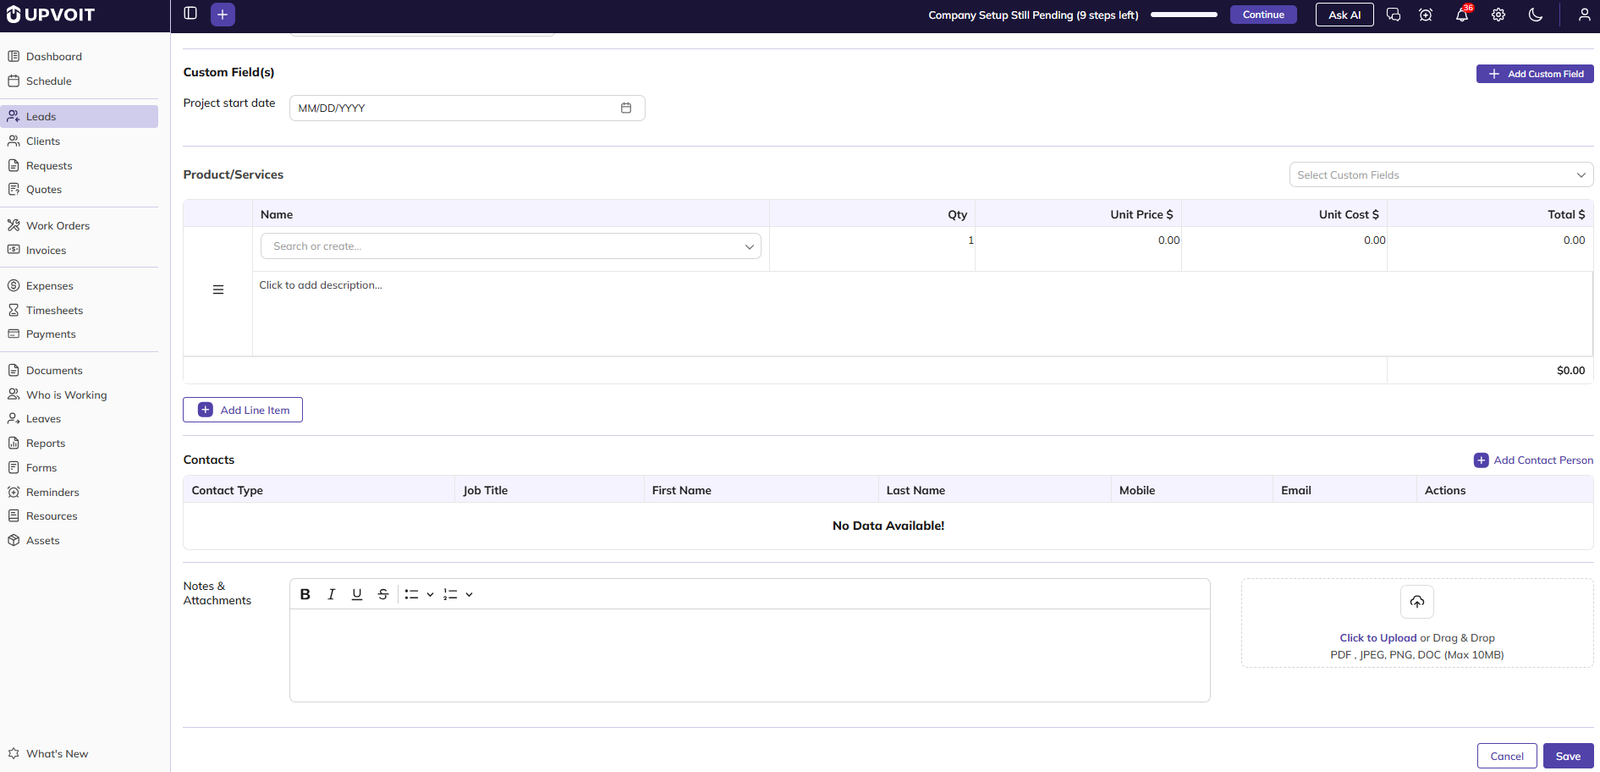
Click Create Lead on the Lead List. Fields marked with * are required.

-
Lead Source:* How the lead reached you. Options are Manual (default), Website, Referral, Social Media, Email, Phone and Advertisement.
-
Status:* Current stage of the lead. Options are New (default), Contacted, Not Interested and Closed. Leads converted into clients show as Converted automatically.
-
Assign To: Team member responsible for following up. Lists active users and Admins.
-
Custom Field(s): Extra fields for information specific to your business. Custom fields created in Settings → Custom Fields and linked to the Lead module appear here automatically. Click Add Custom Field to create a new one from this page. Custom fields apply to all leads.
-
Product/Services: Products or services the lead is interested in.
-
Name: Search for an existing product or service, or type a new name to create it. New items are saved to your product/service list.
-
Qty, Unit Price, Unit Cost and Markup: Enter the pricing. Markup can be a percentage (%) or a fixed amount ($). The total is calculated automatically.
-
Description: Click below the item name to add a description.
-
Custom field columns: Use the dropdown at the top right of the section to show custom fields, such as Lead Description, as columns.
-
Click Add Line Item to add more items. Drag the handle (≡) to reorder them.
-
-
Contacts: Click Add Contact Person to add people linked to the lead. Contact Type can be Job, Invoice or Both.
-
Attachments: Upload PDF, JPEG, PNG or DOC files, up to 10 MB.
Click Save to create the lead.
Lead Detail
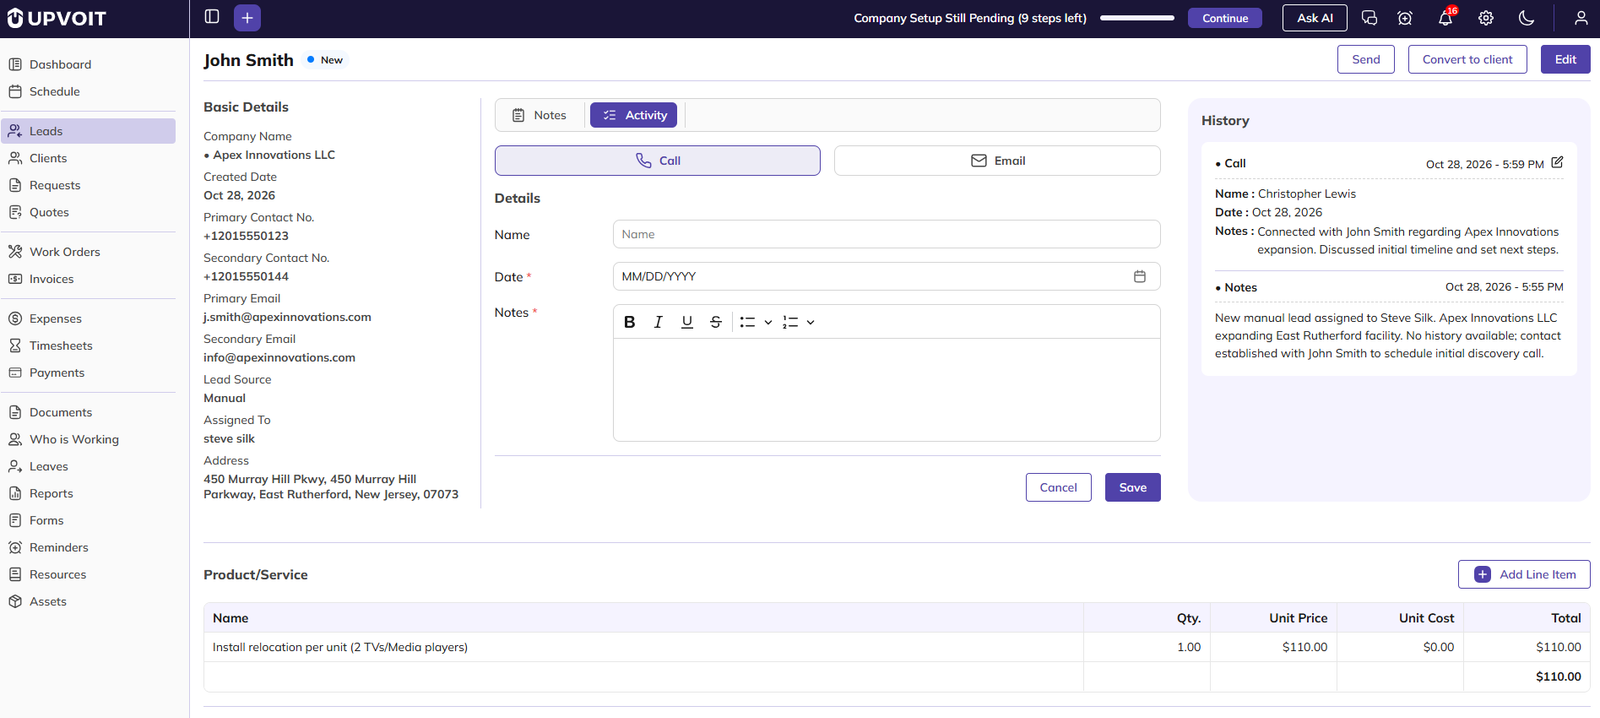
Click a lead name in the Lead List to open its details. The lead’s name and status appear at the top.
-
Send: Send the lead a message by email, SMS or both.
-
Convert to Client: Turn the lead into a client.
-
Edit: Update the lead’s details.
-
Basic Details: Summary of the lead’s company, created date, contact numbers, emails, lead source, assigned team member and address. Custom field values, such as Lead Description, appear below this section when filled in.
-
Notes / Activity: Add notes or log calls and emails with the lead.
-
History: Shows all saved notes, calls and emails with the date and time. Click View More to read a long note in full, or click the edit icon to update a call or email entry.
-
Product/Service: Products or services the lead is interested in. Click Add Line Item to add more.
-
Contacts: Manage the lead’s contact persons using the edit and delete icons, or click Add Contact Person.
-
Notes & Attachments: Add notes and upload files for the lead. Use the icons next to an uploaded file to download or delete it.
-
Delete: Permanently remove the lead.
After Conversion

Once a lead is converted into a client:
-
The status at the top changes to Converted.
-
Send is the only button shown at the top. Convert to Client and Edit are no longer available.
-
Client Name appears in Basic Details. Click it to open the client record.
-
Lead details, product/services and contact persons can no longer be edited.
-
You can still add notes and log calls and emails in Notes / Activity, and delete the lead if needed.
Send Lead
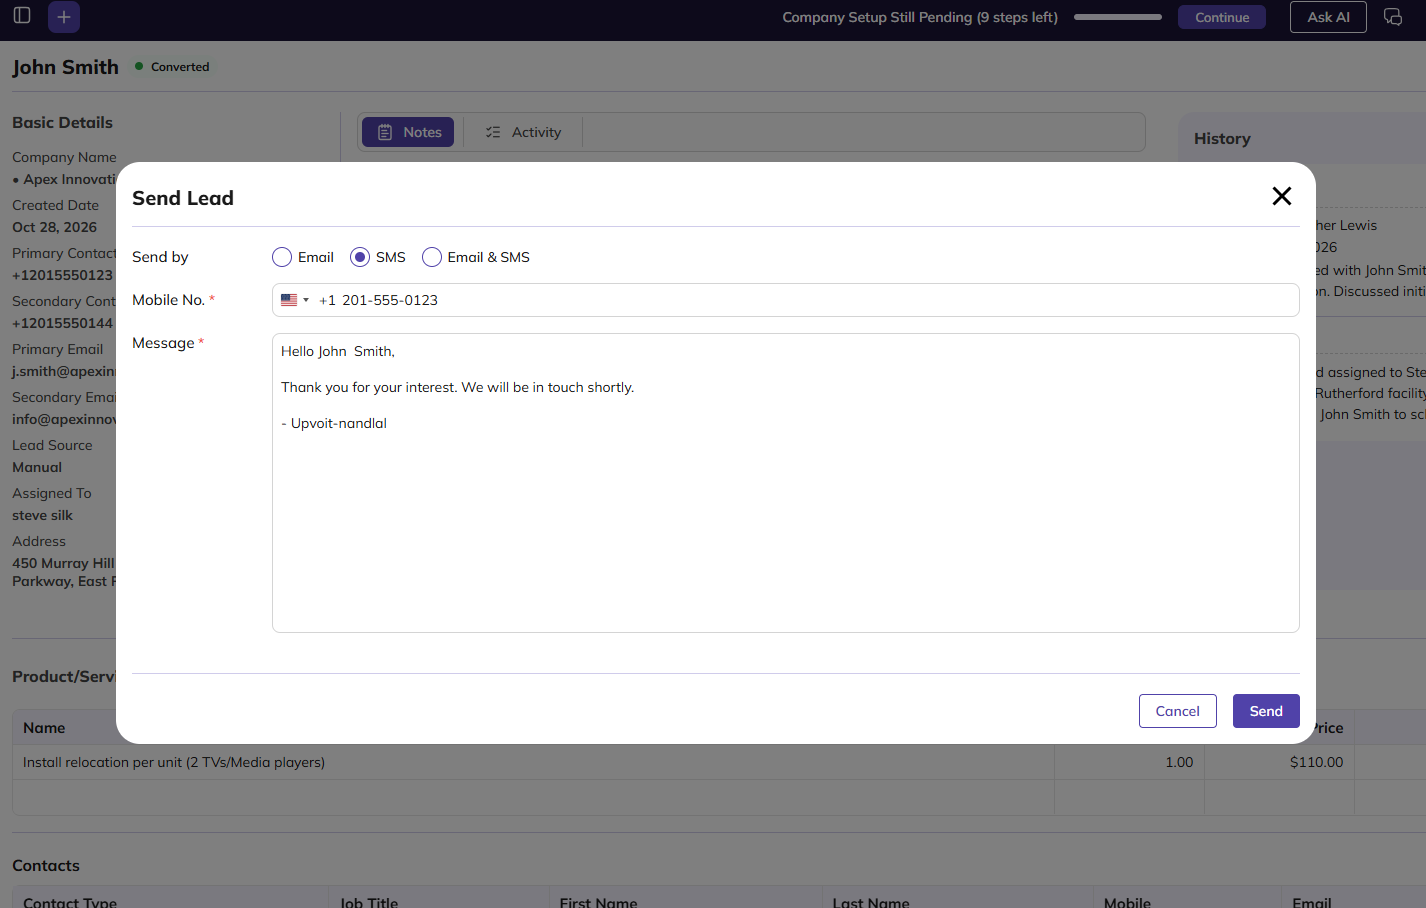
Click Send on the Lead Detail page to send the lead a message by email, SMS or both. The lead’s contact details and a default message are filled in automatically, so you only need to review and edit before sending.

-
Send by: Choose Email, SMS, or Email & SMS.
-
To:* Filled in with the lead’s primary email. Add or remove recipients as needed.
-
CC / Bcc: Other people to copy on the email.
-
Subject:* Filled in with the lead’s name and your company name.
-
Message: Filled in with a default message that includes the lead’s product/services. Edit it as needed using the text editor.
-
Mobile No.*: Filled in with the lead’s primary contact number.
-
Message:* Filled in with a default text message. Edit it as needed.
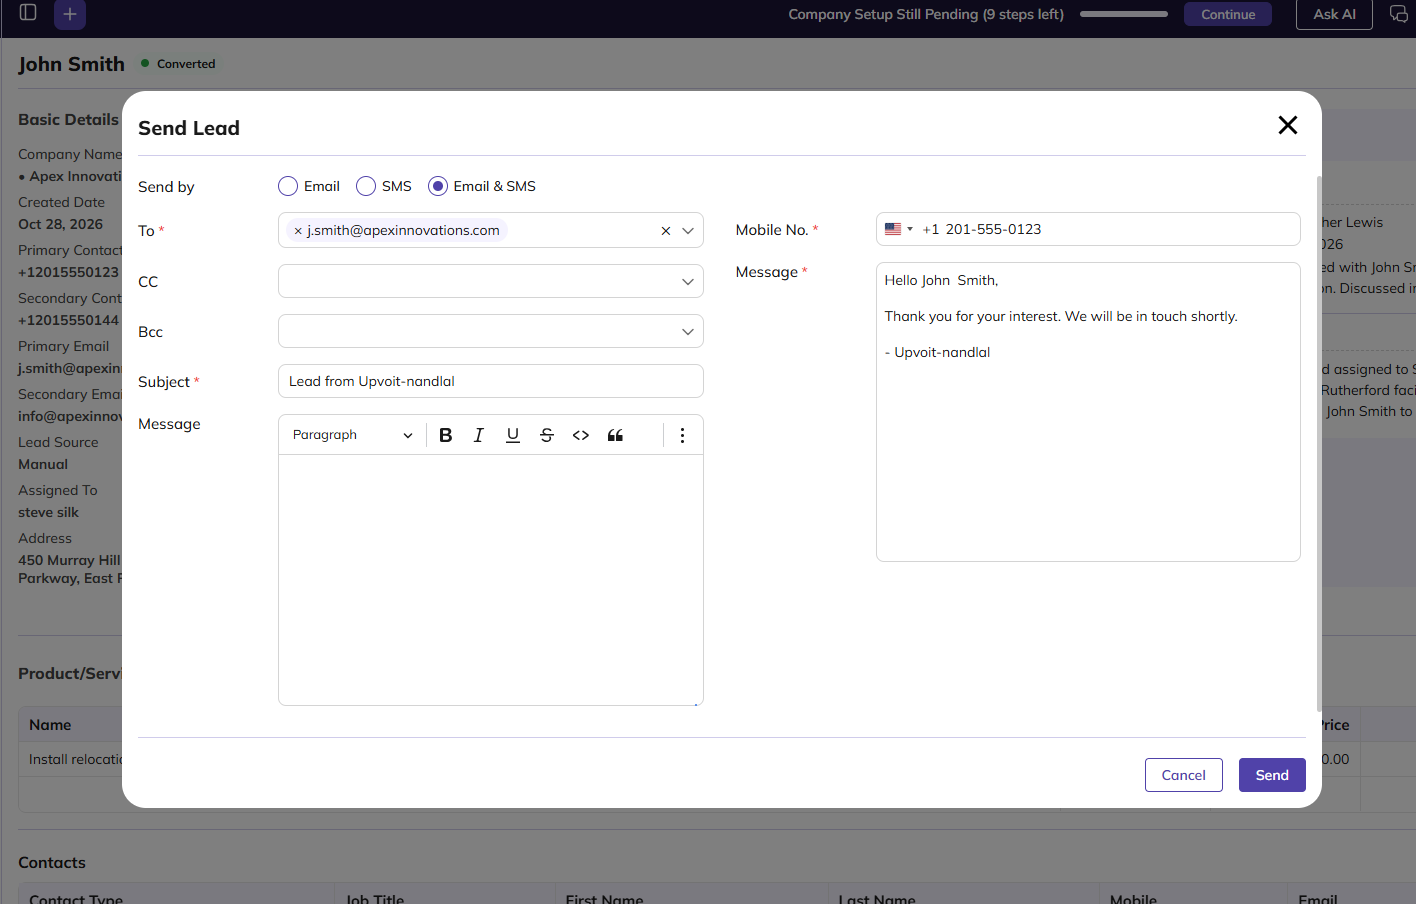
Select Email & SMS to send both at once. The email fields appear on the left and the SMS fields on the right.
Click Send to send the message.
Note: The default email and SMS messages come from the templates in Settings → System Settings → Lead. Change them there to update the default wording for all leads.
Notes and Activity
Use the Notes tab to add a quick note about the lead. Type the note and click Save.
Use the Activity tab to log a call or email with the lead.

-
Call / Email: Choose the type of activity to log.
-
Name: Short title for the activity, such as “Follow-up call”.
-
Date:* Date of the call or email.
-
Notes:* Details of the conversation.
Click Save. The entry appears in the History panel.
Edit Lead
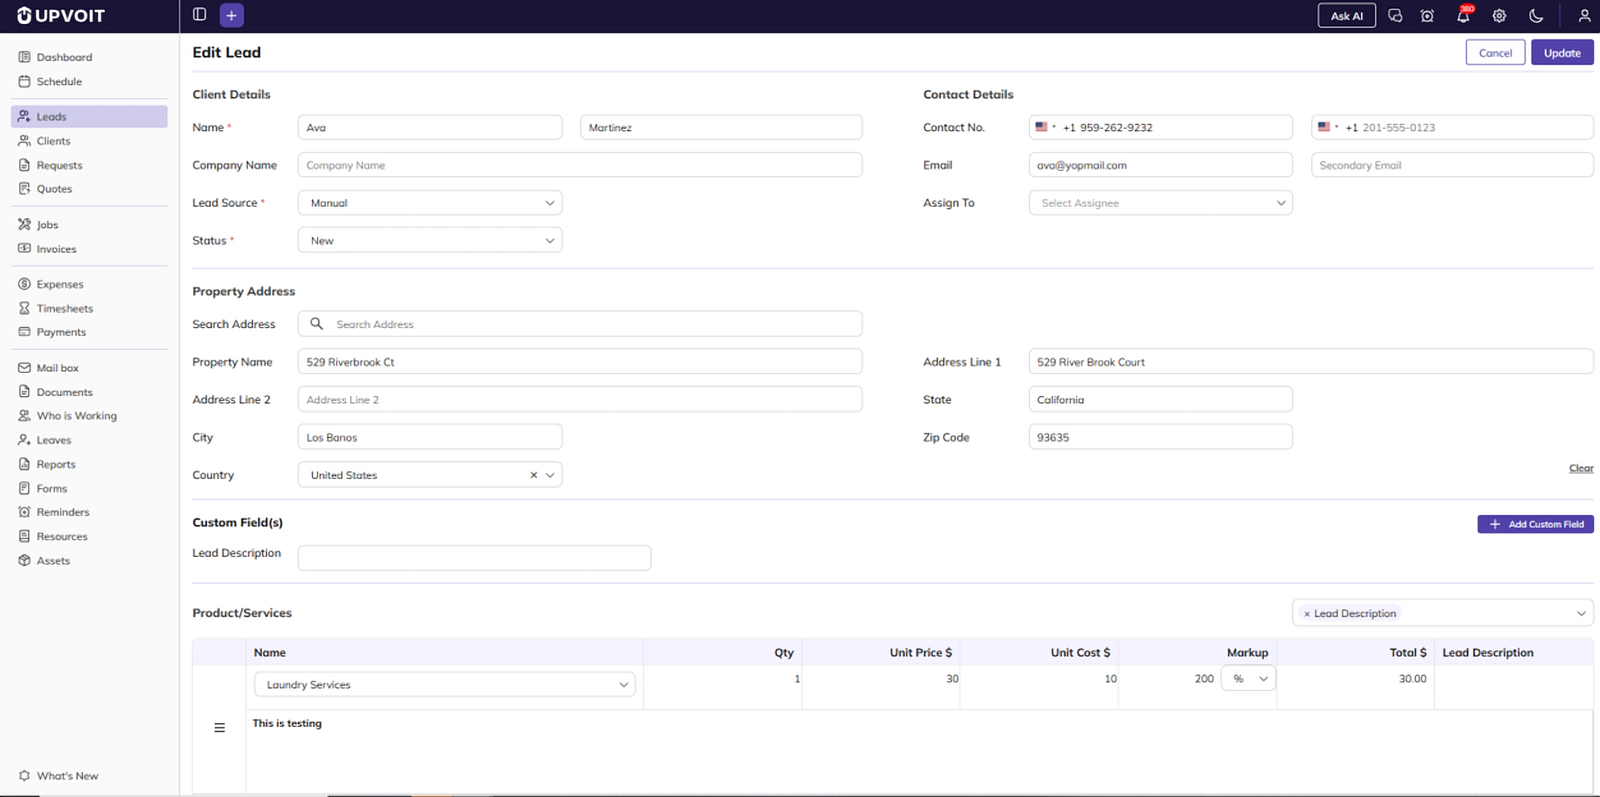
Click Edit on the Lead Detail page. The Edit Lead page opens with the lead’s existing details already filled in. Make your changes and click Update.
Convert to Client
Click Convert to Client on the Lead Detail page. The Create Client form opens with the following details carried over from the lead:
-
Name and company name
-
Contact details (phone numbers and emails)
-
Property address
-
Contact persons
Product/services added to the lead are not carried over.

-
Client Details: Select Use company name as the primary name to show the company name instead of the person’s name for this client.
-
Status: Mark the client as active.
-
Notification: Turn on Do Not Notify Client to stop automated notifications to this client.
-
Contact Details: Set the client’s payment terms and payment method.
-
Billing Address: Select Same as property address if both addresses are the same, or enter a separate billing address.
-
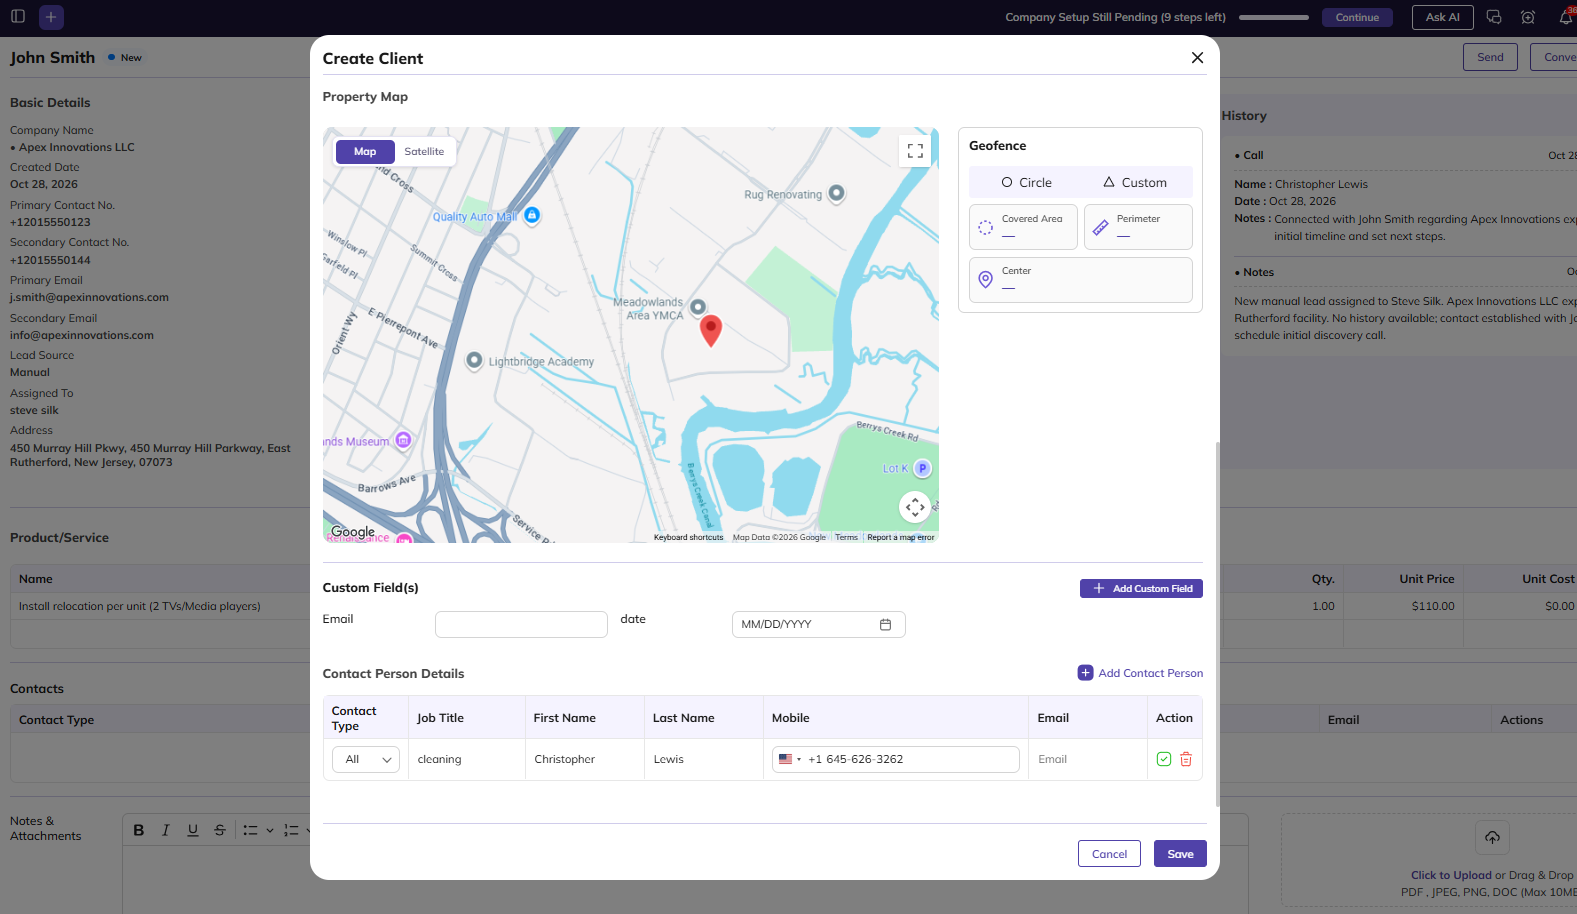
Property Map and Geofence: Shows the property location on the map. Choose Circle or Custom to draw a geofence around the property. The covered area, perimeter and center are shown once drawn.
-
Custom Field(s): Fill in any custom fields linked to the Client module, or click Add Custom Field to add one.
-
Contact Person Details: Contact persons carried over from the lead. Edit or delete them using the icons under Action, or click Add Contact Person to add more. If Allow Login is enabled for your account, an Allow Login column also appears and its selection is carried over from the lead. Select it to give a contact person login access.
Review the details and click Save. The client is created and the lead’s status changes to Converted.
Note: Once a lead is converted, its details and contact persons can no longer be edited. You can still add notes, log activities and delete the lead from the Lead Detail page.
Delete Lead
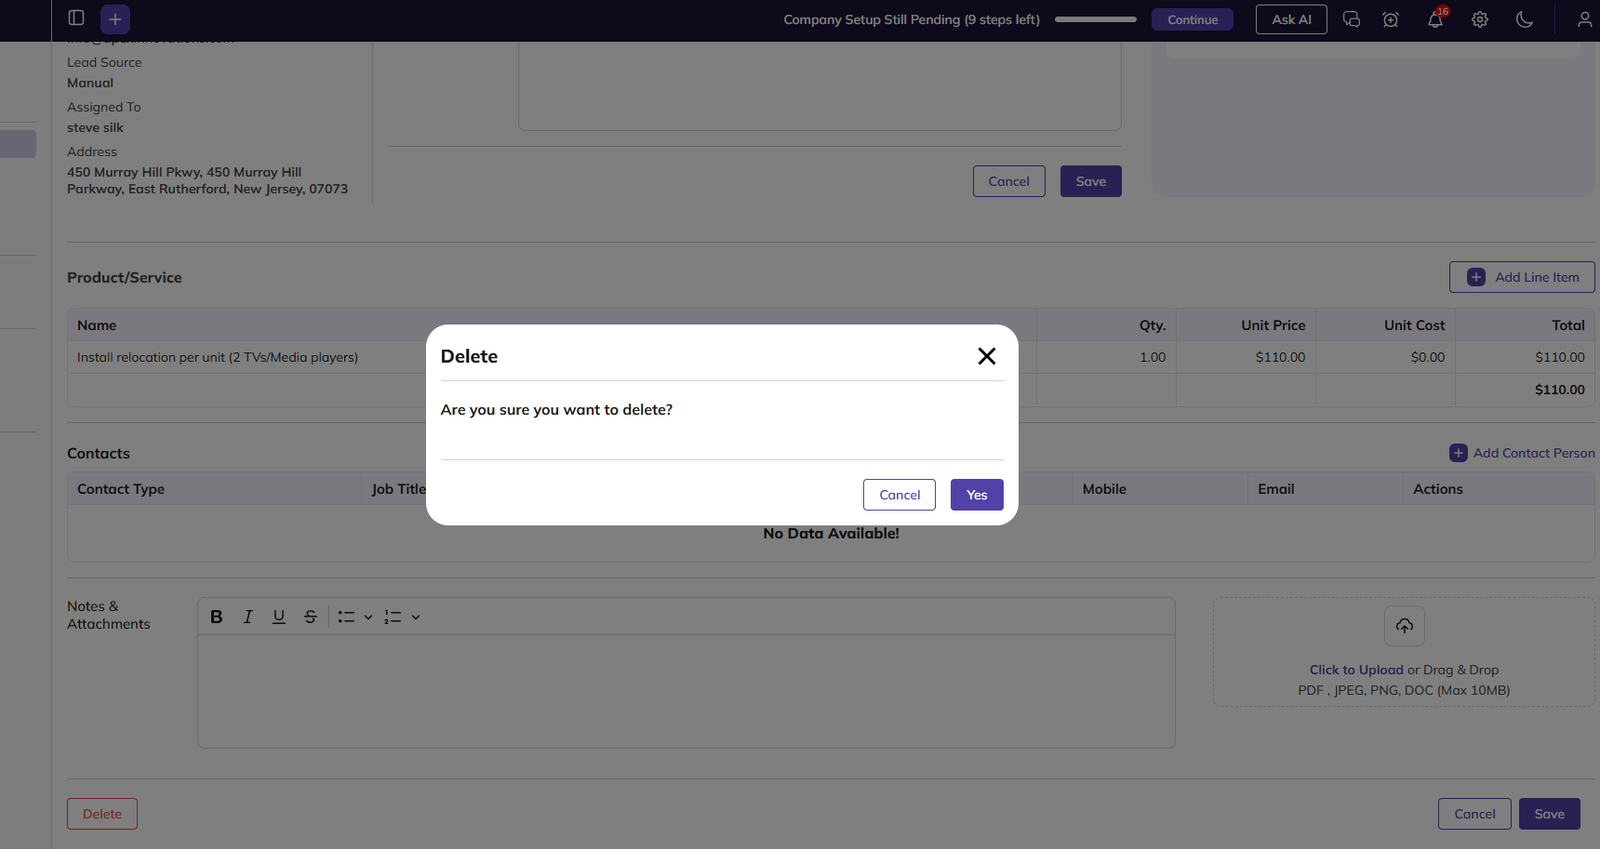
Click Delete at the bottom of the Lead Detail page. A confirmation message appears. Click Yes to delete the lead, or Cancel to keep it. Converted leads can also be deleted.
Did this answer your question?


