
A quote is a priced offer sent to a client for the work they need. It records the client, the property, the products and services offered with their prices, any discount, tax and deposit, and the terms of the offer. A quote can later be converted into a work order.
To open the module, click Quotes in the left main menu.
Overview & Listing
The Quotes module provides an overview of all quotes and their current statuses. Users can view, search, filter and manage quotes from this section.
Quote Overview
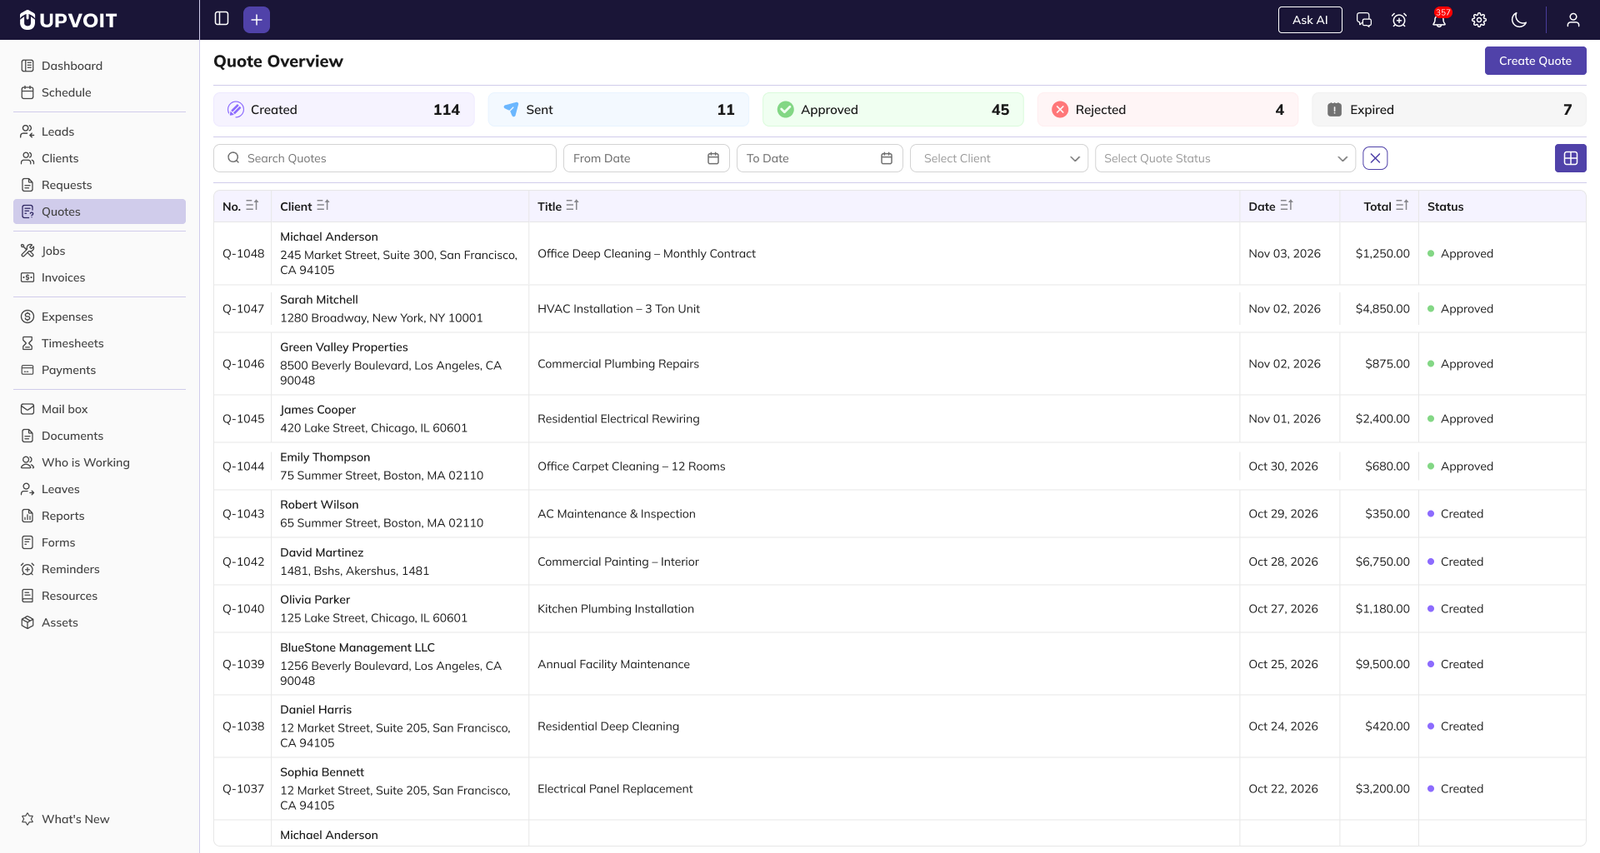
Clicking Quotes opens the Quote Overview page. The Create Quote button is at the top right.
Status cards across the top show how many quotes are in each status: Created, Sent, Approved, Rejected and Expired, Pending Approval.
Quote statuses
Quote statuses are predefined. A new quote starts as Created. The status then changes when the user clicks a button on the quote details page (see 4.1).
-
Created: the quote has been created.
-
Sent: the user has clicked Send on the quote details page.
-
Approved: the user has clicked Approve on the quote details page.
-
Rejected: the user has clicked Reject on the quote details page.
-
Expired: (definition to be added)
-
Pending Approval: (definition to be added)
Quote List: Search, Filter and Sort
Below the status cards is the list of all quotes. Each row shows the No. (quote number), Client (with the property address below the name), Title, Date and:
-
Total: the total of the products and services on the quote.
-
Status: the quote’s current status
To find a quote, use the search and filters above the list:
-
Search Quotes: search by keyword.
-
MM/DD/YYYY (two boxes): show quotes within a date range.
-
Select Client: show one client’s quotes.
-
Select Quote Status: show quotes in one status.
To sort the list, click the sort icon next to any column heading except Status.
To open a quote, click it in the list. The quote details page opens.
Kanban Board View

To see quotes as a board, click the grid icon at the top right of the list. The Kanban board shows one column per status: Created, Sent, Approved, Rejected, Expired and Pending Approval. Each column heading shows the number of quotes in that status and their combined total value.
Each quote appears as a card in its status column. A card shows:
-
the quote number, quote date and total
-
the client name
-
the assigned user
-
the created date
-
the date of the latest status change
-
the quote’s rating (star)
To open a quote, click the open icon at the top right of its card.
The search, date range, Select Client and X (clear) options work the same as in the list. To return to the list, click the list icon at the top right.
Ways to create a Quote
Create from Quote Menu
Click Quotes in the left main menu, then click Create Quote at the top right of the Quote Overview page. The Create Quote page opens.
Create from Client → Overview

Open the client from Clients in the left main menu. On the client’s Overview, click Quote. The Create Quote page opens with the client already selected.
Create Quote
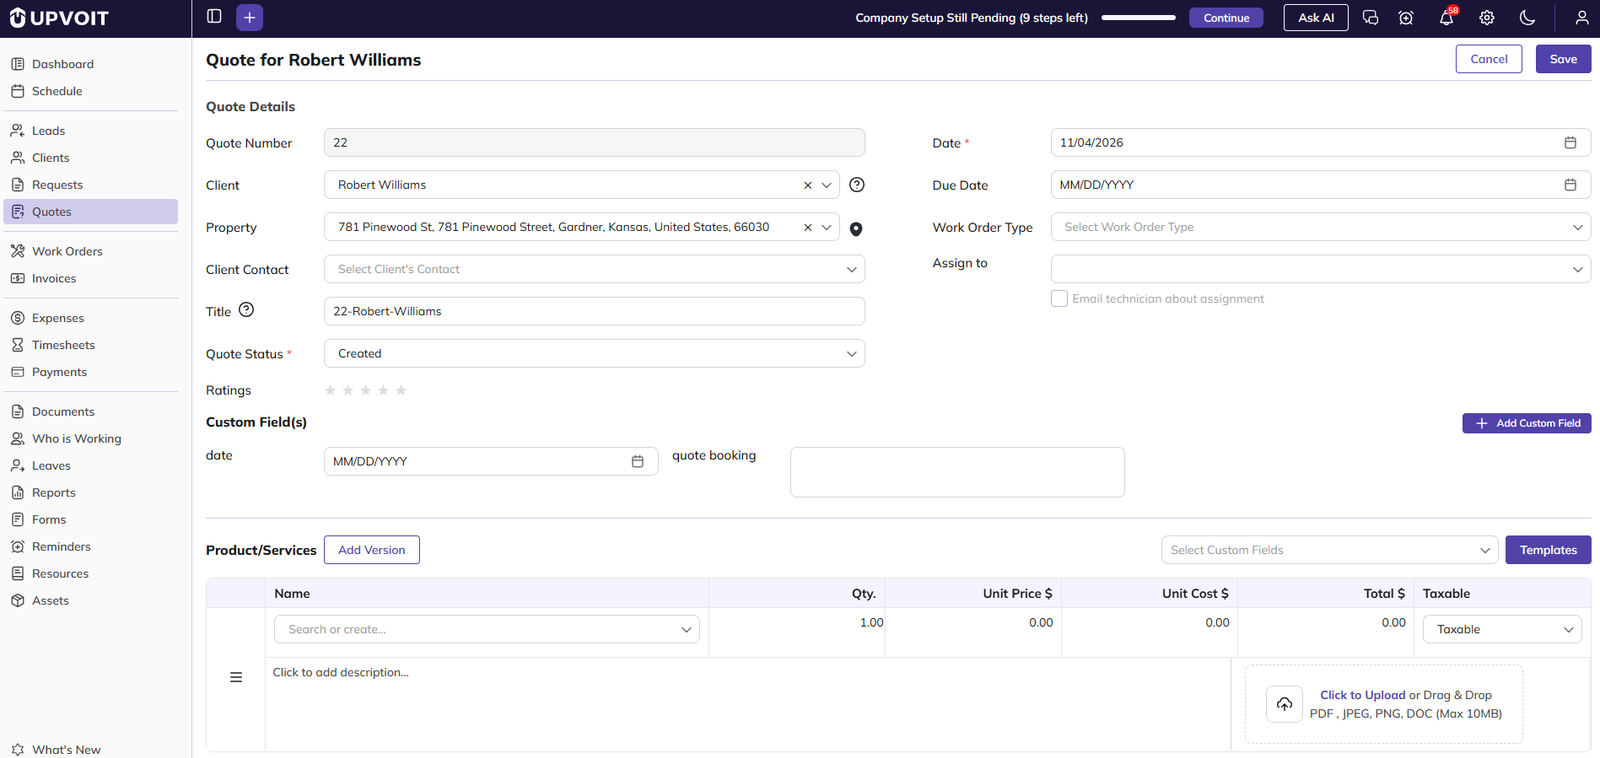
The Create Quote page has the following sections: Quote Details, Custom Field(s), Product/Services, Payment Details, Terms & Notes, and Internal Notes & Attachments. Fields marked with a red asterisk (*) are required.
Quote Details
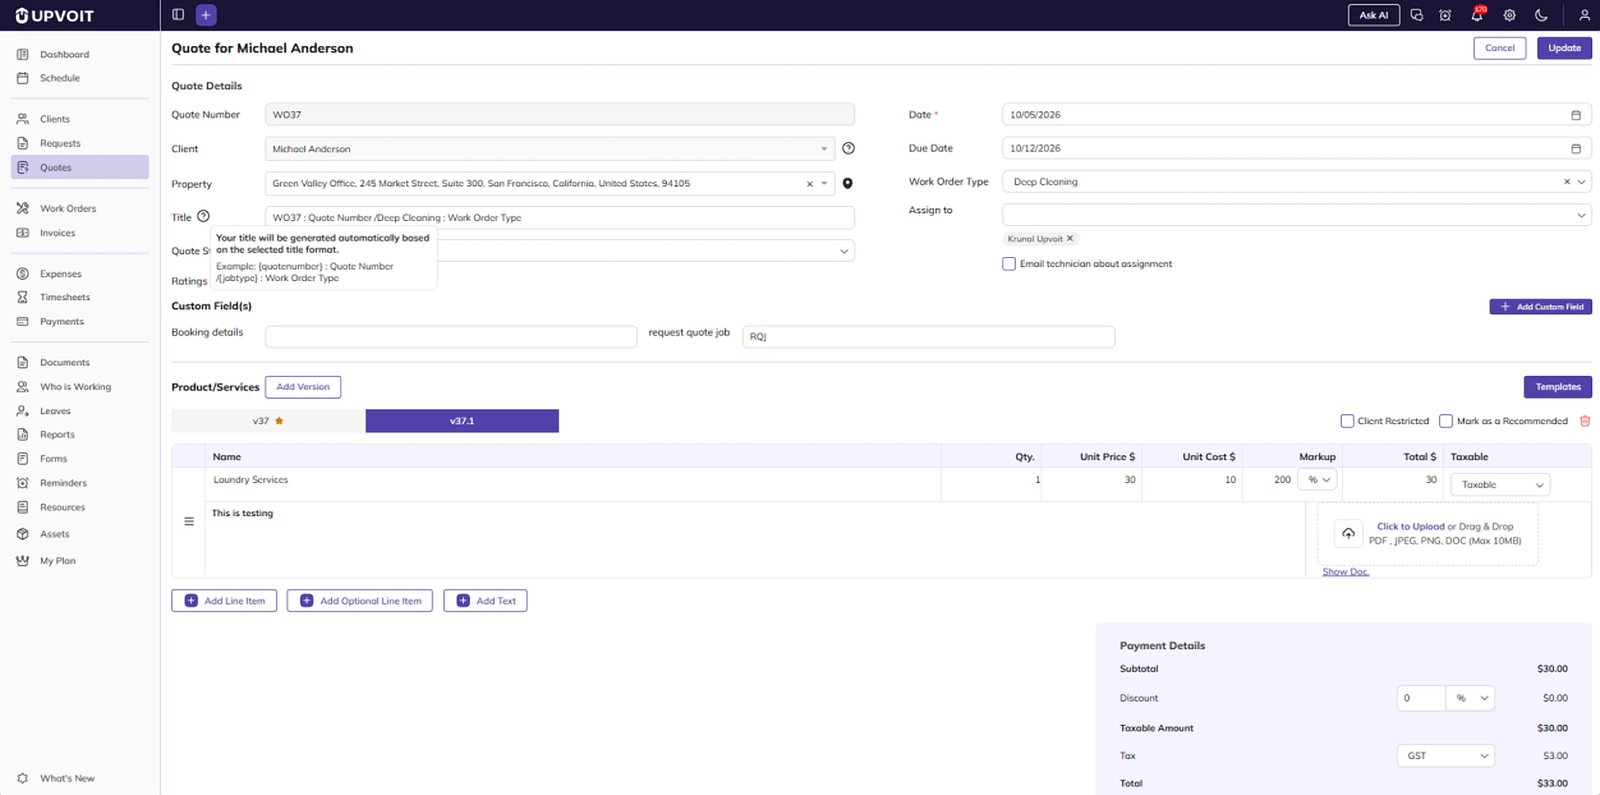
Select the client and property, then fill in the quote details. Once a client is selected, the page heading changes to “Quote for [client name]” and the Save button appears. Hover over the help icon (?) next to Client to see the client’s email and phone number.
-
Quote Number and Title: filled in automatically or entered manually, depending on System Settings → Quote. Hover over the help icon (?) next to Title to see the title format.
-
Quote Status: Created by default (see 1.1).
-
Ratings: the quote’s priority.
-
Work Order Type and Assign to: the options come from Settings → Work Order Type and Settings → Users. Tick Email technician about assignment to notify the assigned user.

Custom Fields
The Custom Field(s) section shows the fields set up in Settings → Custom Fields. To add another, click Add Custom Field.
Products and Services
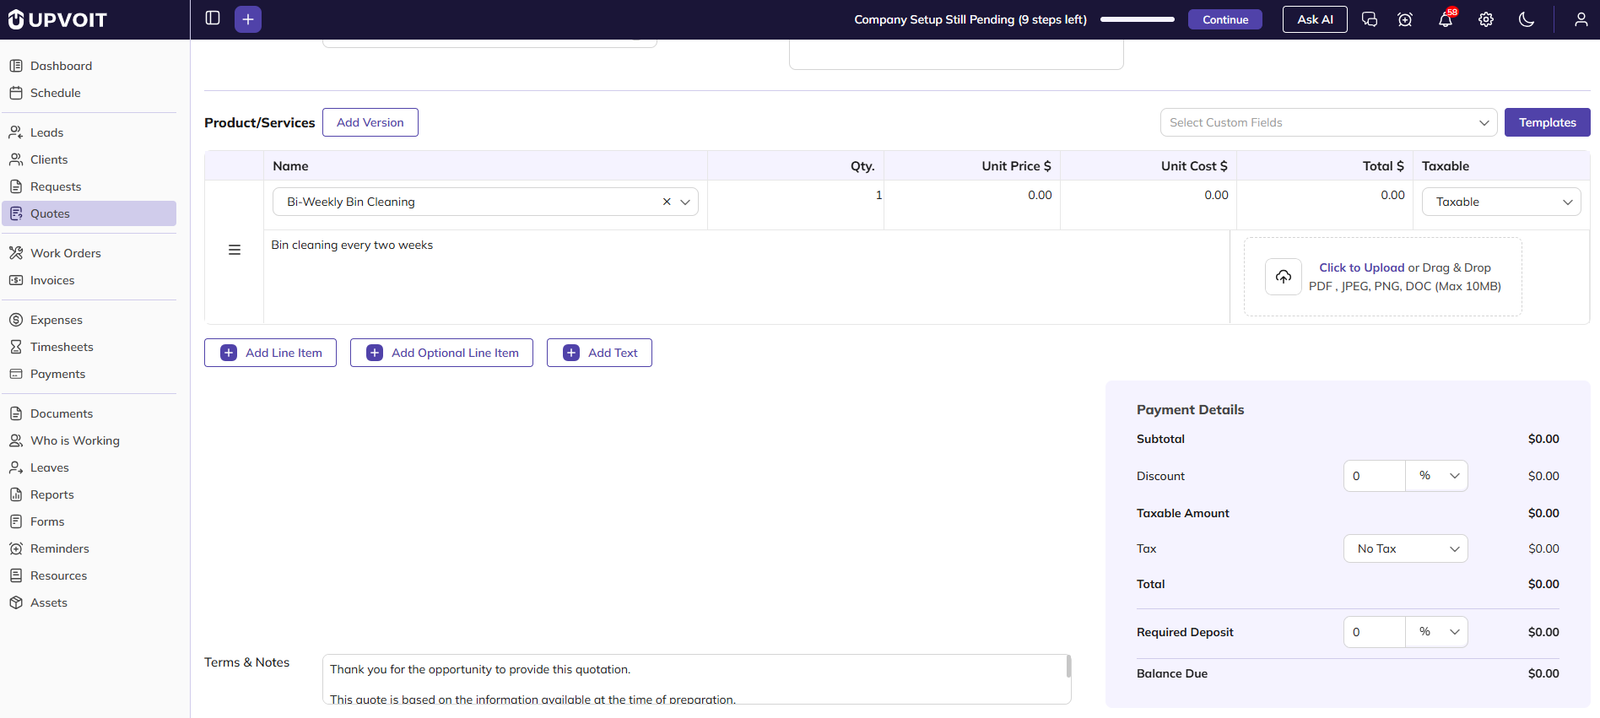
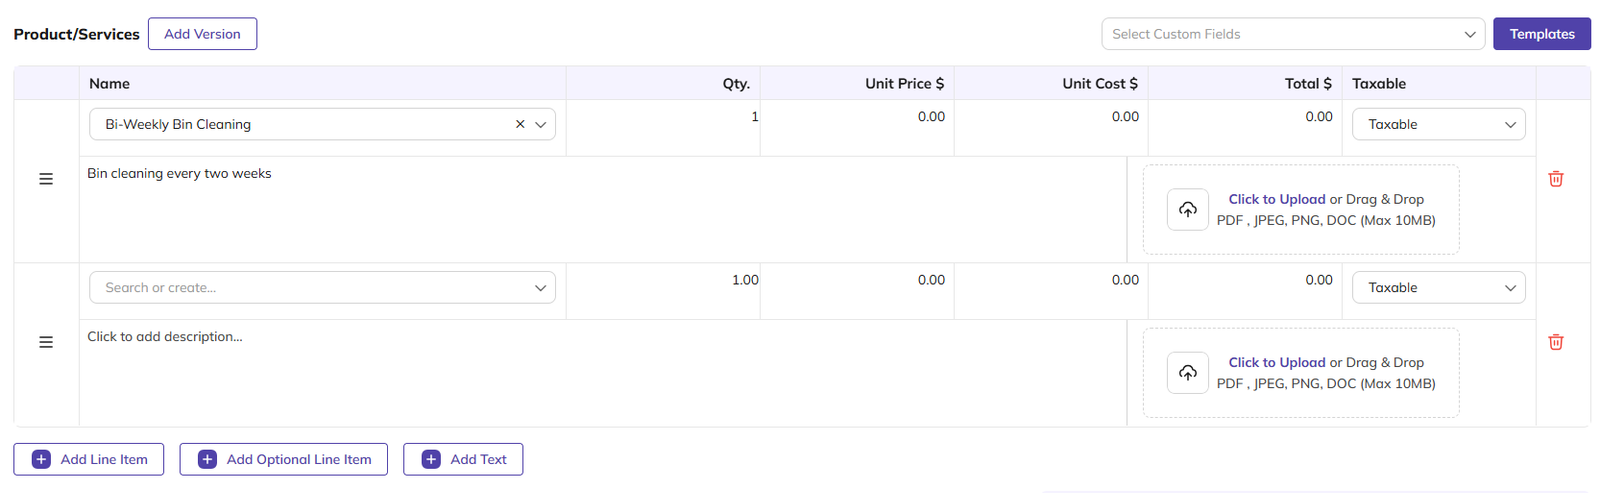
Add the items being quoted. Products and services come from Settings → Services, or you can type a new one. Markup is the difference between Unit Cost and Unit Price, shown as a percentage or a fixed amount. Each line can have a description and an attachment (PDF, JPEG, PNG or DOC, up to 10 MB). Drag the handle (≡) to reorder lines.
-
Add Line Item: add a product or service.
-
Add Optional Line Item: add a line the client can choose to include. It has a Recommended checkbox, ticked by default.
-
Add Text: add a text-only line, such as a heading or note.
-
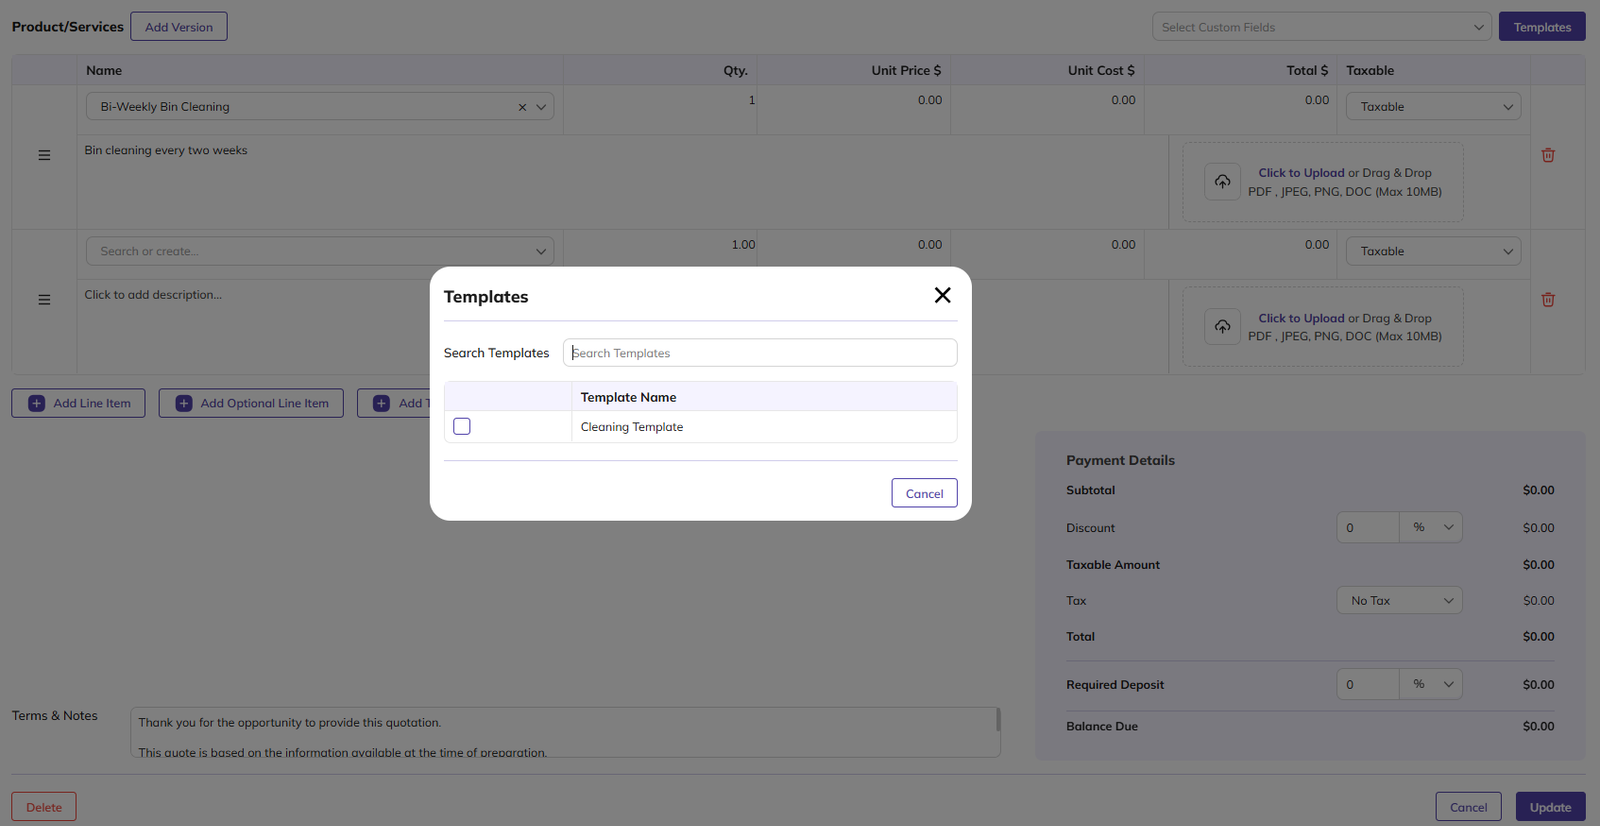
Templates: add items from a template set up in Settings → Templates. Tick one or more templates and click Select.
Quote Versions

Versions let you offer the client different sets of products and services in the same quote. To add a version, click Add Version next to the Product/Services heading. Each version appears as a tab named after the quote number, for example vWO38, vWO38.1 and vWO38.2. Click a tab to see or edit that version’s items.
Each version has its own line items and its own Payment Details, so the totals change as you switch between tabs.
The recommended version is marked with a star (★) next to its name. By default, the first version is recommended. To recommend a different version, select its tab and tick Mark as a Recommended. The star moves to that version, and it becomes the version used for the quote.
For the selected version, you can also:
-
Tick Client Restricted to restrict the version from the client.
-
Click the delete icon to delete the version.
Payment Details
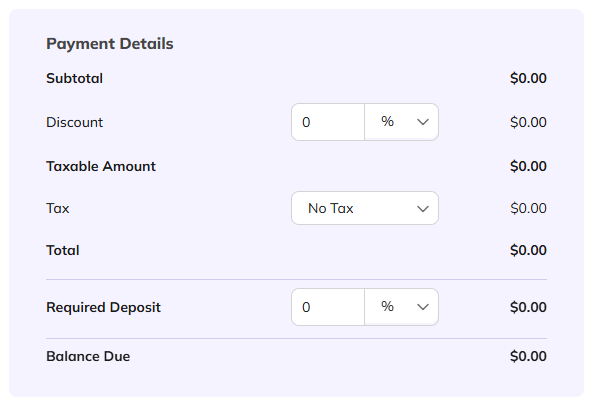
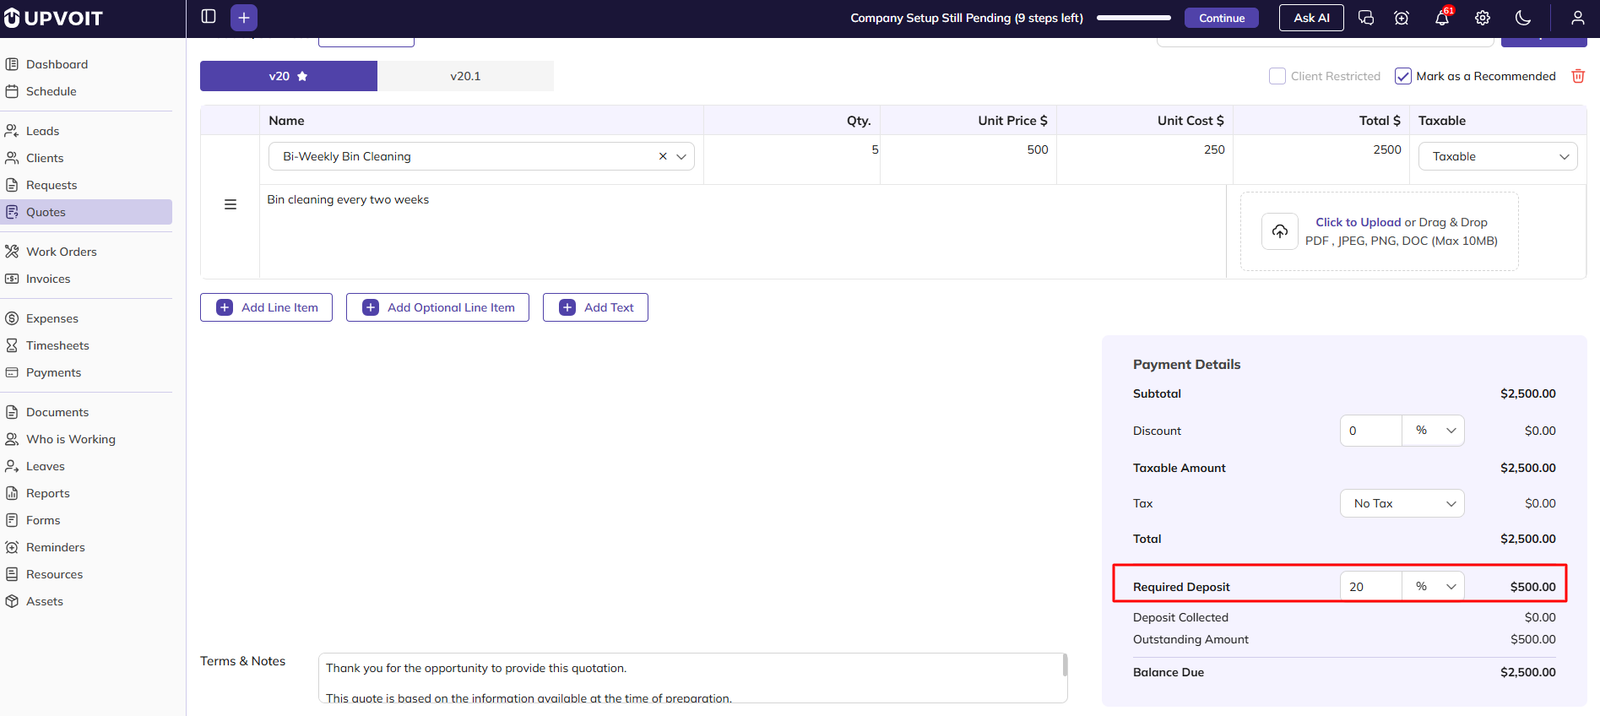
The Payment Details panel calculates the totals from the line items. Enter a Discount and Required Deposit as a percentage or amount, and choose the Tax to apply. The Balance Due is the total minus the deposit.
Terms & Notes and Internal Notes

Terms & Notes are shown to the client and are filled in from System Settings → Quote. Edit them for this quote if needed.
Internal Notes & Attachments are for your team only. Tick Work Order and/or Invoices under Link note to related to show the note on those records too.
Save the Quote
Click Save at the top right to save the quote, or Cancel to leave without saving.
View Quote
Quote Details Page
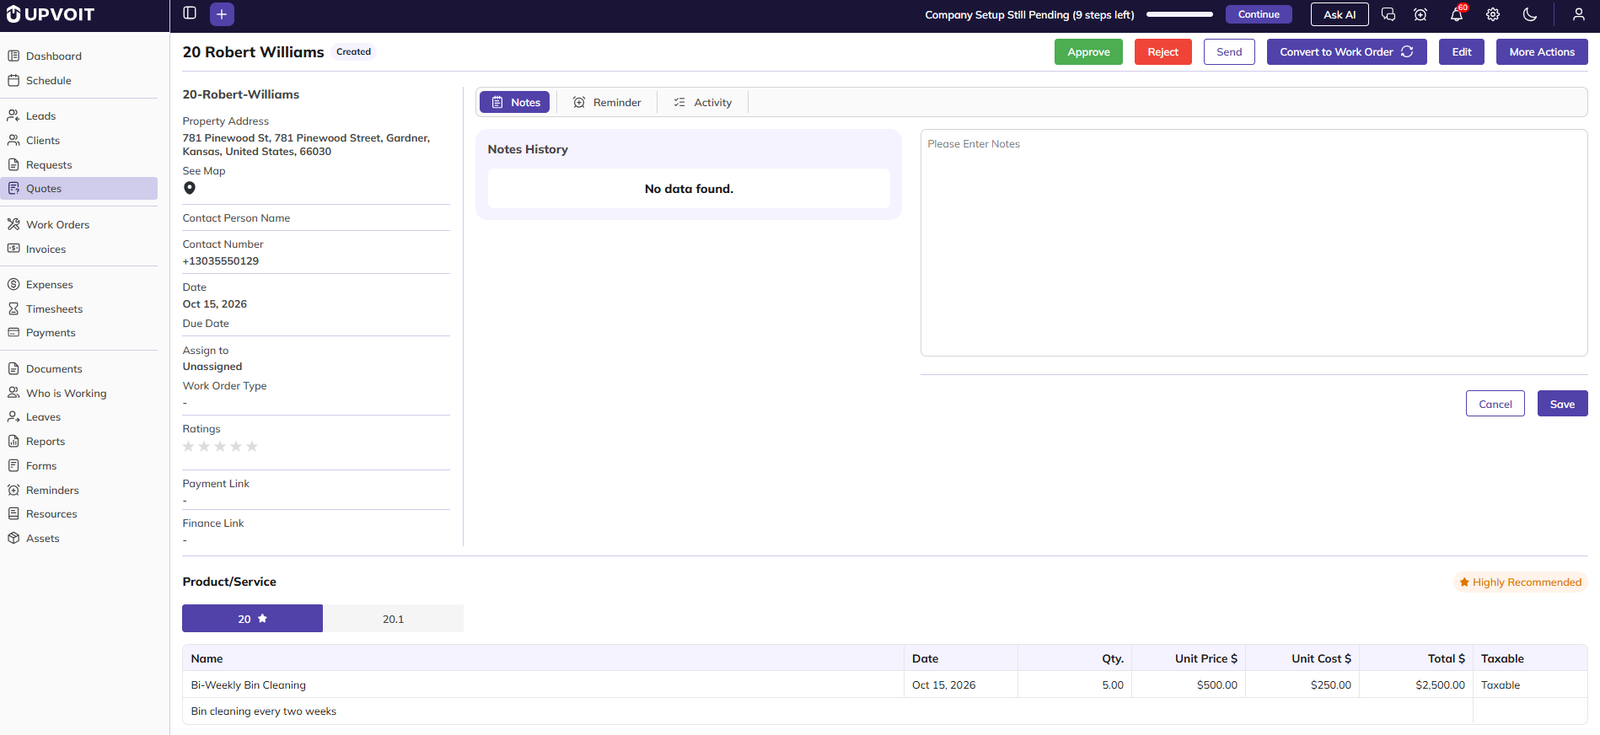
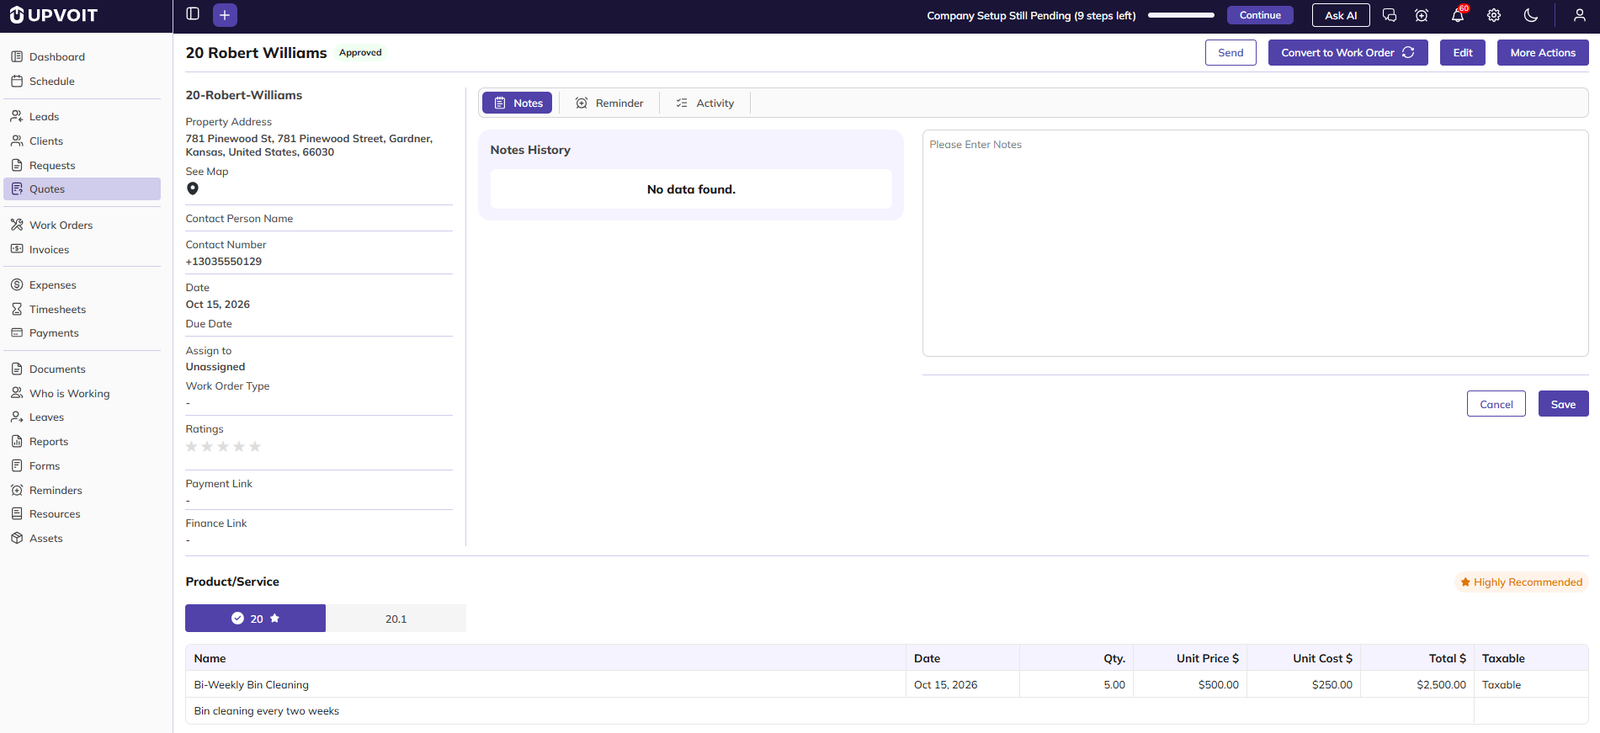
Click a quote in the list or on the Kanban board to open it. The heading shows the quote number, client and status, and the action buttons are at the top right.
-
Ratings: click the stars to change the priority.
-
Payment Link: appears after a deposit is requested (see 4.3).
-
Finance Link: comes from Settings → System Settings → General.
The Delete button is at the bottom left (see 6).
Approve and Reject
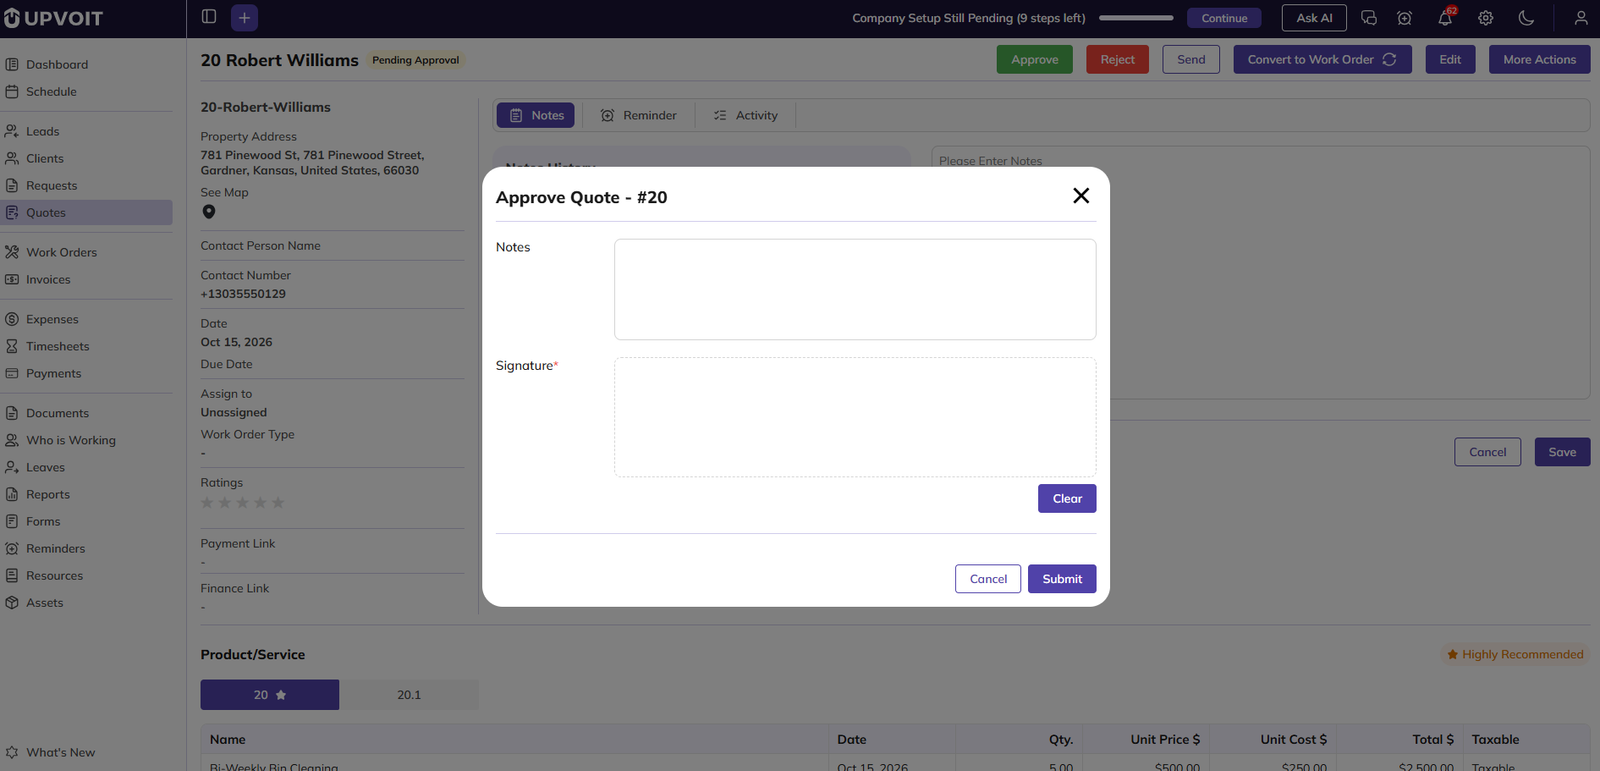
Click Approve or Reject to change the quote’s status. If the quote has versions, the approved one is marked with a tick (✓).
Collect Deposit
The Collect Deposit button appears only for an approved quote that has a Required Deposit.
-
Add a deposit to the quote. When creating or editing the quote, enter the Required Deposit in Payment Details (as a percentage or amount) and save the quote.
-
Approve the quote. Open the quote and click Approve. The status changes to Approved, and the Approve and Reject buttons are replaced by Collect Deposit.
-
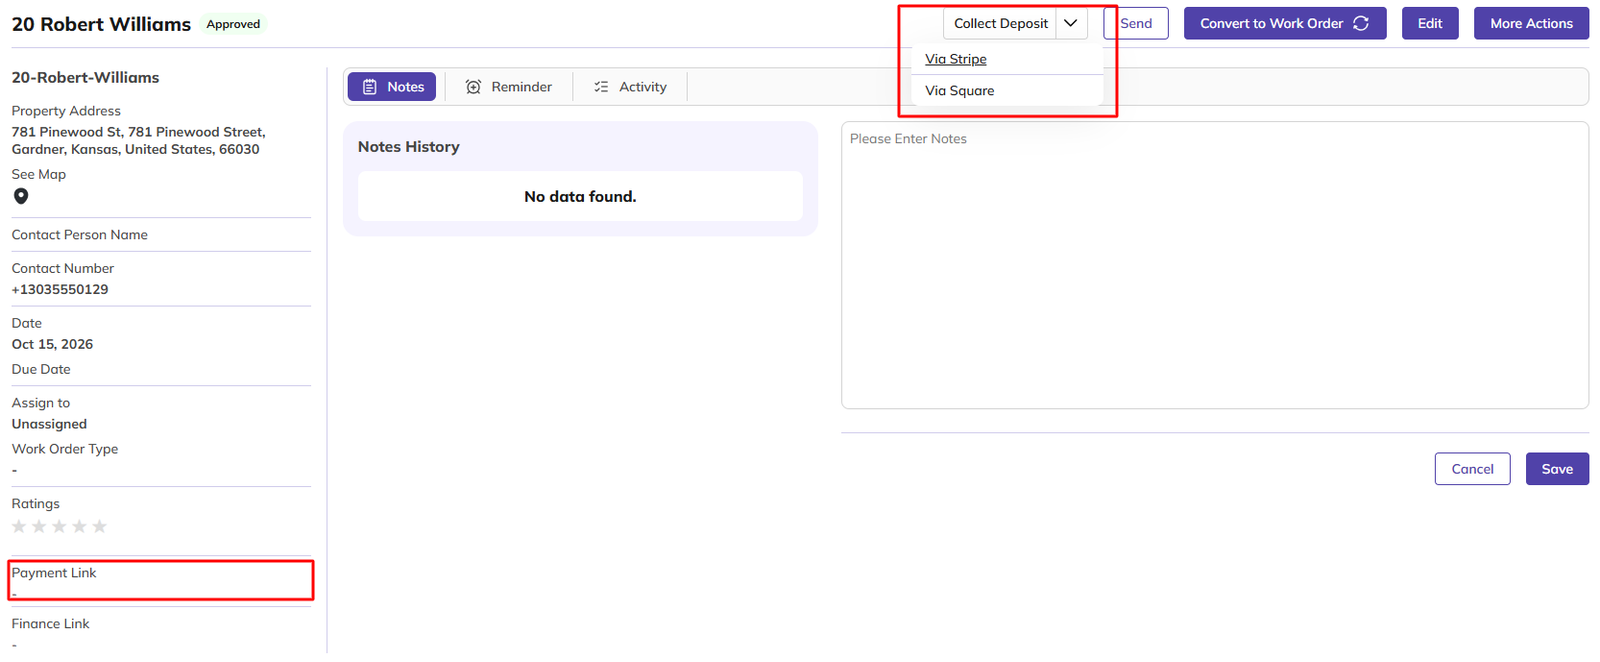
Choose a payment method. Click the arrow next to Collect Deposit and choose Via Stripe or Via Square.
-
Send the payment link. An email with a payment link is sent to the client, and the link appears under Payment Link in the left panel. Click the copy icon to share it another way if needed.
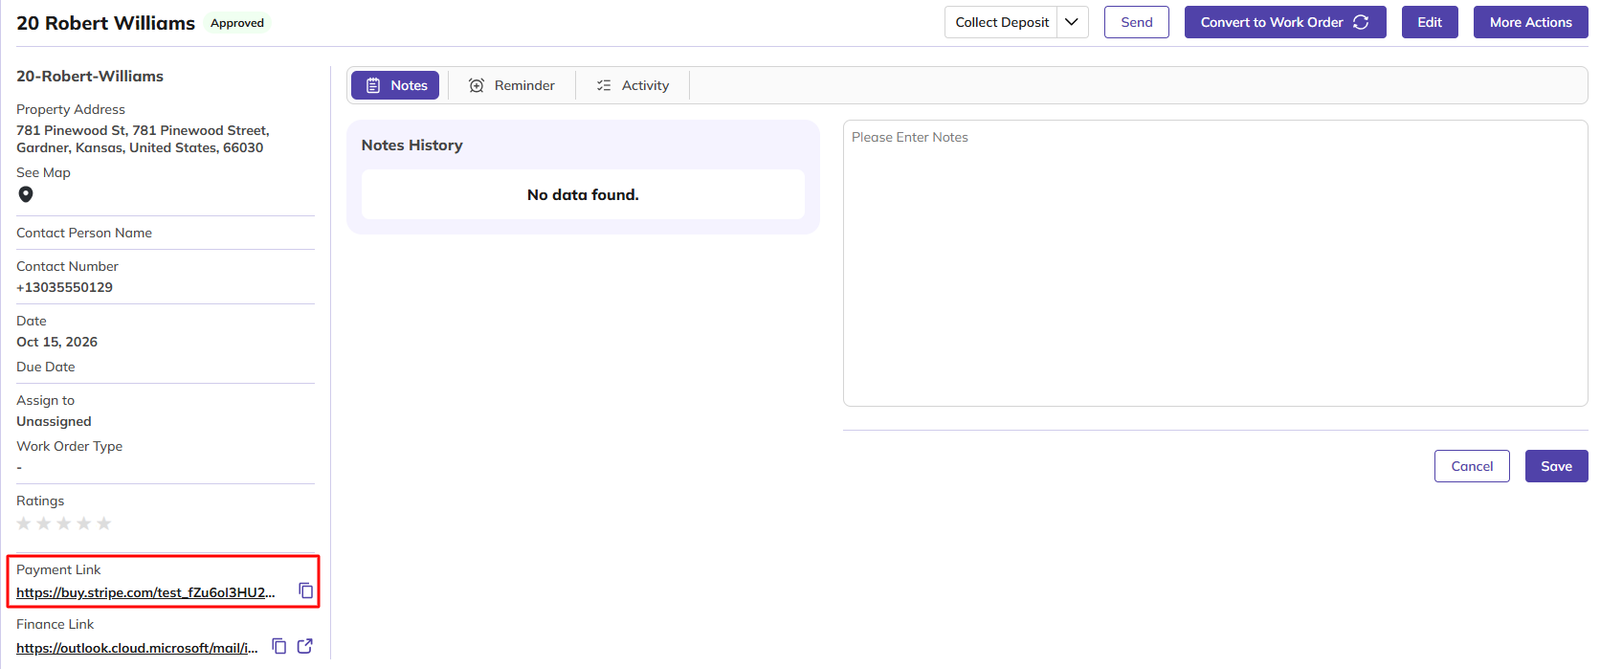
If the quote has no Required Deposit, the Collect Deposit button does not appear.
Send Quote
Click Send to open the Send Quote window, then choose how to send it under Send by. Sending changes the status to Sent.
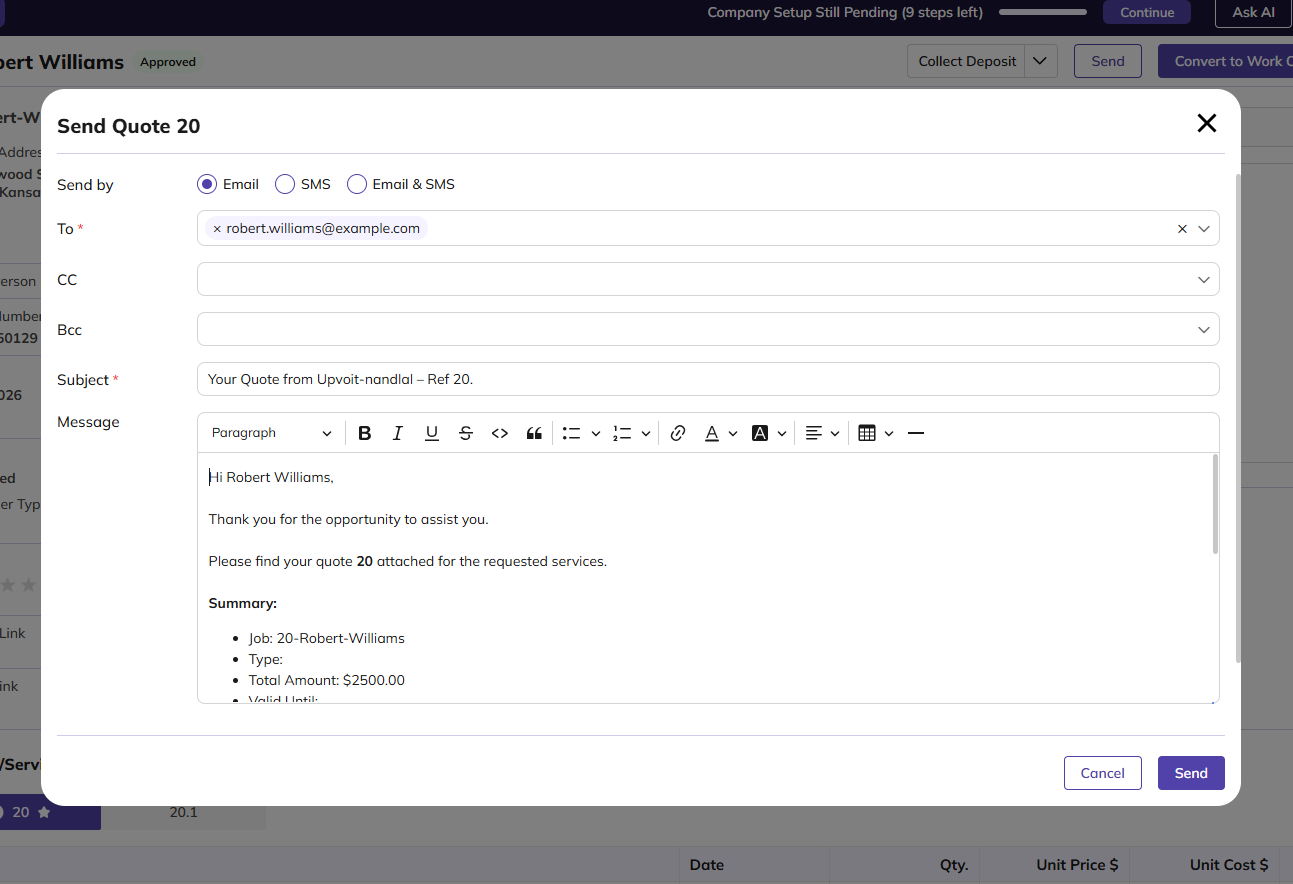
CC, Bcc, Subject and Message come from the email template in Settings → System Settings → Quote. The quote PDF is attached by default.
SMS
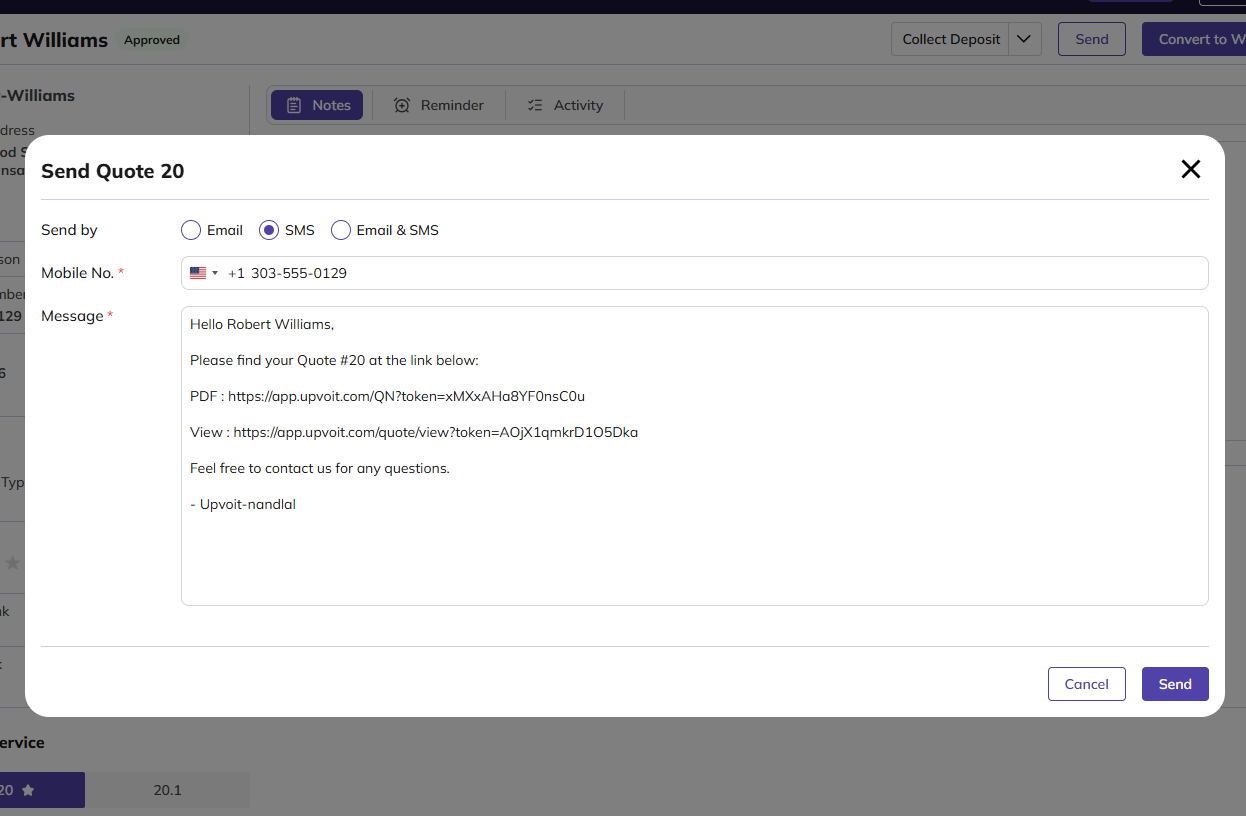
Enter the client’s mobile number. The message is ready-made, with links to view and download the quote.
Email & SMS

The email fields appear on the left and the SMS fields on the right, so the quote is sent both ways at once.
More Actions
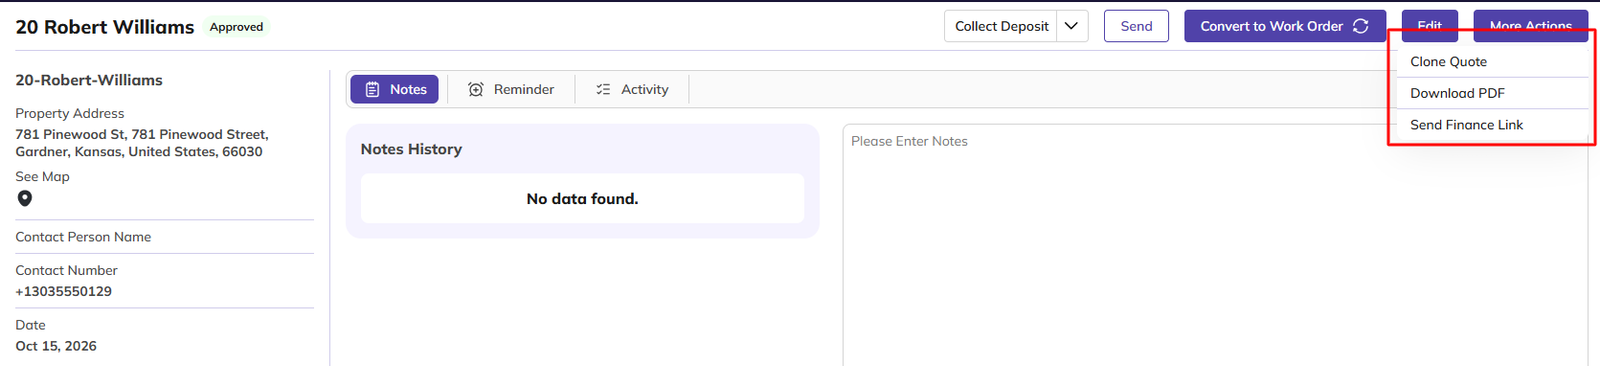
-
Clone Quote: opens Create Quote with this quote’s details copied.
-
Download PDF: downloads the quote.
-
Send Finance Link: opens a window to send the finance link to the client.

Notes
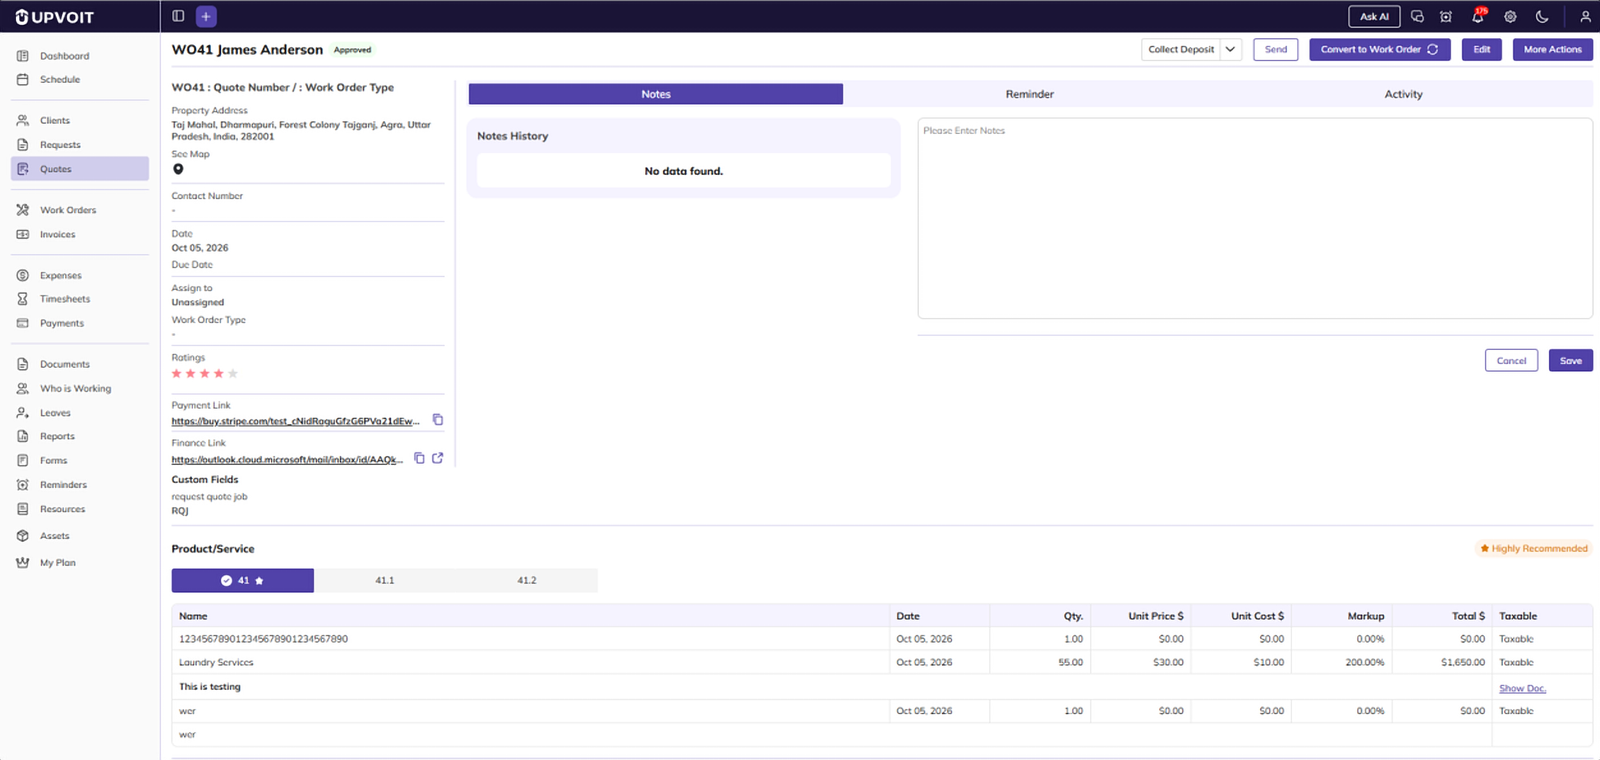
Notes added here are visible to the client. Saved notes appear under Notes History.
Reminders

Set a one-time or repeating reminder for yourself or a team member, sent by text, email or both.
Activity
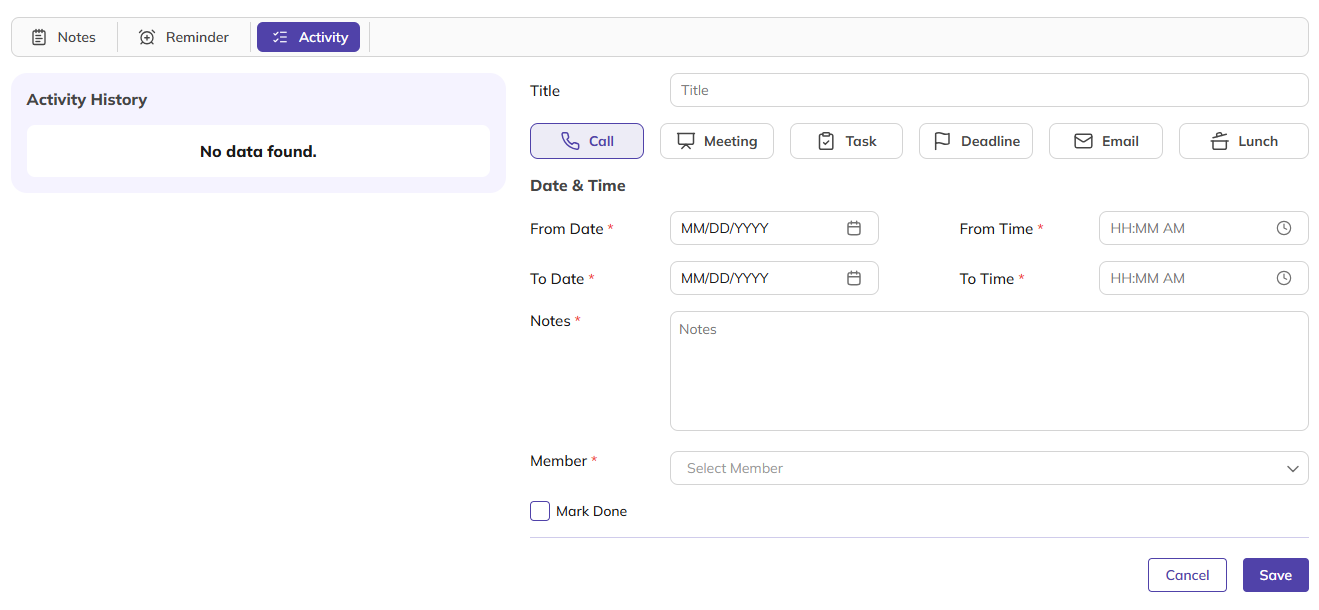
Log a call, meeting, task, deadline, email or lunch for the quote. Logged items appear under Activity History.
Products, Versions and Payment Details
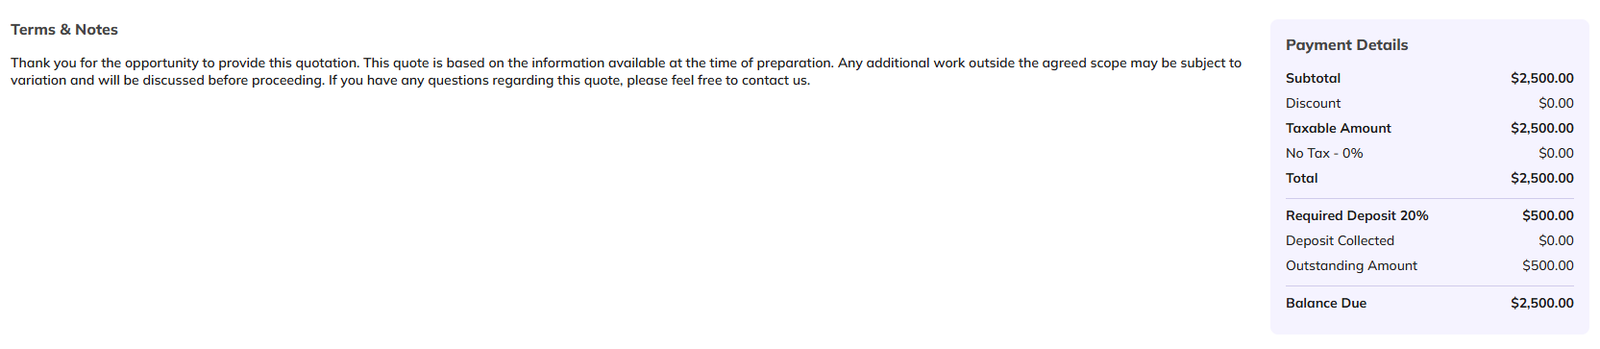
Each version appears as a tab with its own items and Payment Details. The recommended version has a star and a Highly Recommended label. Click Show Doc. on a line to open its attachment. If a deposit was requested, Payment Details also show Deposit Collected and Outstanding Amount.
Internal Notes & Attachments
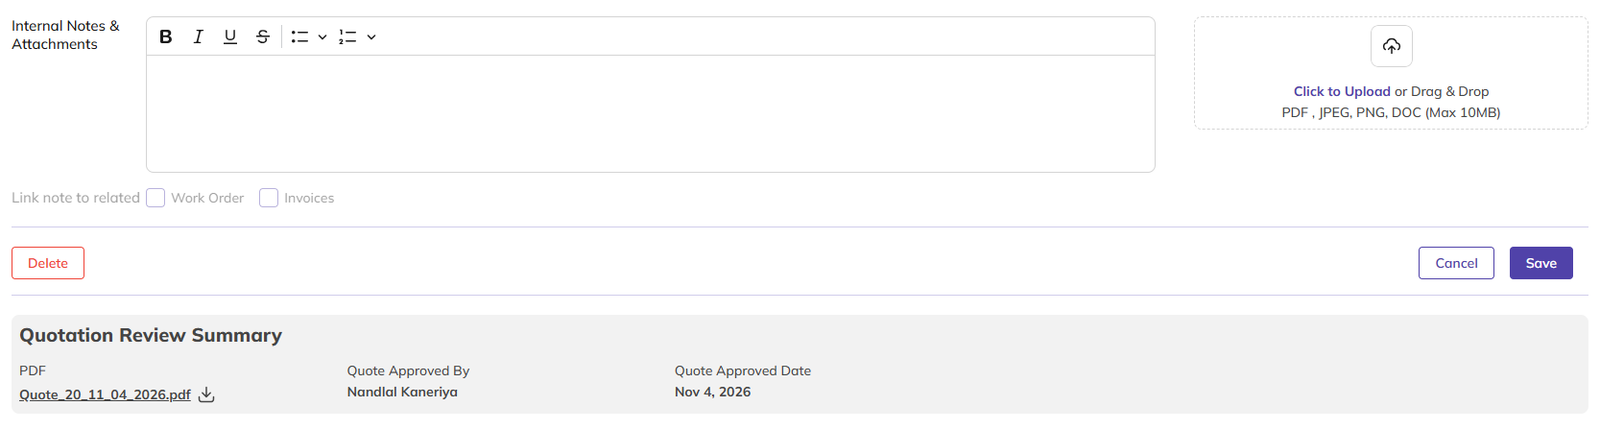
Internal notes are for your team only and are not shown to the client.
Edit Quote
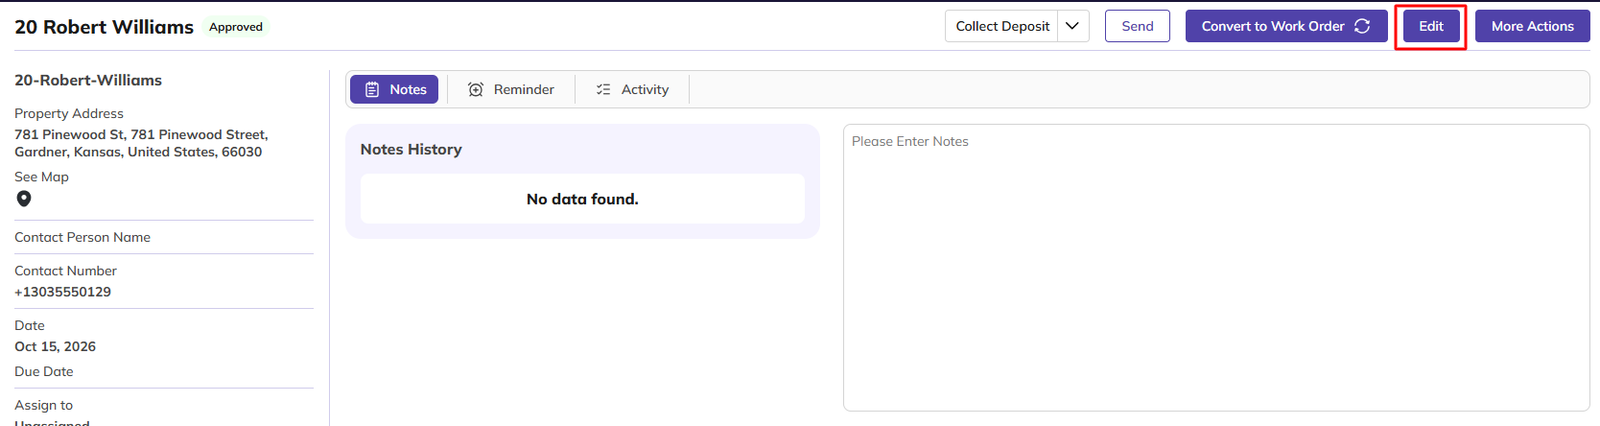
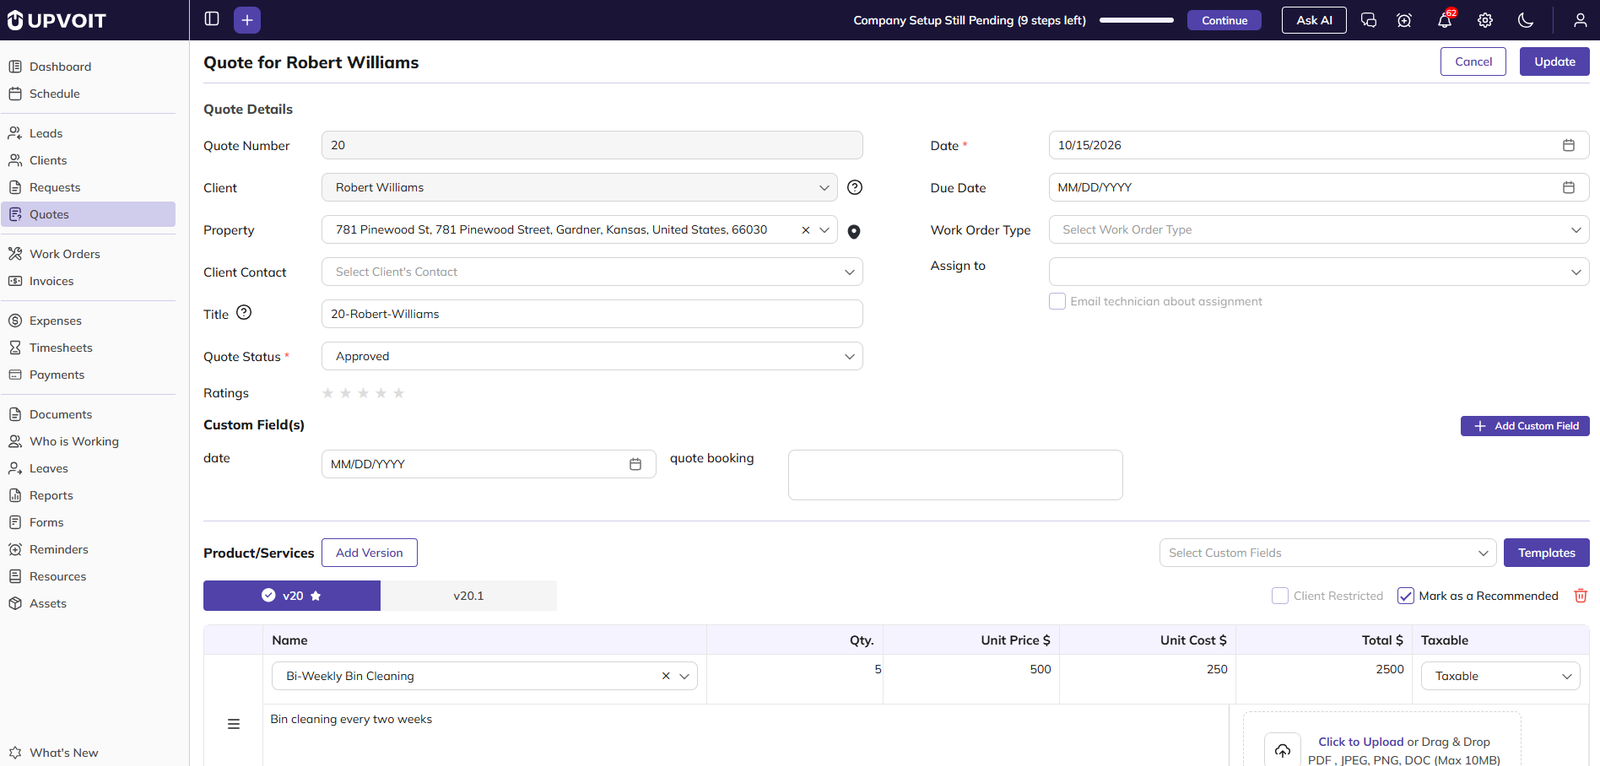
Click Edit at the top right of the quote details page. The Edit Quote page opens with the quote’s existing details. Make your changes and click Save. The fields work the same as when creating a quote (see 3).
An approved quote can still be edited. A quote that has been converted to a work order can no longer be edited, as it is removed from the quote list.
Delete Quote

Open the quote and click Delete at the bottom left of the quote details page. A confirmation message appears. Click Yes to delete the quote, or Cancel to keep it.
Convert Quote

Click Convert to Work Order at the top right of the quote details page. The Create Work Order page opens with the quote’s details copied. Review the details and save the work order.
The quote does not need to be approved before converting. Once converted, the quote no longer appears in the quote list.
Did this answer your question?


