Schedule Overview
The Schedule page helps you plan, review, and manage work for technicians and teams.
You can:
View work by day, week, or month
Switch between Calendar and Map views
Apply filters to focus on specific work
Detect scheduling conflicts
Identify unassigned work
Accessing the Schedule Page
Open Schedule from the main navigation.
By default, the page opens in Calendar view.
Use the top toggle to switch between Calendar and Map at any time.
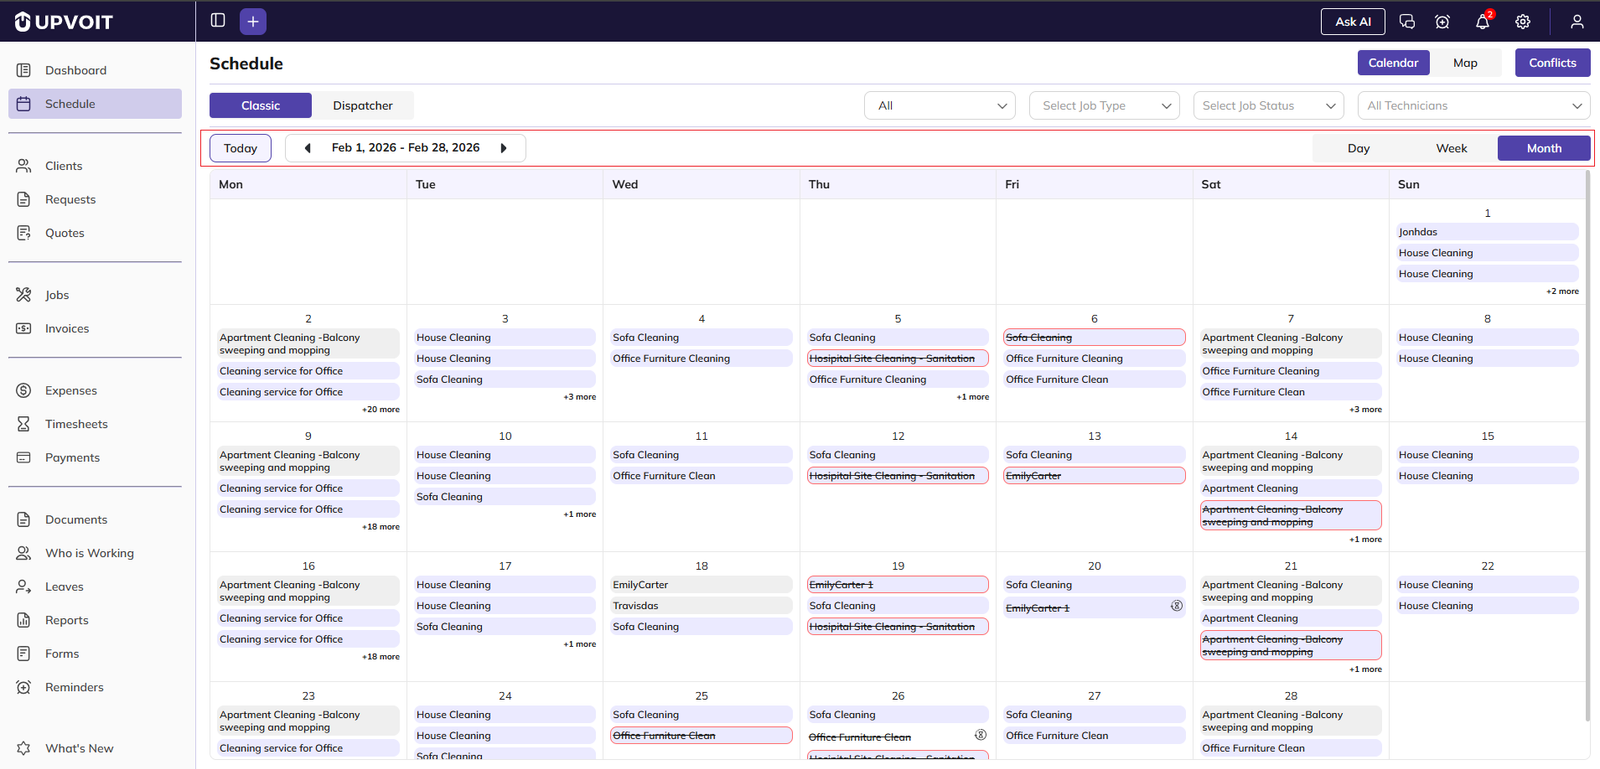
Calendar View
Layout Options
You may see layout choices such as:
Classic
Dispatcher
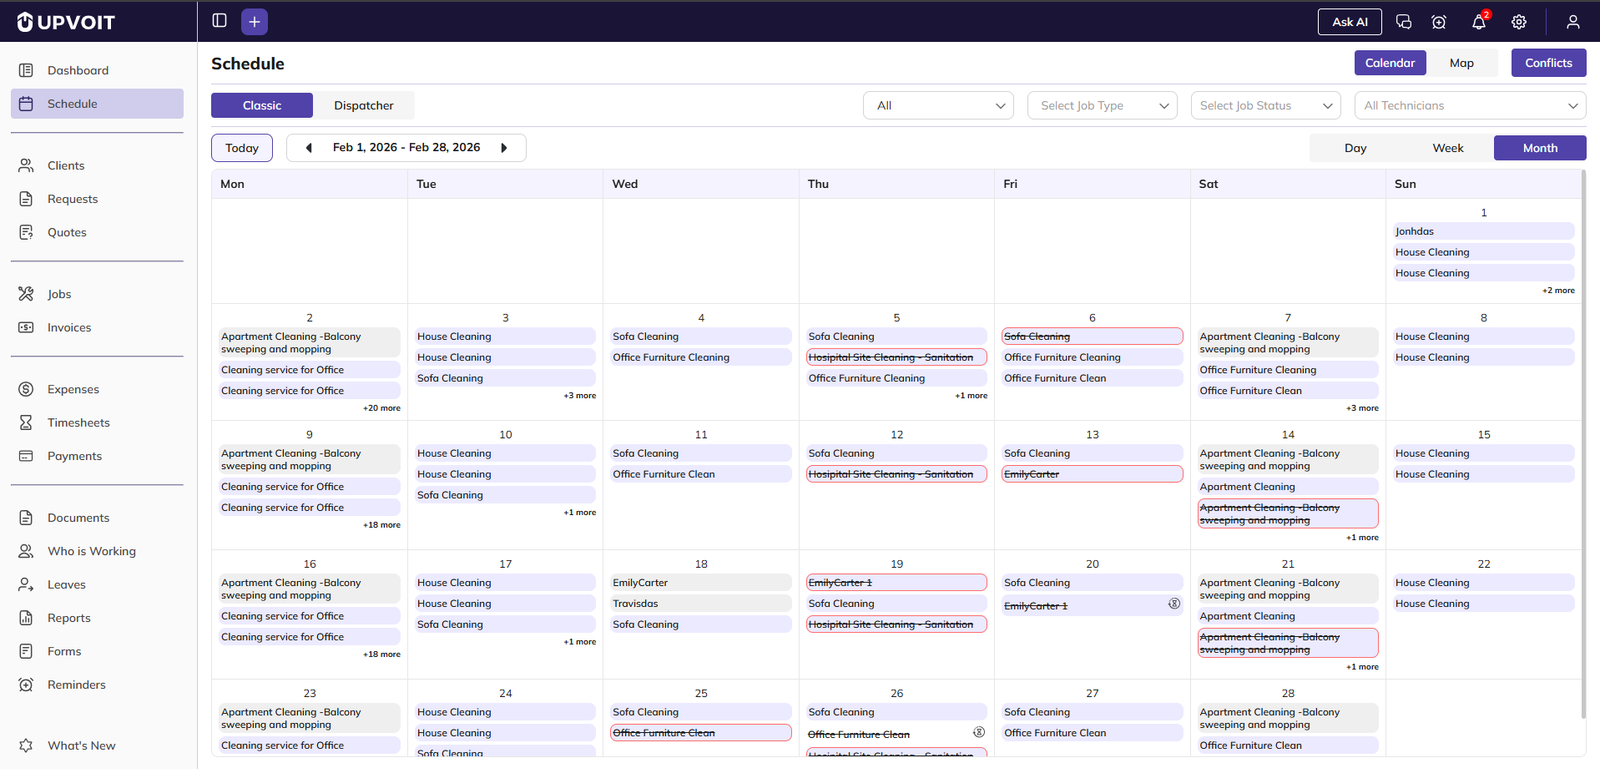
If unsure, start with Classic for a simpler workflow.
Time Range and Navigation
Use the top controls to manage date range:
Day
Week
Month
Today button to return to the current date
Arrow buttons to move forward or backward in time
Hover Preview on Scheduled Items
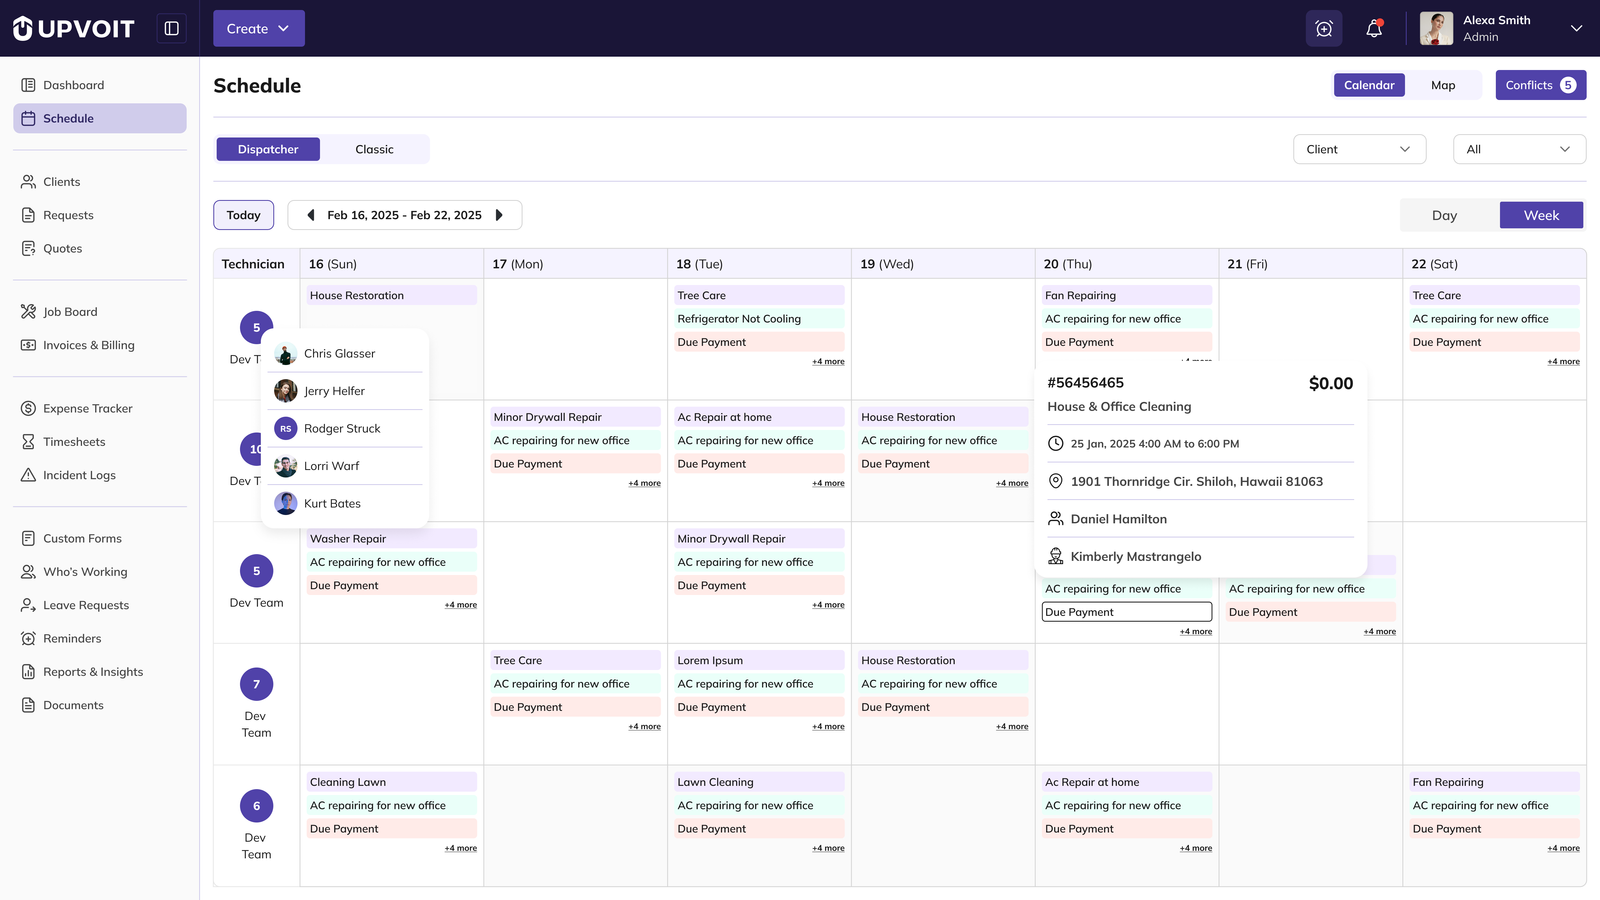
When hovering over an item, a quick preview shows:
Job number
Job or Request title
Pricing
Start and end date/time
Client name
Property address
Assigned technicians
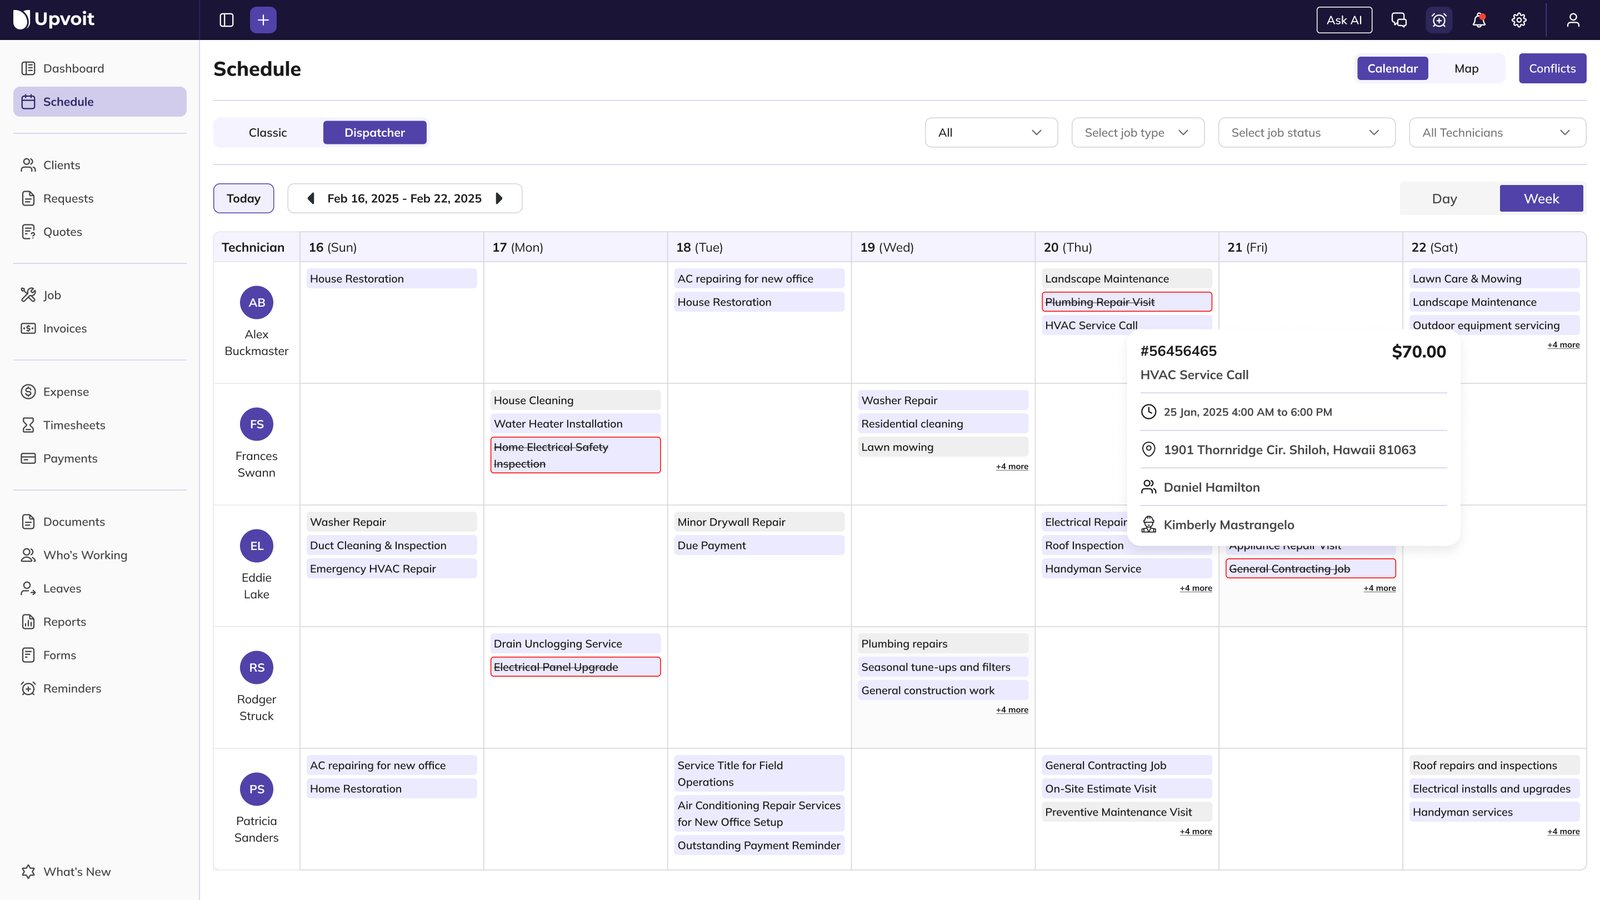
Dispatcher View
Week View
In Week view, you can organize by:
Technician (default)
Team
Client group
Additional filters:
Visits
Requests
Job type
Job status
Unassigned visits or requests appear in Vacant Jobs.
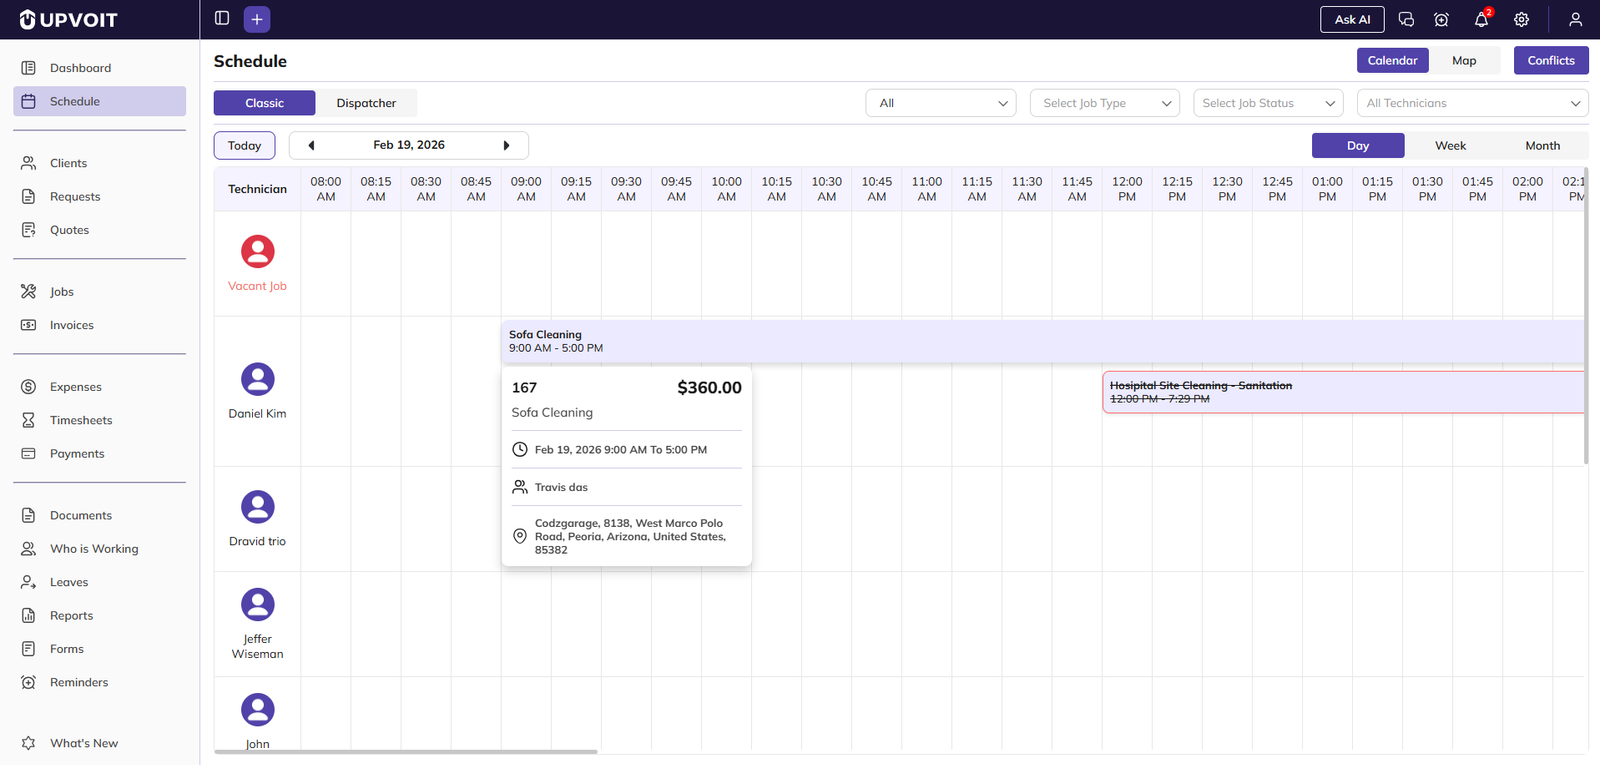
Day View
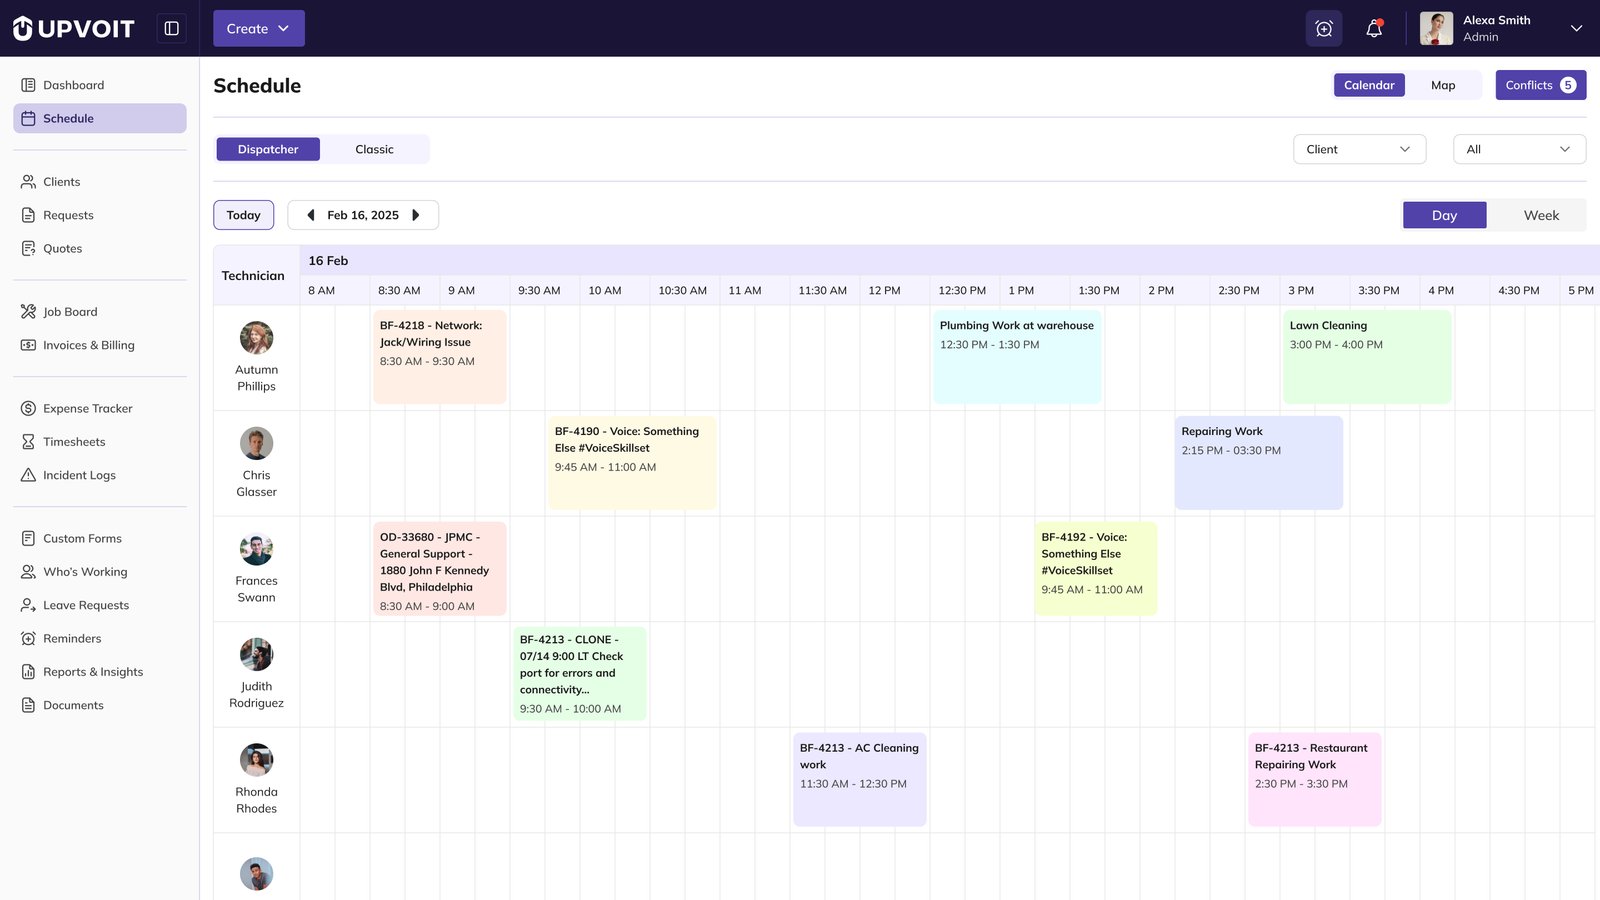
Shows a single day
Uses hourly rows with 15-minute intervals
Displays visits or requests by scheduled start/end time
Supports all filters (Technician selected by default)
Shows unassigned items in Vacant Jobs
Schedule Color and Status Indicators
Use these visual cues to quickly understand status:

Light orange: Request scheduled but not yet confirmed as a job
Light gray: No technician assigned
Light purple: Confirmed scheduled job
Strikethrough item: Completed job
Bordered item: Job completed, payment pending
Using Filters Effectively
If the calendar is crowded, filter by:
Technician
Team
Client
Type
Status
Best tip: start with one technician to clearly review their day or week.
Scheduled Item Details Window
Click any item to open details.
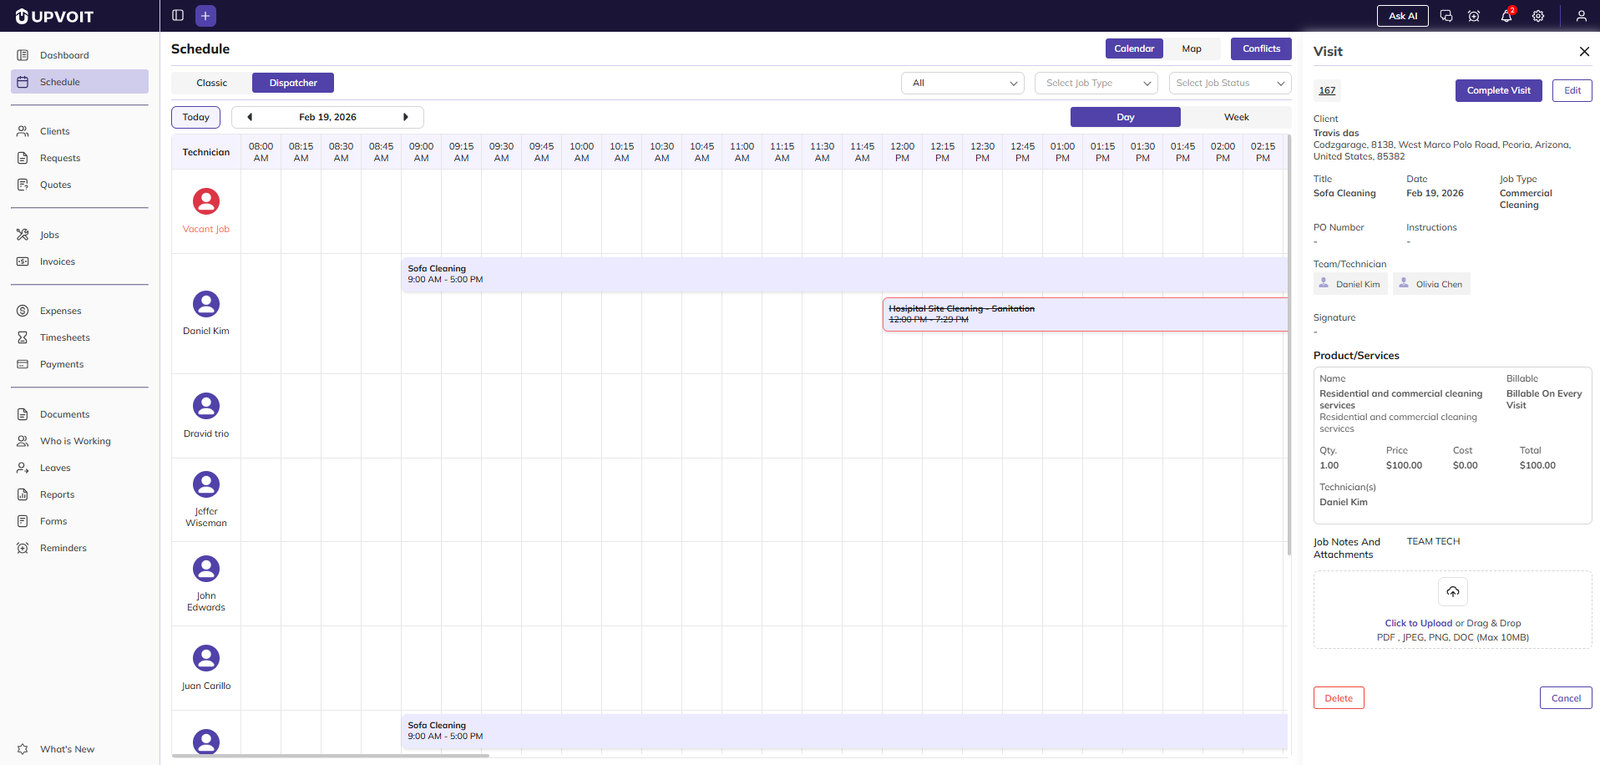
Common details include:
Client name
Job or Request title
Date
Job type
PO number
Instructions
Assigned technicians/team
Signature
Products/Services
Notes:
Up to two products or services may show by default.
Use More/Less to expand or collapse the full list.
You can upload attachments.
You can delete visits or requests (based on permissions).
You can complete work using Complete Visit (for visits) or Complete Assessment (for requests).
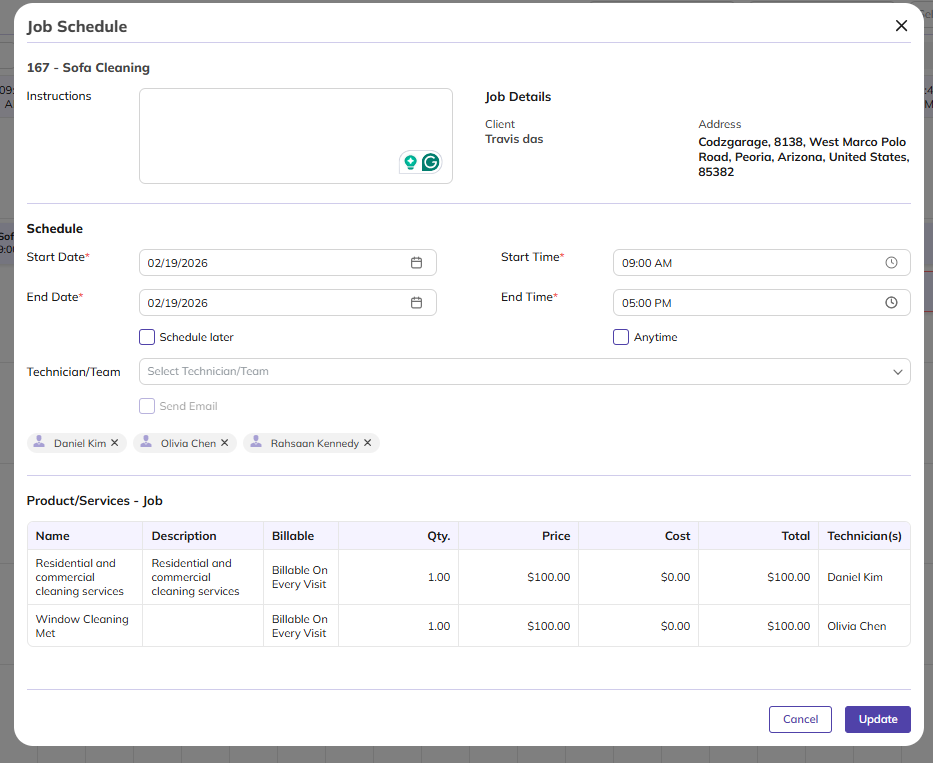
Editing a Visit or Request
Open the details window.
Click Edit.
Update title, client info and address, date/time, assigned technicians, and product/service details.
Click Update to save changes.
Drag-and-Drop Rescheduling
You can move scheduled items quickly:
Click and hold an item.
Drag to a new day, time, or technician.
Release to apply.
You may be prompted to notify the client or technician.
Important:
Completed items usually cannot be moved.
Some actions depend on your access permissions.
Managing Conflicts
A conflict occurs when:
A technician is double-booked
Jobs or requests overlap and are not feasible
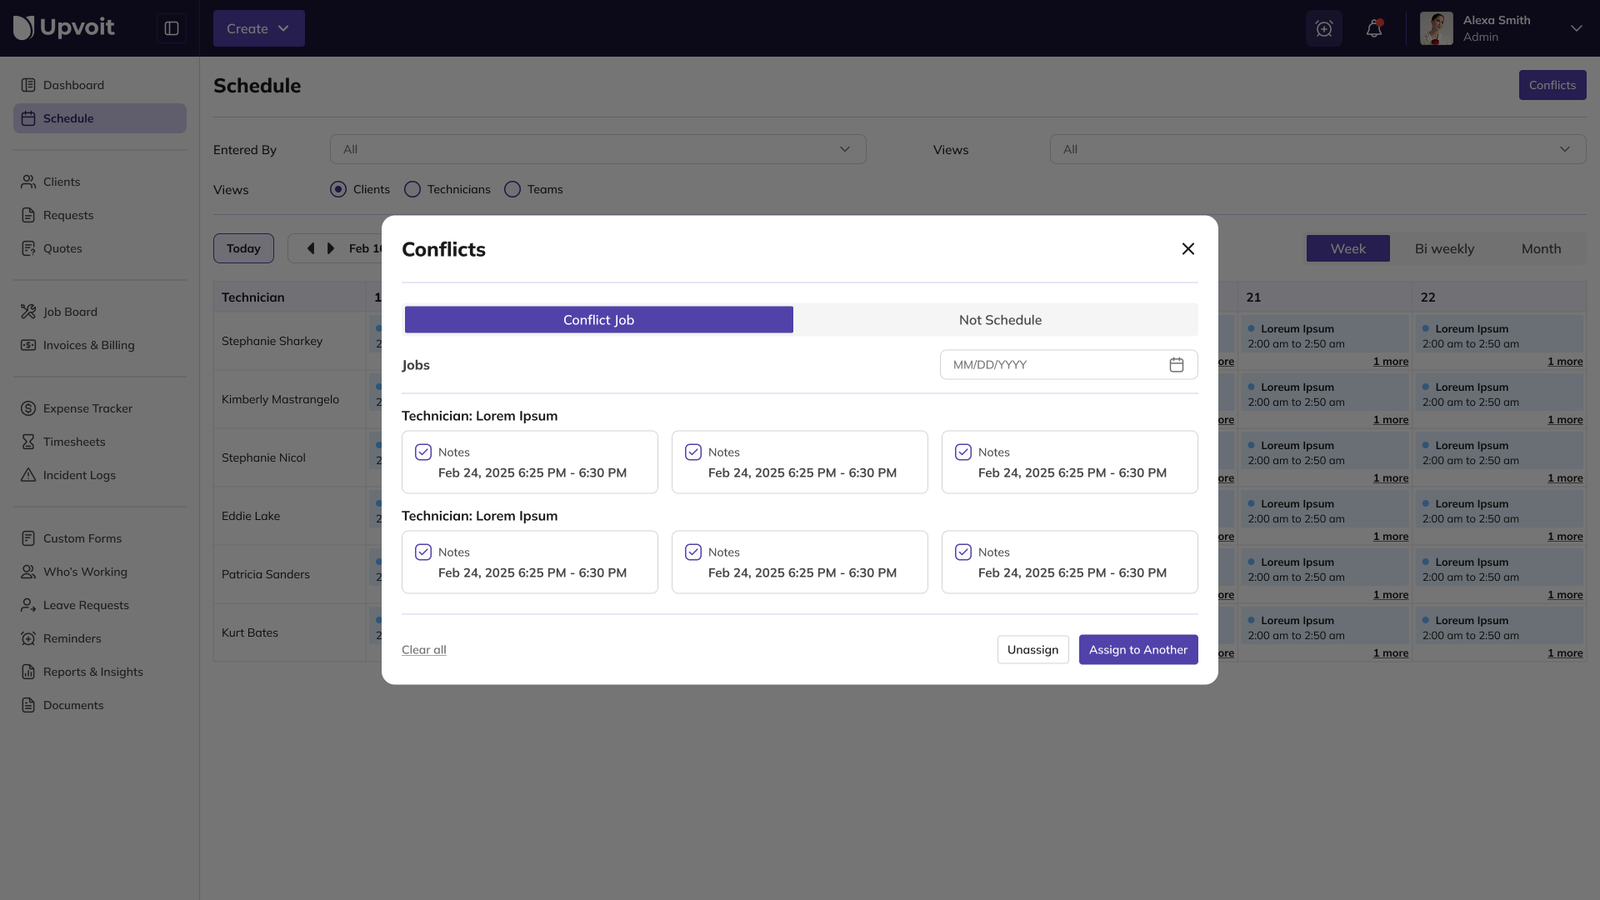
To resolve:
Open Conflicts.
Select date (if needed).
Review overlapping items.
Reassign or unassign as needed.
To reassign:
Select conflicting items.
Click Assign to another.
Choose technician.
Save.
Map View
Map view helps you see where work is happening.
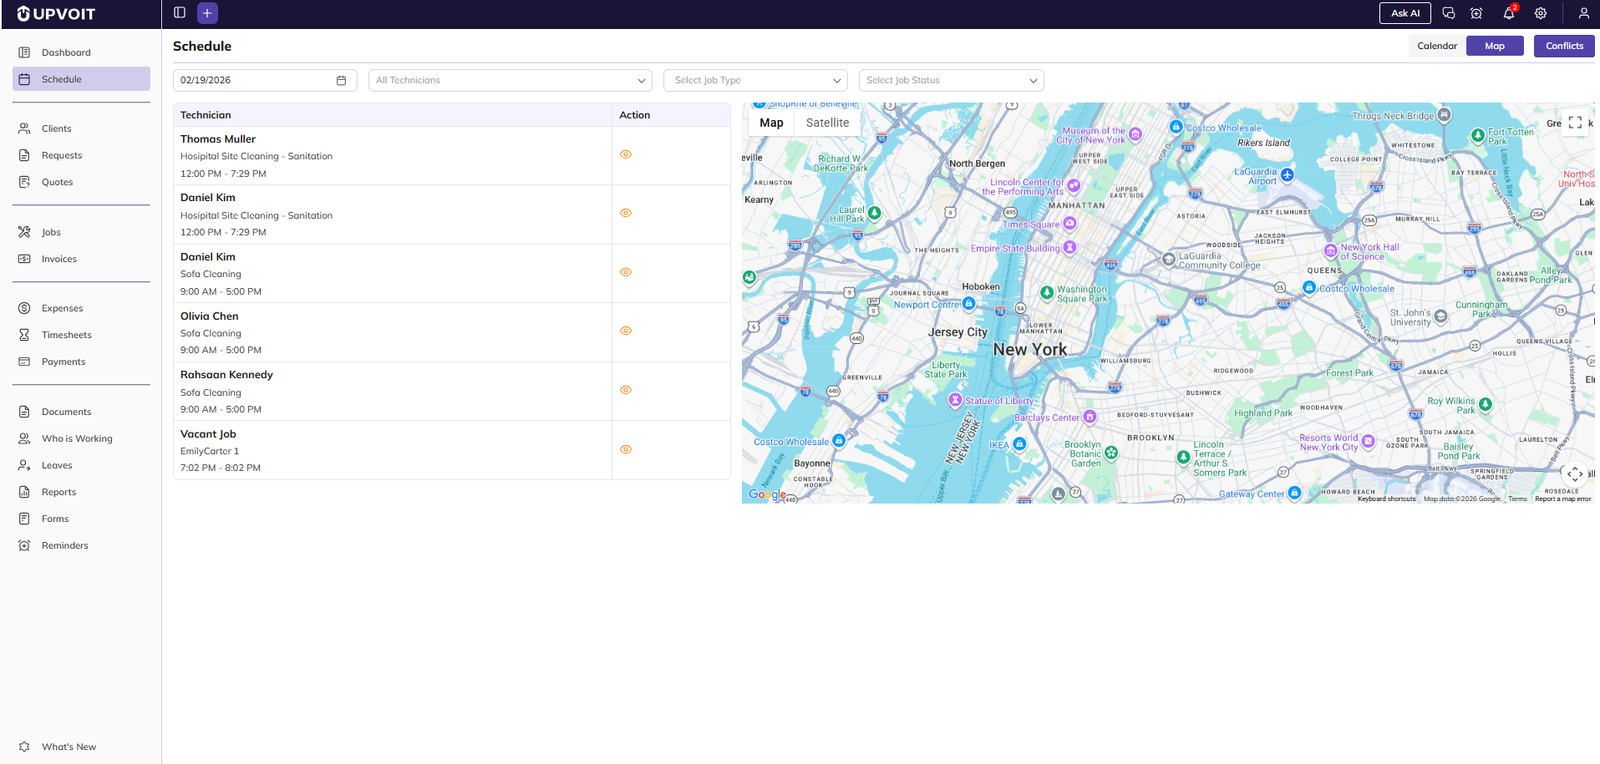
How to use:
Switch to Map.
Select date.
Apply filters if needed.
Review list and map pins together.
Actions:
Clicking a list item centers the map on that location.
View icon opens full details.
If an item has no saved address, it may show No location added.
If no items appear:
Check date range
Clear filters
Click Today
Troubleshooting
No schedule items visible
Confirm selected date range.
Clear filters.
Click Today.
Verify work is assigned.
Too many items in calendar
Filter by one technician first.
Narrow by type or status.
Unassigned work not visible
Check Vacant Jobs in Dispatcher view.
Confirm day or week scope.
Cannot move an item
Verify item is not completed.
Check your access permissions.
Map item has no pin
Add or verify property address in item details.
Best Practices
Use Classic for quick review; use Dispatcher for assignment-heavy planning.
Start each day by checking Vacant Jobs.
Use filters before making bulk changes.
Review conflicts daily to avoid missed visits.
Confirm address data so Map view remains accurate.
Conclusion
The Schedule page gives you a complete operational picture of:
What is scheduled
When it is scheduled
Where it is happening
Using Calendar, Dispatcher, Conflicts, and Map together helps you keep work organized, reduce overlap, and improve team execution.
Did this answer your question?


