The Request Module centralizes all incoming client service requests in one organized space. Track, filter, and convert requests into quotes or jobs without losing information.
Request Dashboard
The Request Dashboard gives you a complete overview of all client service requests at a glance. From the sidebar, open the Requests section.
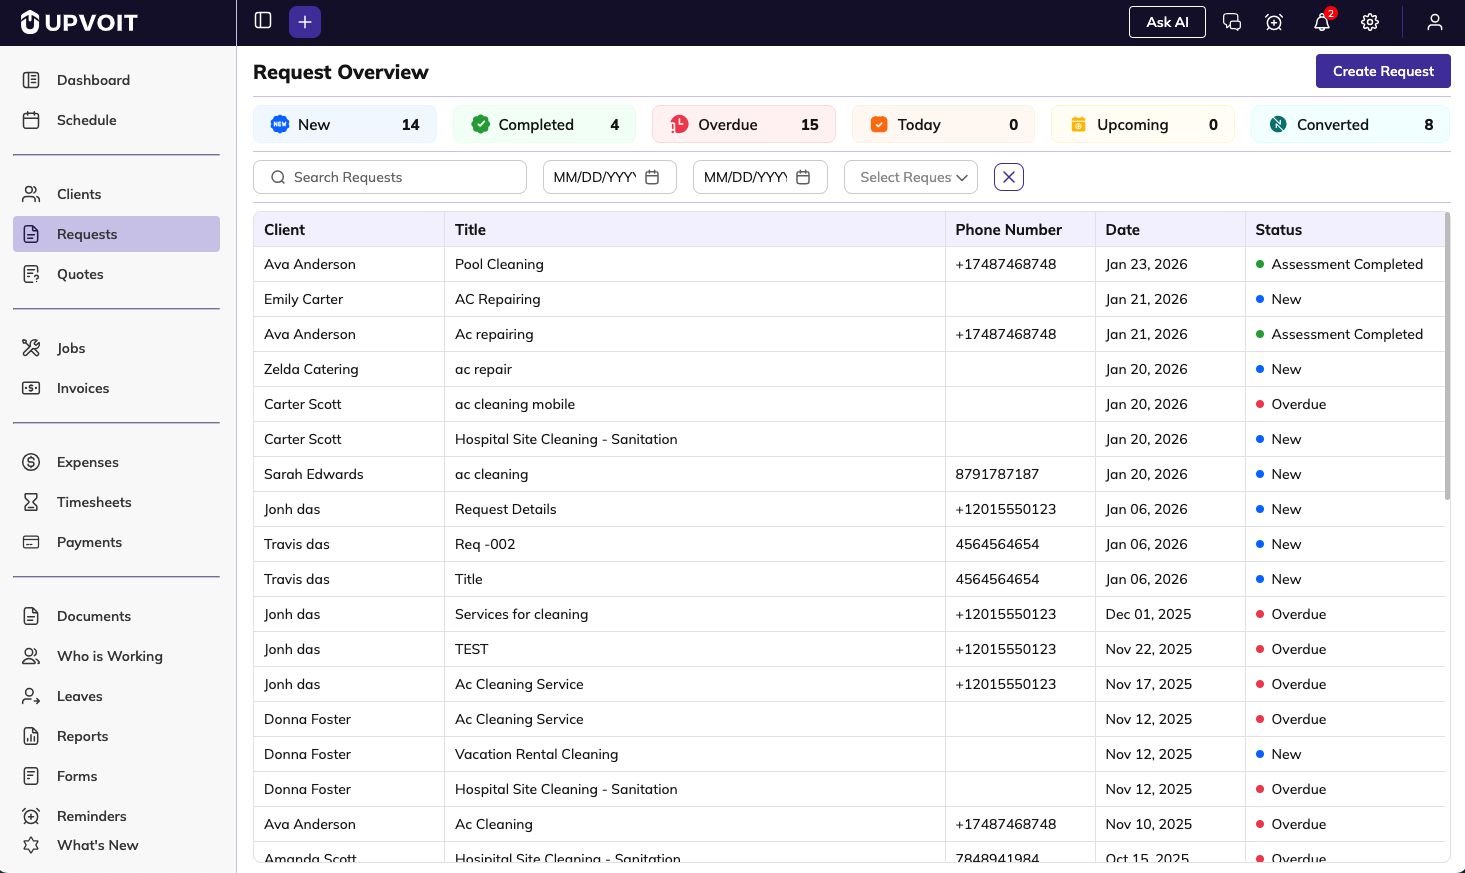
Status Counters
At the top of the dashboard, you’ll see status-wise counts:

-
New – Recently submitted requests awaiting review
-
Completed – Finished assessments or processed requests
-
Overdue – Requests past their due date requiring attention
-
Today – Requests scheduled for today
-
Upcoming – Future scheduled requests
-
Converted – Requests that have been converted to quotes or jobs
These counters provide an instant snapshot of your pipeline so you can prioritize what needs attention.
Request List View
The main list displays all requests with key details:

-
Client Name – Who submitted the request
-
Title – Brief description of the service needed
-
Phone Number – Contact information
-
Date – When the request was created or scheduled
-
Status – Current stage with colored indicators for quick identification
Status Indicators:
-
Blue dot New request
-
Green dot Assessment completed
-
Red dot Overdue
-
Teal dot Converted to quote or job
Request Filters
Use the filter section to quickly find specific requests without scrolling through the entire list.
Available Filters:

-
Search Bar – Type to search by client name, request title, or any text in the request details.
-
Date Range
-
From Date – Set the start date
-
To Date – Set the end date
View requests created or scheduled within a specific time period.
-
-
Status Dropdown – Filter by request status: New, Completed, Overdue, Today, Upcoming, or Converted.
-
Clear Filters – Click the X icon to reset all filters and see the complete list again.
Creating a New Request
Capture all client service requests with complete details from the start.
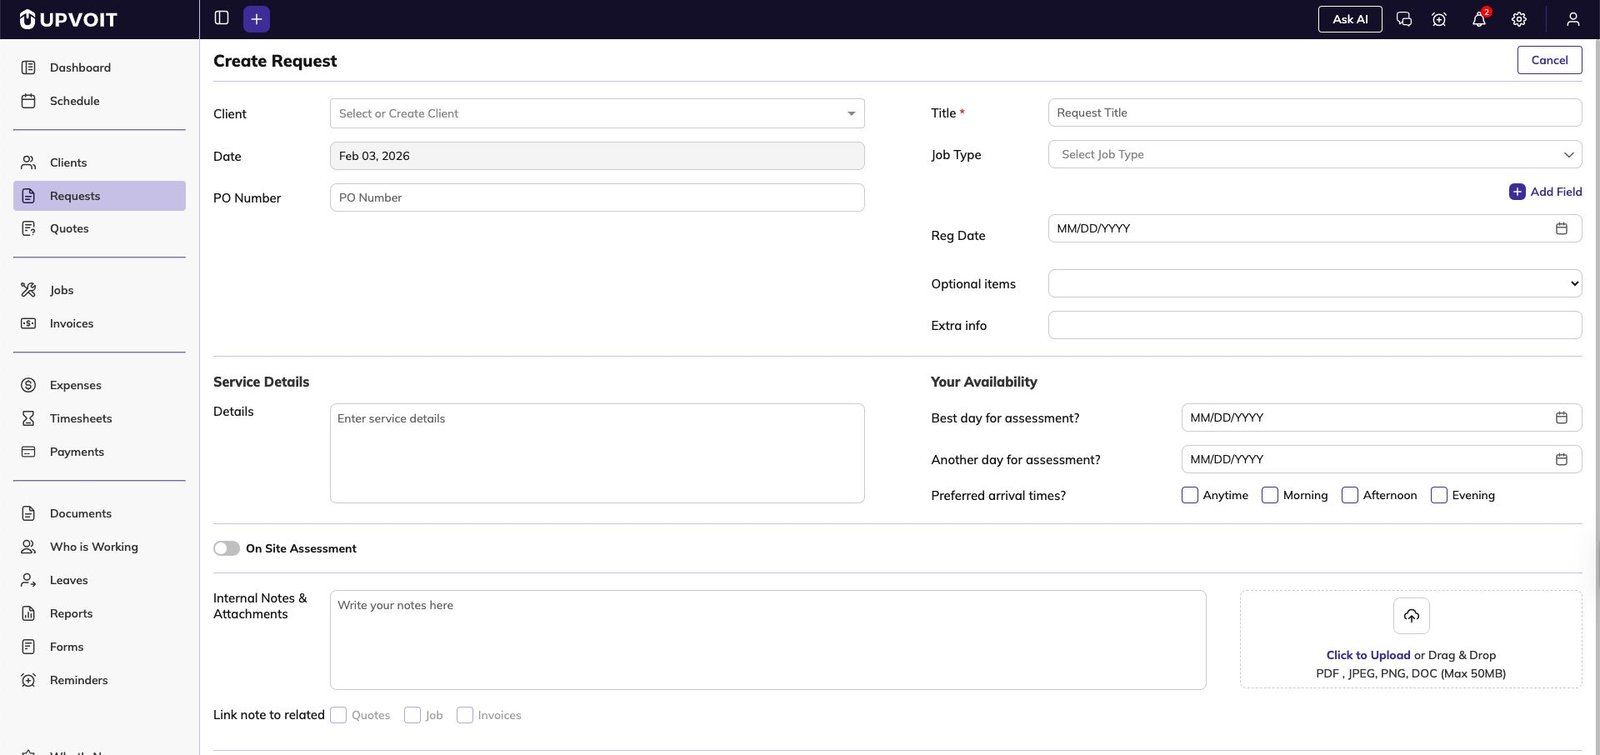
Steps to Create:
-
Click “Create Request” button from the Request Dashboard

-
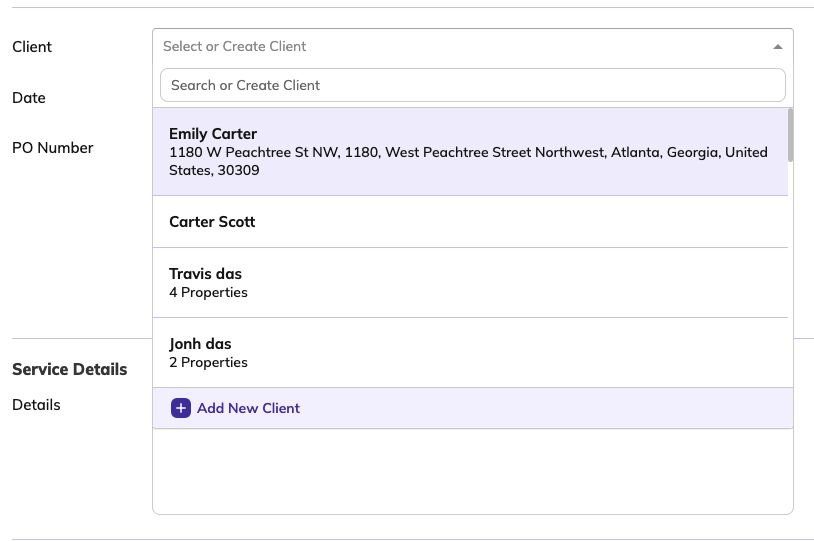
Select or Add Client
-
Choose existing client from dropdown
-
Search by client name
-
Click “Add New Client” if they don’t exist
-
Fill in basic client details (name, email, phone, address)
-
-
Request Details

-
Title (required) – Brief description of service needed
-
Date – When request was received (defaults to today)
-
Job Type – Select category (Installation, Maintenance, Repair, etc.)
-
PO Number (optional) – Purchase order for commercial clients
-
-
Custom Fields
-
Click “Add Field” button
-
Add any business-specific information you need to track
-
-
Service Details
-
Describe what the client needs in the text area
-
Enable “On Site Assessment” toggle if technician visit required
-
-
Client Availability
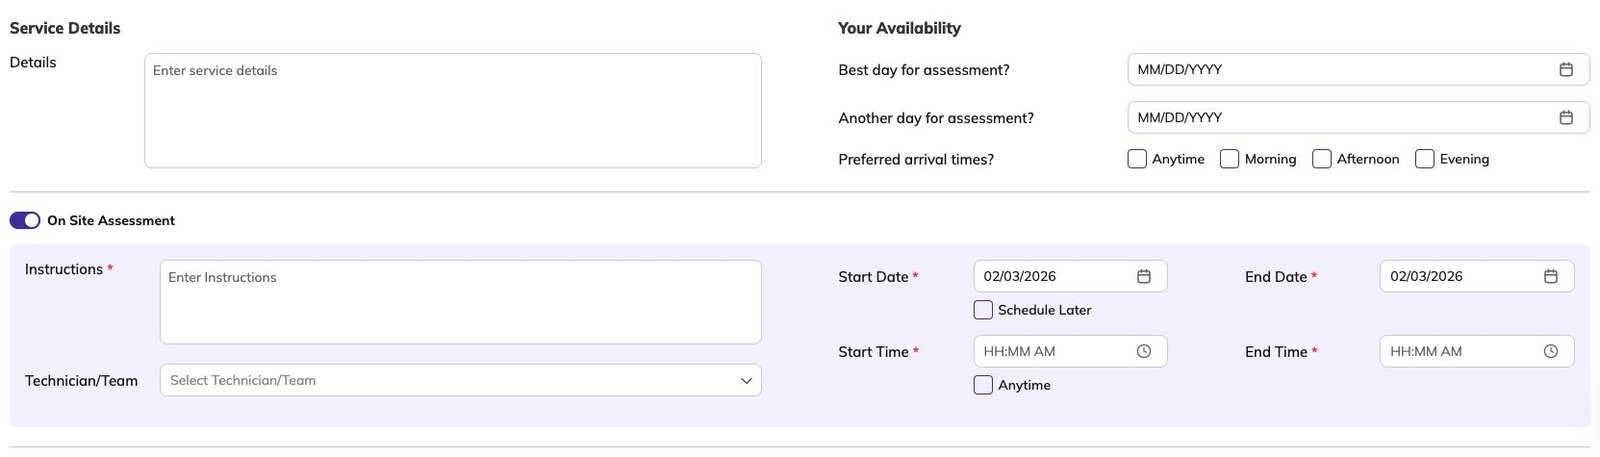
-
Best day for assessment – Preferred date
-
Another day for assessment – Alternate option
-
Preferred arrival times – Morning, Afternoon, Evening, or Anytime
-
Technician/Team – Assign who will handle the assessment
-
-
Internal Notes & Attachments

-
Add private team notes (not visible to client)
-
Upload photos, diagrams, or documents
-
Check “Link note to related” boxes (Quotes, Jobs, Invoices) to carry information forward automatically
-
-
Click “Save” to store the request
The request now appears in your Request Dashboard and can be converted to quotes or jobs when ready.
Viewing and Editing Requests
Access full details of any request and make updates as needed.
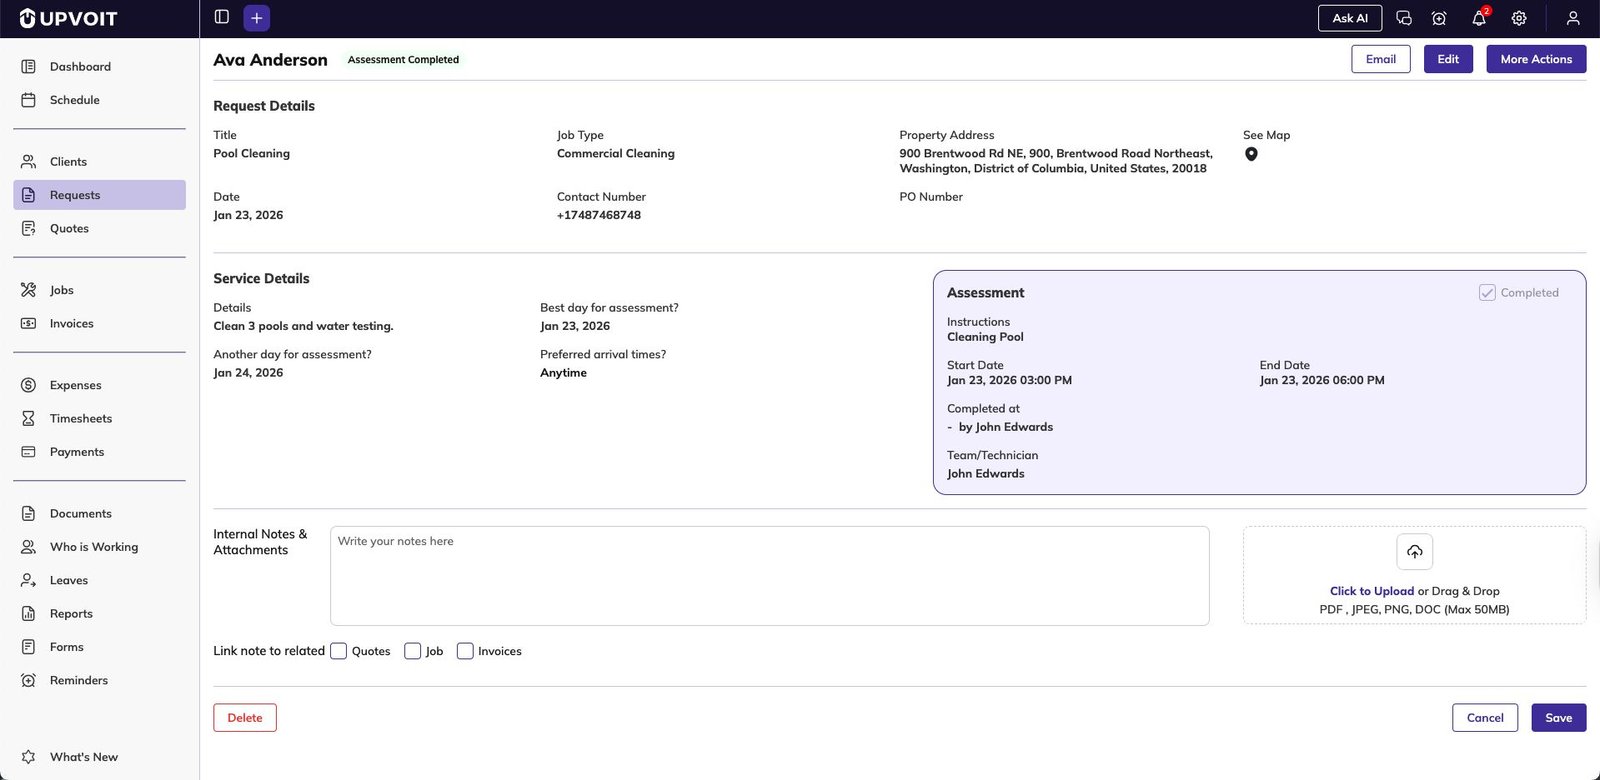
View Request Details
From the Request Dashboard, click any request row to open the full details page.
Request Detail Sections:
Request Details

-
Title, job type, property address
-
“See Map” link to view location
-
Date, contact number, PO number
Service Details

-
Full description of what client needs
-
Best day and alternate day for assessment
-
Preferred arrival times
-
Assigned technician/team
Assessment Section
-
Completed checkbox – Mark assessment as done
-
Instructions – Notes for technicians
-
Start Date and End Date – Assessment period
-
Team/Technician – Who is assigned
Internal Notes & Attachments
-
Team communication and uploaded files
-
Files can be deleted using the delete icon
-
Additional files can be added anytime
Action Buttons:
Additional files can be added anytime
-
Email Button Send updates to the client about their request.
-
Edit Button Modify any information. Changes are saved and tracked in system history.
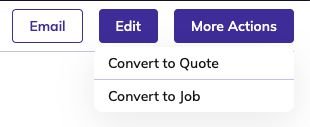
More Actions Menu
-
Convert to Quote – Create quotation with all request details pre-filled
-
Convert to Job – Generate job with request information automatically
Delete Button (bottom left)
-
Permanently remove the request. Use carefully – consider changing status to “Cancelled” instead to maintain records.
Schedule Request Overview
View requests in a calendar format alongside your scheduled jobs. From the side menu, click Schedule to open the calendar view.
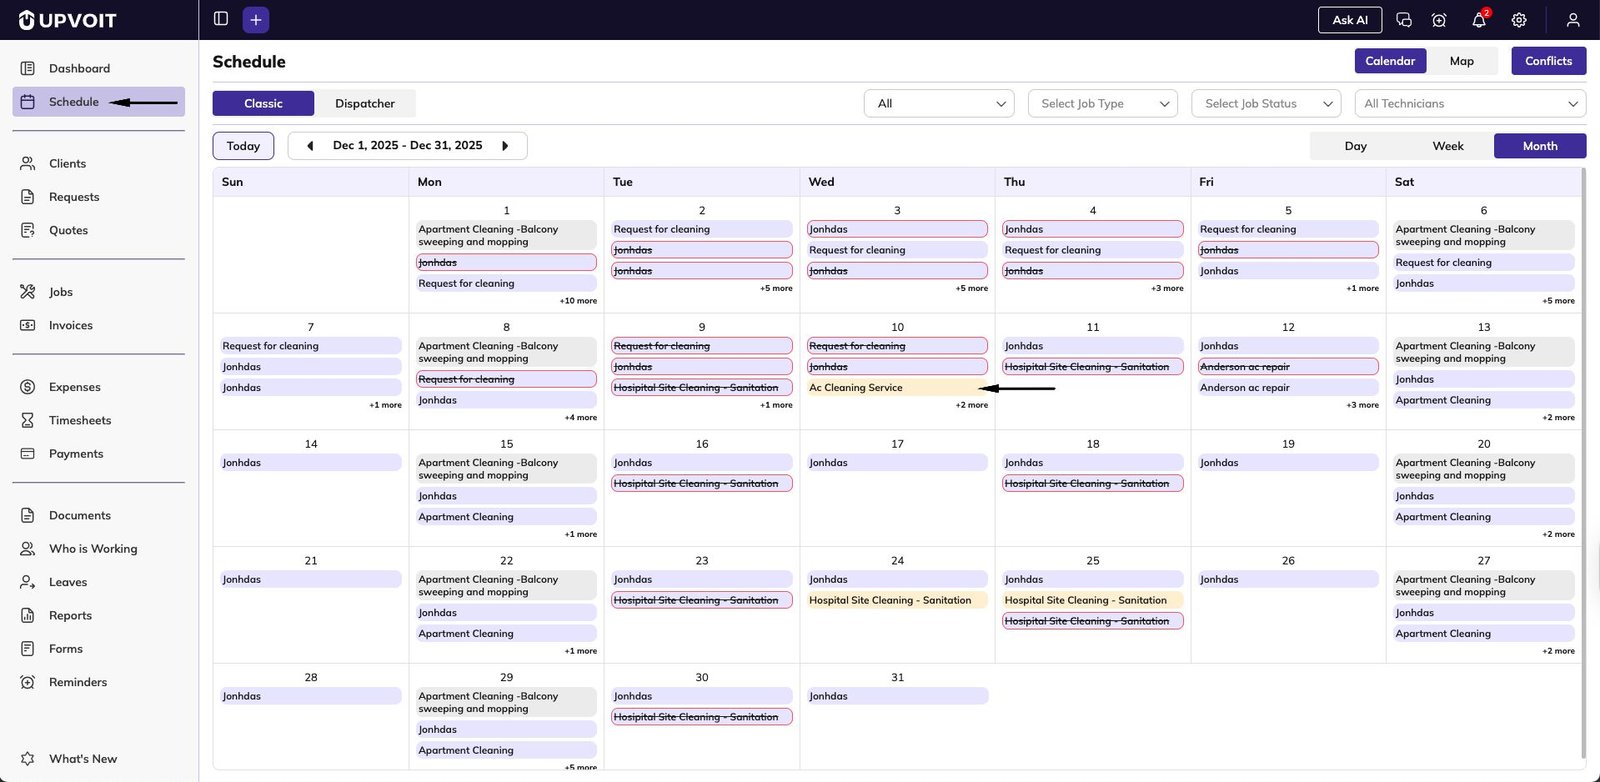
Visual Indicators
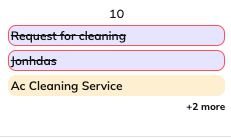
-
Yellow background – New requests that haven’t been completed
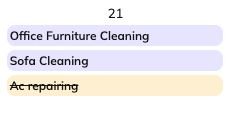
-
Yellow background with strikethrough text – Completed requests
Benefits
-
See requests organized by date
-
View requests alongside scheduled jobs for better planning
-
Identify gaps in your schedule
-
Plan technician assignments more effectively
This calendar view provides a visual timeline of your workload, making it easier to coordinate assessments and manage team availability.
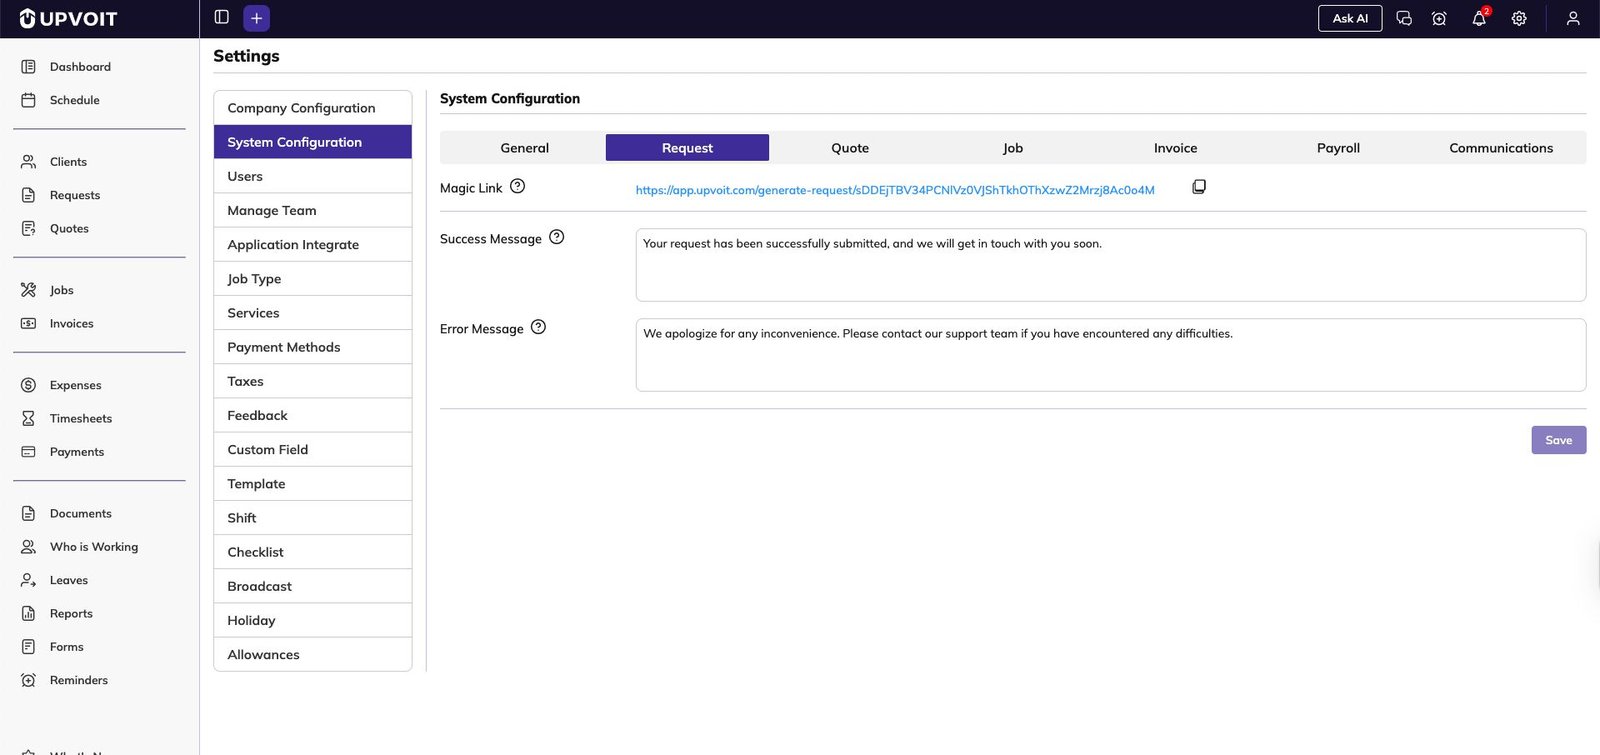
Magic Link
Allow clients to submit requests directly without calling or emailing.
How to Set Up:
-
Go to Settings → System Configuration → Request tab
-
Find the Magic Link field
-
Click the copy icon to copy the unique URL
Share the Link:
-
Add to your website
-
Include in email signatures
-
Post on social media
-
Send directly to clients
How It Works:
When clients open the Magic Link:
-
Request form loads with all fields
-
Client fills in required information (marked with red asterisk *)
-
Client submits the form
-
Upvoit automatically:
-
Checks if email/phone matches existing client
-
If yes → stores request under that client
-
If no → creates new client record automatically
-
Configure Messages:

In the same settings section:
-
Success Message – Shown after successful submission
-
Error Message – Displayed if submission fails
This eliminates data entry for your team and gives clients 24/7 access to submit service requests.
Custom Fields
Capture industry-specific or business-specific information beyond standard fields.
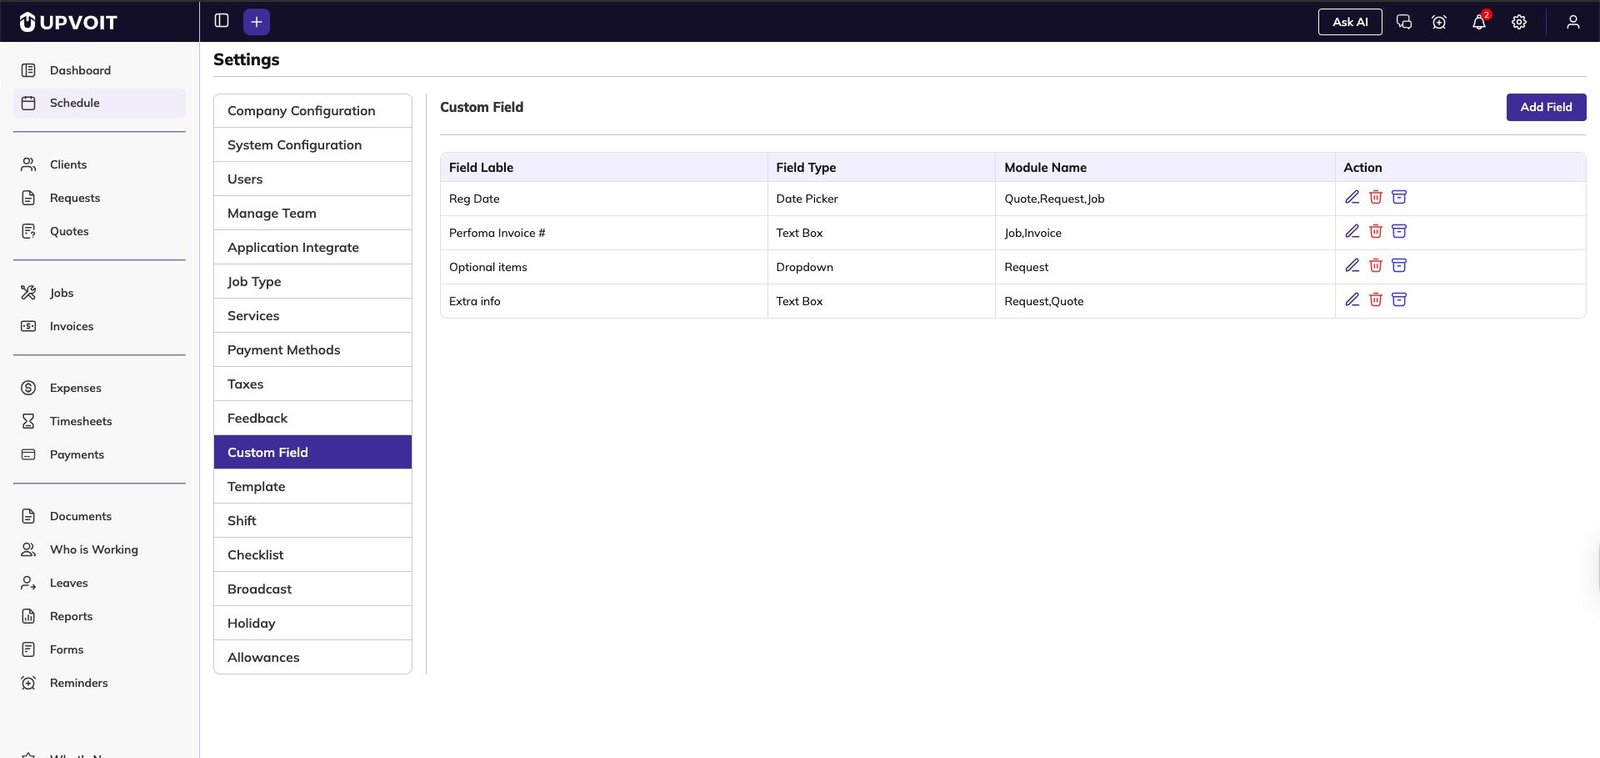
Managing Custom Fields:
-
Go to Settings → Custom Field
-
View all existing custom fields in the table
-
Click “Add Field” to create new one
Creating a Custom Field:
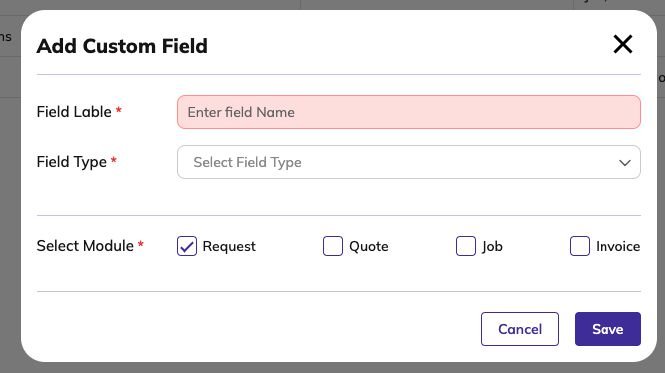
Field Label (required)
The name shown on the form (e.g., “Equipment Model”, “Warranty Status”)
Field Type (required)
Choose format:
-
Text Box – Single-line short text
-
Text Area – Multi-line longer text
-
Dropdown – Select from predefined options
-
Date Picker – Calendar selection
-
Checkbox – Yes/no options
-
And more…
Select Module (required)
Choose where this field appears:
-
Request
-
Quote
-
Job
-
Invoice
Custom fields appear in the “Add Field” section when creating or editing requests.
Best Practices
Request Management
-
Update status regularly to keep dashboard accurate
-
Use descriptive titles for easy identification
-
Attach photos when clients report visual issues
-
Link notes to related modules to maintain continuity
Assessment Scheduling
-
Capture both preferred and alternate dates
-
Note arrival time preferences to improve customer satisfaction
-
Assign technicians based on availability from Schedule view
Converting Requests
-
Complete assessments before converting to ensure accurate quotes
-
Use “Convert to Quote” when pricing is needed
-
Use “Convert to Job” for immediate work authorization
-
All notes and attachments carry over automatically
Magic Link Usage
-
Add to website contact page for 24/7 submissions
-
Train clients to use it for faster service
-
Customize success message to set expectations
Did this answer your question?


