The Job module is the core of your day-to-day service operations in Upvoit. It allows you to create jobs, schedule work, assign technicians, track labour and expenses, manage billing, and monitor profitability — all from one place.
Job Overview & Listing
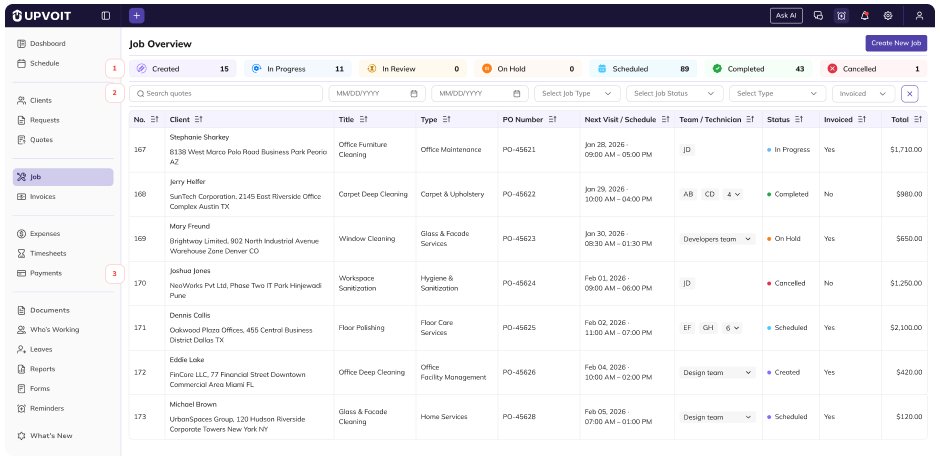
The Job Overview provides a snapshot of all your jobs in one place.
-
At the top, status cards show how many jobs are in each stage, such as Created, Scheduled, In Progress, In Review, Completed, On Hold, or Cancelled.
-
The Filter section is available below the status cards. It helps you quickly find specific jobs by using filters such as search keyword, date range (start and end), job type, status, and invoice.
-
Below the status cards, the job list displays key details for each job, including job number, client and property, job title, job type, PO number, schedule, assigned technicians, current status, invoice status, and total amount.
The invoice status indicates ‘Yes’ if an invoice has been created for the job, or ‘No’ if it has not.
Job status can also be updated directly from this list.
Creating a Job
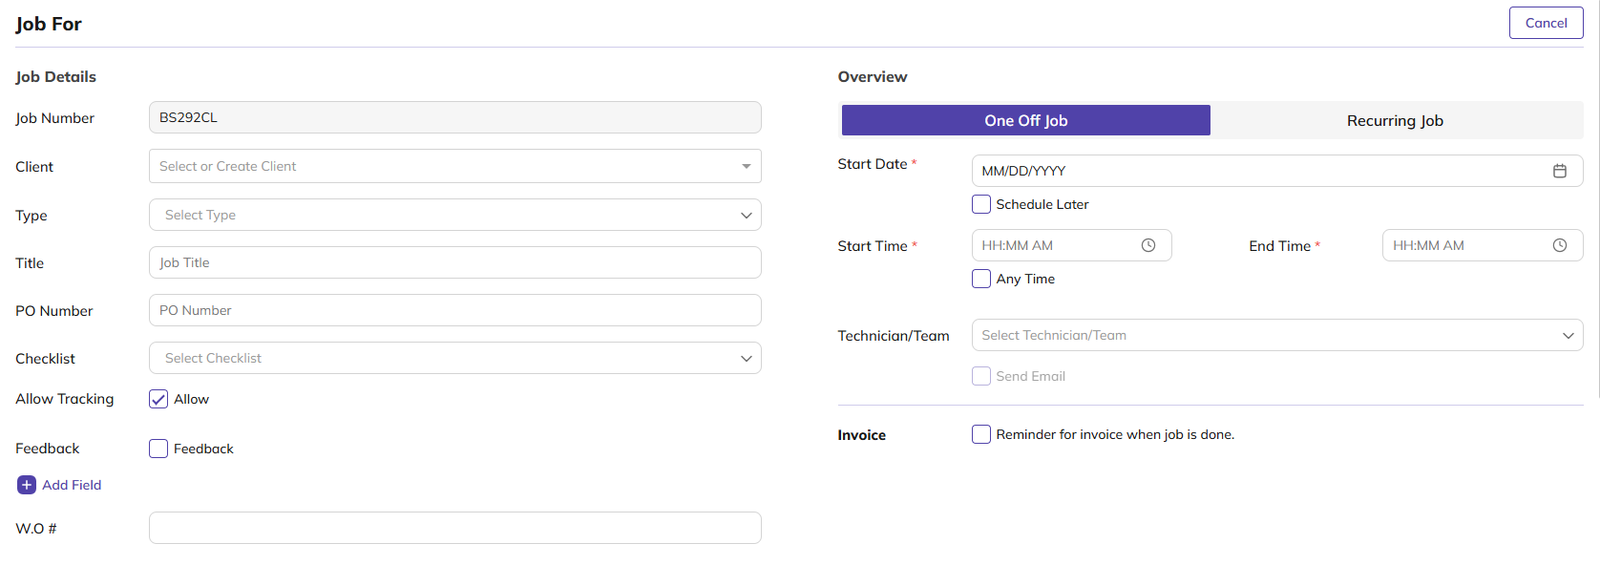
To create a job, click Create Job from the top-right corner of the Jobs page.
1. Job Number
Job numbers can be generated automatically or entered manually, depending on your configuration.
You can manage job number settings from Settings → System Configuration → Job, where you can define prefixes, suffixes, and number padding.
2. Client
You can select a client to create a job for that client.
3. Job Type
Each job requires a job type and a job title.
4. Job Title
Job titles can be entered manually or generated automatically using dynamic keys.
You can configure the job title format from the Settings section and define how titles are generated based on your business needs.
5. PO Number
You can also add a PO number for reference.
6. Checklists
If checklists are enabled, you can attach a checklist to a job.
Checklists help standardise work by defining tasks that must be completed during the job.
You can configure checklists to follow a random or sequential order, ensuring technicians complete tasks in the required flow.
Checklists are managed from the Masters section and can be reused across jobs.
7. Client Contacts & Notifications
You can select a client contact person for the job and enable email notifications to keep them informed.
These notifications help ensure clear communication with the client throughout the job lifecycle.
8. Allow Technician Tracking
Technician tracking allows you to monitor job progress in real time.
When tracking is enabled, and technicians are clocked in, you can see who is working on the job along with their current location in the Who’s Working section.
9. Customer Feedback
Customer feedback can be enabled to automatically send a feedback email to the client after the job is completed.
Feedback templates and questions are managed from the Masters section.
Once created, these feedback forms can be selected while creating or editing a job.
10. Custom Fields
Custom fields allow you to capture additional job-specific information.
Custom fields are configured from the Masters section, where you can define the field type and select the modules they apply to.
Once created, these fields appear automatically in the job form.
11. Scheduling Jobs
Jobs can be scheduled as One off or Recurring.
1. One off job
For one-off jobs, you can select a specific date and time, mark the job as Any Time, or choose Schedule Later.
2. Recurring job
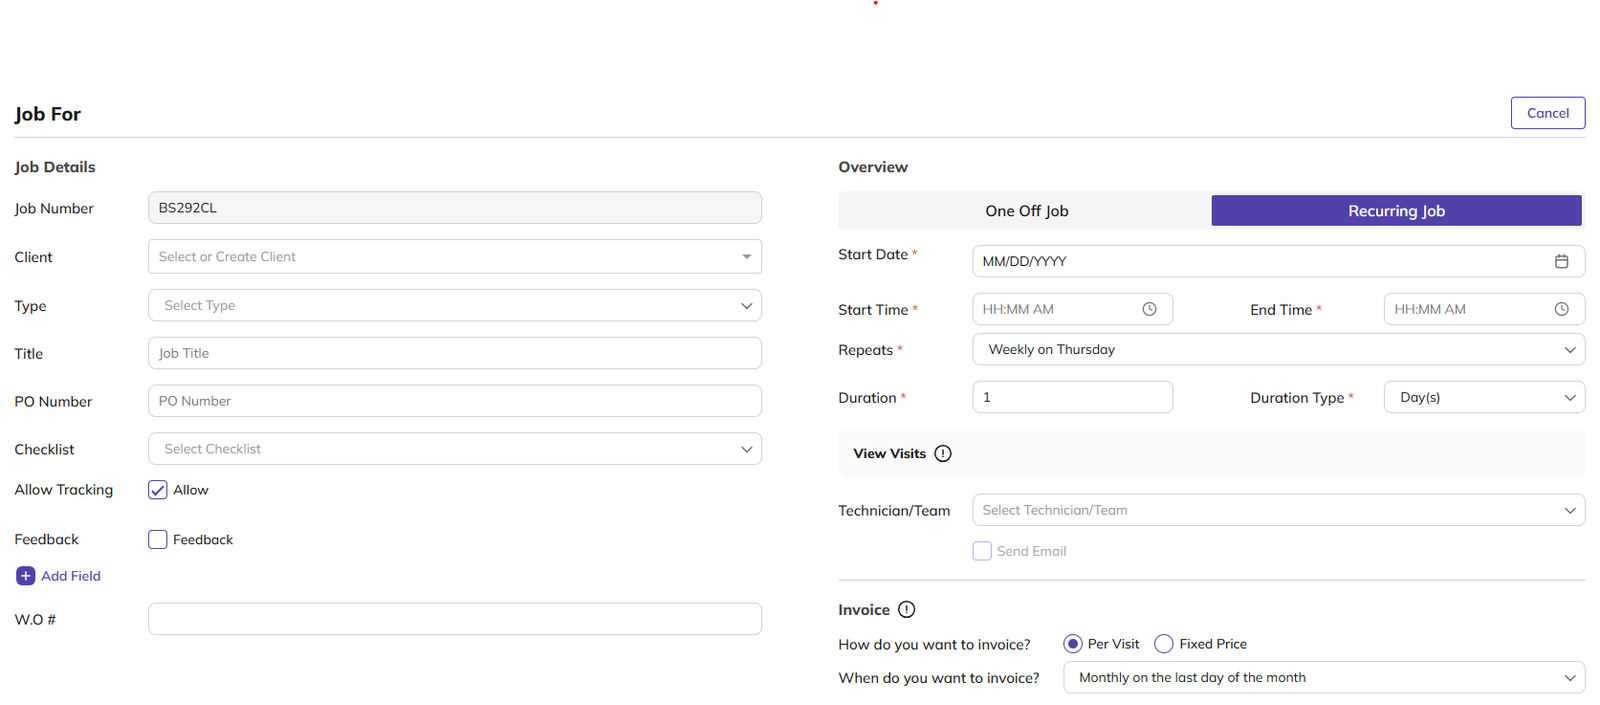
Recurring jobs can be scheduled as needed, weekly, every 2 weeks, monthly, or via a custom schedule.
Custom schedules let you define how often a job repeats:
-
Daily
-
Weekly – choose the day(s) of the week
-
Monthly – choose the day of the month or the week/day combination
-
Yearly
You can also define the job duration, preview all generated visits, and choose how the job should be invoiced — per visit, monthly, or upon completion.
12. Assigning Technicians & Teams
Jobs can be assigned to individual technicians or entire teams.
If Supervisor Mode is enabled, a supervisor can be assigned who clocks in and out on behalf of the team.
Clock-in behaviour can be configured as individual-based or team-based from the settings.
Assigned technicians can be removed as long as they have not clocked in.
Email notifications can be sent automatically when a job is assigned.
13. Products & Services
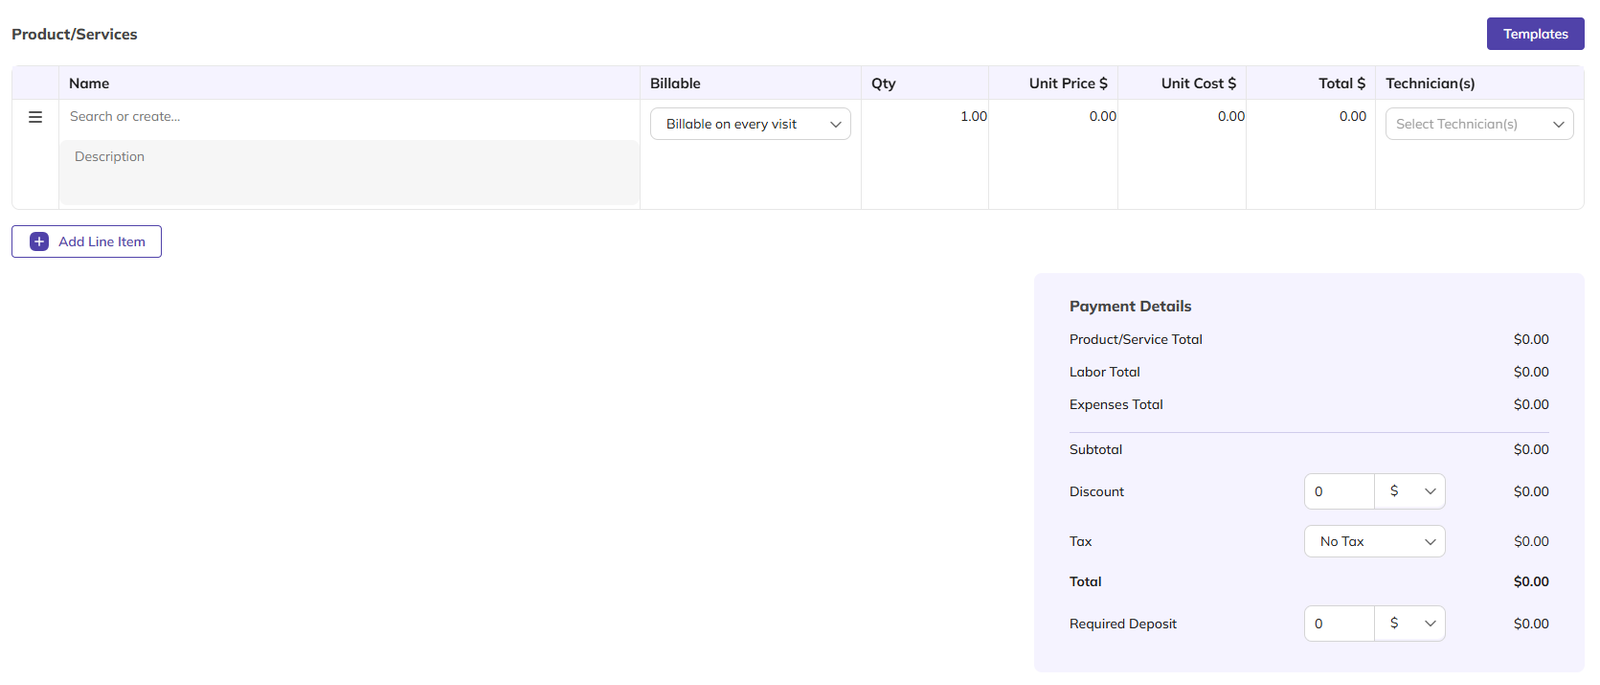
Products and services define what is billed for the job.
You can add services, materials, or charges as line items by entering descriptions, quantities, pricing, and cost.
Totals are calculated automatically.
Each line item supports different billing behaviours:
-
Charged on every visit
-
Charged once per job
-
Charged on every invoice
-
Used for internal tracking only and not billed
Service templates can be created from the Masters section to quickly add commonly used service bundles.
If enabled, line items can be assigned to technicians.
Assigned line items are linked to technician payroll, ensuring correct cost and payment allocation.
14. Payment Details
The Payment Details section provides a full cost breakdown of products, labour, and expenses.
You can apply discounts as a flat amount or percentage and select applicable tax rates. Tax position — whether tax applies before or after discounts — can be configured from Settings → General.
You can also set required deposits and review the final total before saving the job.
15. Notes & Attachments
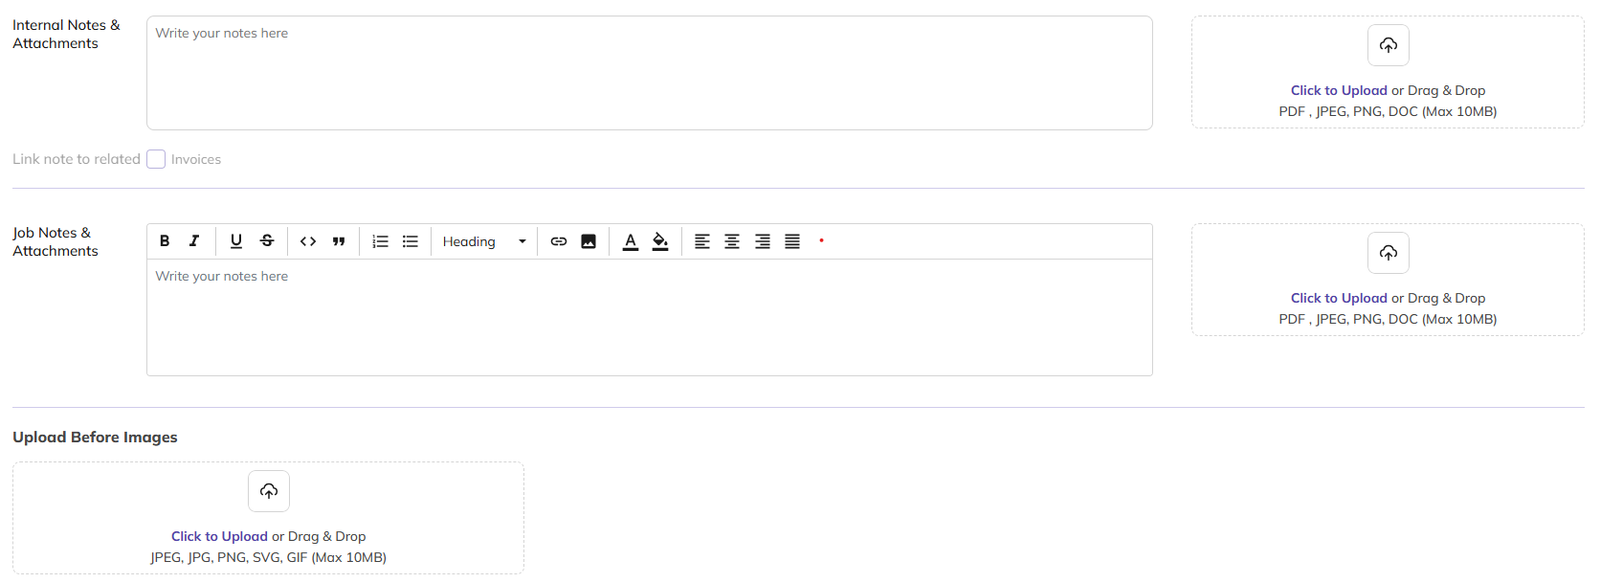
Notes and attachments help keep everyone aligned.
-
Internal notes and attachments are visible only to staff and administrators. These can be linked to invoices using a checkbox.
-
Job notes and attachments are visible to technicians and can be used to provide instructions or job-specific guidance.
-
You can also upload before-and-after images to visually document the work.
Job View
After saving, you are redirected to the Job View page.
At the top of the page, you can see the job number, client name, and current status, along with quick actions such as On the way, Send Email, Edit Job, and more options like Create Similar Job and Generate Invoice.
Email templates for subjects and message bodies are configurable using dynamic keys, and sent emails can be reviewed directly from the job.
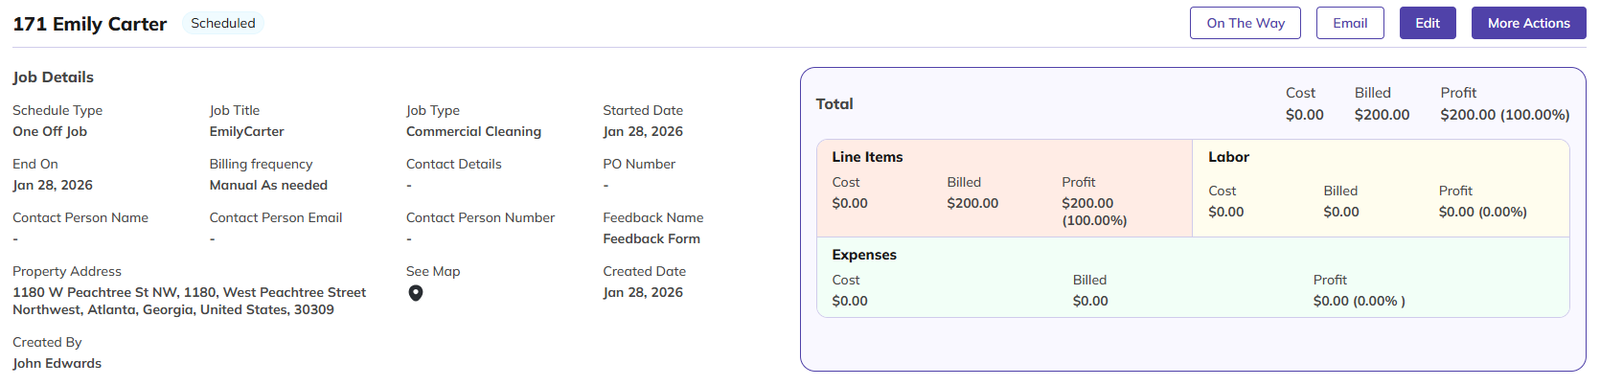
1. Job Details
In the Job Detail section, you can view all job information, including Schedule Type, Job Title, Job Type, Start Date, End Date, Billing Frequency, Contact Details, PO Number, Contact Person Name, Contact Person Email, Contact Person Number, Feedback Name, Property Address, Map View, Created Date, and Created By.
2. Profit Summary
The profit summary shows job profitability broken down into sections.
-
The Total section provides overall cost, billed amount, and profit.
-
The Line Items section shows profit from products and services.
-
The Labour section compares payroll cost against billed labour.
-
The Expenses section shows job-related costs such as fuel or materials.
This breakdown helps you understand exactly where profit is earned.
3. Product/Service

You can view products and services here, and also add new products or services directly from this page.
4. Labour Tracking
Labour entries track technician time spent on the job.
When adding a labour entry, employee billing and payroll rates are automatically pulled from the user profile.
Start and end times are used to calculate total hours and minutes.
Overtime is calculated based on the configuration for both payroll and invoicing.
You can define overtime rules such as daily, weekly, shift-based, weekend, or no overtime.
Labour costs and billing totals are calculated automatically.
4.1 Add Time
4.1.1 Time Details
You can select a date, choose an employee, and set the start and end time.
4.1.2 Payroll
The Payroll section automatically calculates based on hours:
-
Straight and overtime hours
-
Employee cost
-
Total employee cost (employee cost × straight hours)
-
Overtime cost
-
Total overtime cost (employee cost × overtime hours)
-
Travel miles rate and travel miles
-
Total travel cost (travel miles rate × travel miles)
-
Total cost (employee + overtime + travel)
4.1.3 Invoice
Here, you can choose whether a time entry is billable or not.
If Billable is set to true, the time entry will be added to the invoice.
You can also enable billable time by default by going to:
Settings → System Configuration → Invoice → Job hours are billable to clients by default.
4.1.4 Billing
The Billing section automatically calculates based on hours:
-
Straight and overtime hours
-
Billing rate
-
Total Billing rate (Billing rate × straight hours)
-
Overtime Billing rate
-
Total Overtime Billing rate (Overtime Billing rate × overtime hours)
-
Travel miles Billing rate and travel miles
-
Total travel Billing cost (travel miles rate × travel miles)
-
Total Billing cost (total Billing + total overtime billing cost + total travel billing cost)
4.1.5 Notes
You can add notes here if you want to include any timesheet-related information or other details.
5. Expense Tracking
Expense tracking allows you to record job-related costs such as materials, fuel, or other expenses.
In this list, you can view the item name and description, reimburse to, date, created date, created by, total cost, billable status, and available actions such as Edit, Delete, and Download Attachment.
5.1 Add expenses
You can add the following expense details:
-
Product or Service
-
Description
-
Reimburse to
-
Date
-
Total Cost
-
Attachments
-
Billable
6. Visits & Completion
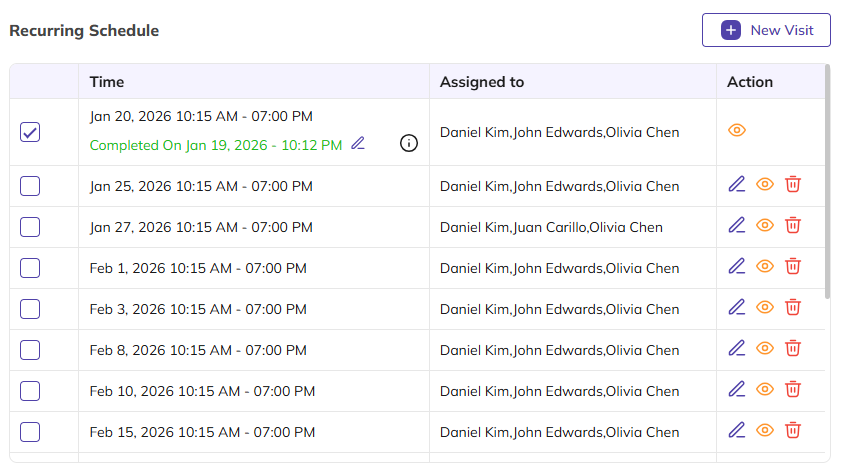
Jobs can include one or multiple visits.
In this list, you can view the scheduled date and time, assigned to, and available actions such as Edit, View, and Delete.
For recurring jobs, all visits are listed and can be managed individually. Visits can be added, updated, deleted, or marked as complete.
If two-stage completion is enabled, technicians complete the visit first, and administrators review and finalise it.
6.1 New Visit
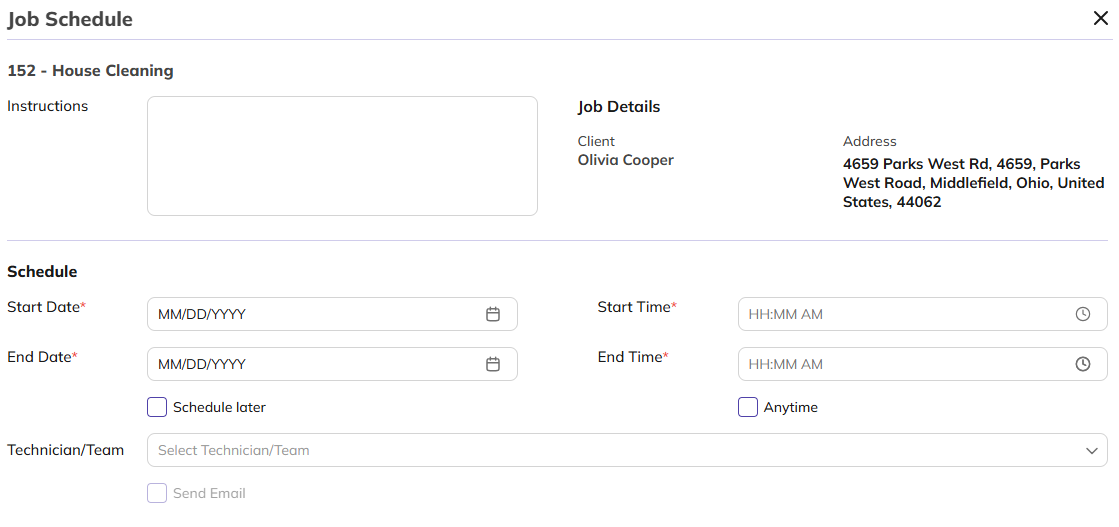
You can add the following Visit details:
-
Instruction
-
Schedule start date
-
Schedule end date
-
Schedule start time
-
Schedule end time
-
technician/team assign
7. Invoicing Jobs
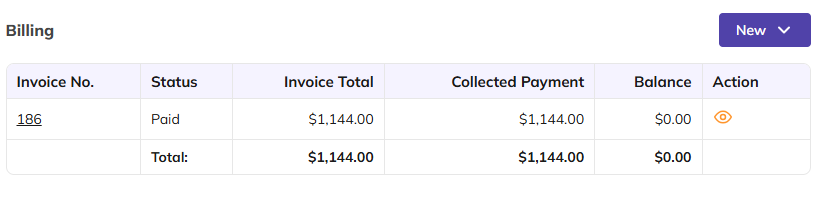
Invoices can be generated directly from a job.
In this list, you can view the invoice number, status, invoice total, collected payments, remaining balance, and available actions.
7.1 Create invoice
Click the New button to be redirected to the Invoice page.
-
Select a Visit to create an invoice for that visit.
-
Click Skip to create an invoice without linking it to any job.
-
Click Next to create an invoice for a specific job.
This gives you the flexibility to generate invoices with or without associated jobs or visits.
All job details are pre-filled, and invoice reminders help ensure nothing is missed.
Scheduler View
Once a job is created, it also appears in the Scheduler on its scheduled dates.
The Scheduler provides a timeline-based view of all scheduled jobs and visits, making it easy to track upcoming and completed work.
From the Scheduler, you can open any job or visit to quickly view basic details such as client, property, schedule, assigned technicians, and status — without navigating back to the job list.
Job Status & Notifications
Jobs move through clear statuses as work progresses, including Created, Scheduled, In Progress, In Review, Completed, On Hold, and Cancelled.
Automatic notifications keep both clients and technicians informed at every stage of the job lifecycle.
Did this answer your question?


