Forms Overview
The Forms module lets you design, publish, and track custom forms for your business, such as site inspections, payroll inputs, job completion reports, or employee registrations. You can build forms with drag-and-drop fields, generate them with AI, or import existing Google Forms.
From the left menu, click Forms to open the module.
Forms List
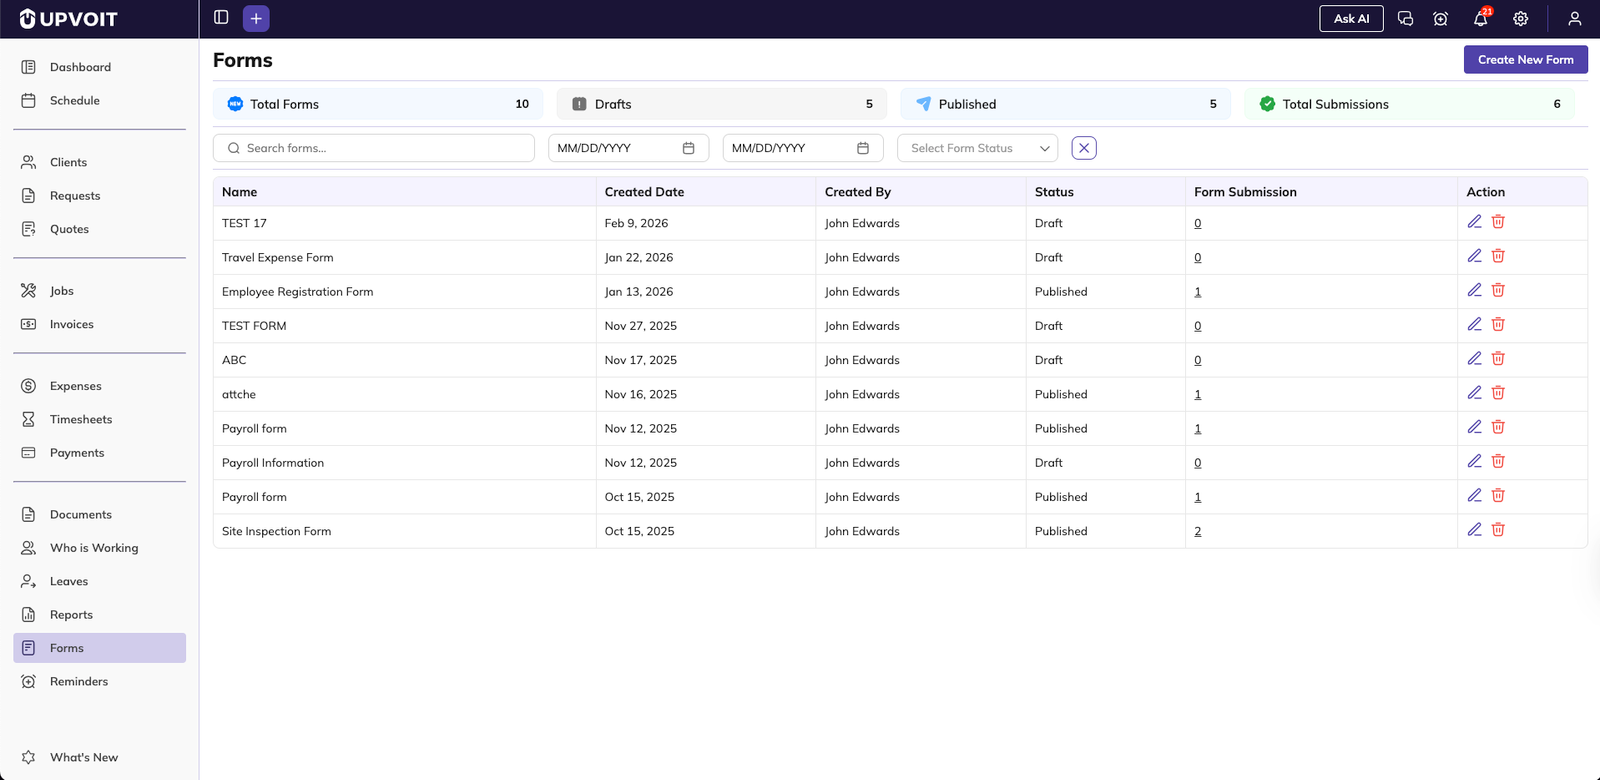
When you open Forms, you land on the Forms list view.

The list shows:
Name: Form title
Created Date: When the form was created
Created By: User who created the form
Status: Draft or Published
Form Submission: Number of submissions received
Action: Edit (pencil) and Delete (trash) icons
At the top of the page you can see quick stats:
Total Forms
Drafts
Published
Total Submissions
Filters and Search
Use the toolbar to narrow down forms:
Search forms: Filter by form name
Date range filters: Filter by created date
Form Status dropdown: Show Draft, Published, or all forms
X button: Clear filters
Click Form Submission counts to review submissions for a specific form (if your setup supports it).
To create a new form, click Create New Form in the top-right corner.
Creating a Form Manually
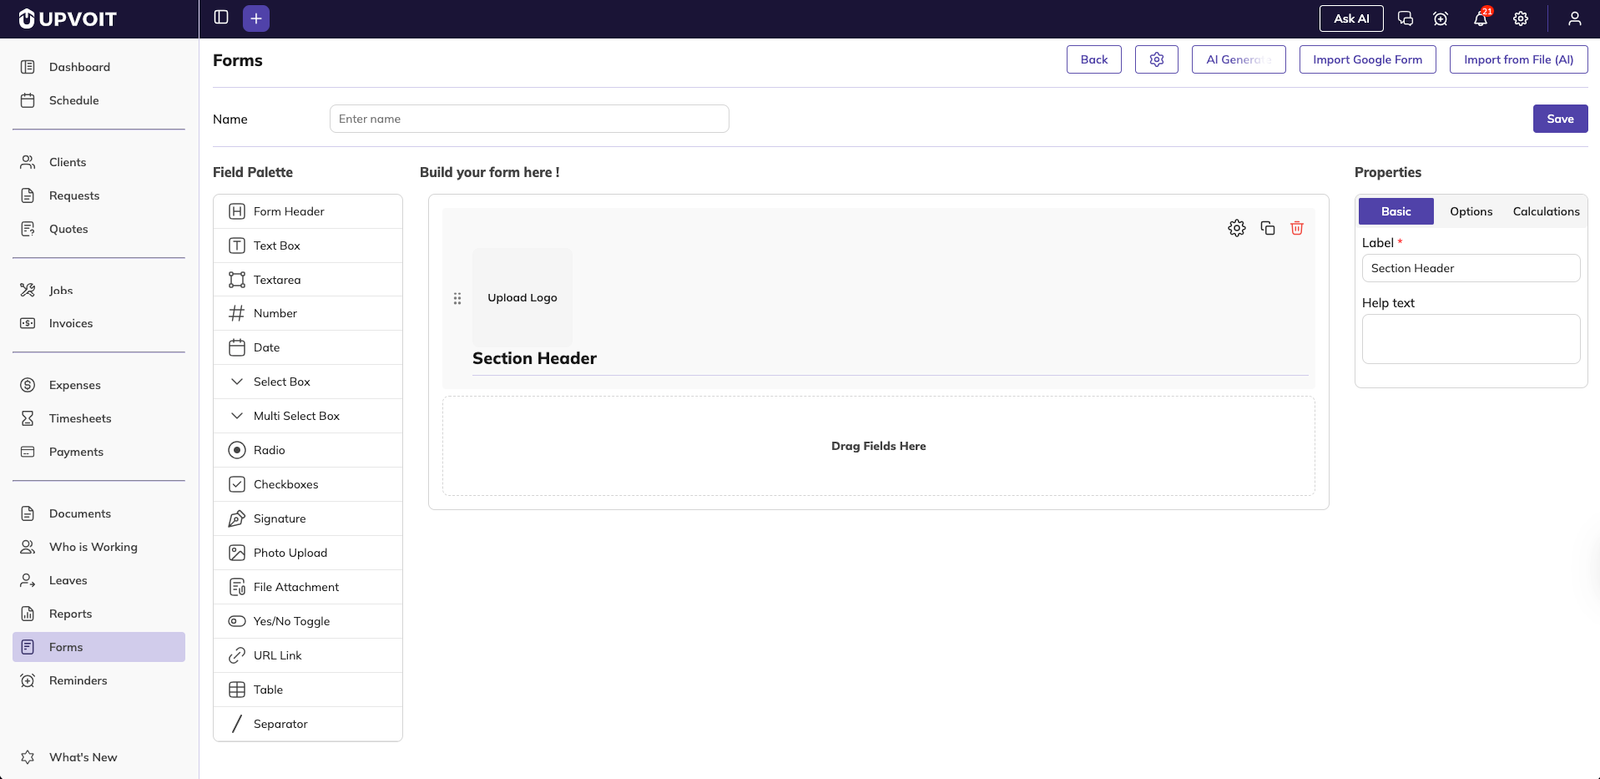
After clicking Create New Form, you enter the form builder.
Form Name
At the top, enter a Name for your form. This title appears in the Forms list and on the form header (depending on your design).
Field Palette and Builder Area
The page is split into:
Field Palette (left): List of available field types
Build your form here! (center): Drag-and-drop canvas
Properties (right): Settings for the selected field
Common Field Palette options include:
Form Header
Text Box / Textarea
Number
Date
Select Box / Multi Select Box
Radio / Checkboxes
Signature
Photo Upload / File Attachment
Yes/No Toggle
URL Link
Table
Separator
Adding and Configuring Fields
Drag a field from Field Palette into the Build your form here area.
Click the field to edit its Properties on the right.
Basic: Label, help text, placeholder, required, and related settings.
Options: Choices for select, radio, or checkbox fields.
Calculations: For advanced numeric or summary fields (if used in your account).
Reorder fields by dragging them up or down.
Duplicate or delete fields using the icons on each field block.
Form Settings (Design and Access)
Click the Settings icon near the top of the builder to open global form settings.

Available options include:
BG Color: Background color for the form (hex value)
Form Width (px): Maximum width of the form in pixels (for example, 1080)
Link Expiry Date: Optional date after which the public form link stops accepting responses
Login Required: Choose Yes or No to decide whether users must log in to Upvoit to submit the form
Click Save in the settings popup to apply these settings.
AI Form Generator
Use AI to generate complete forms from a natural language description.
In the builder, click AI Generate at the top.
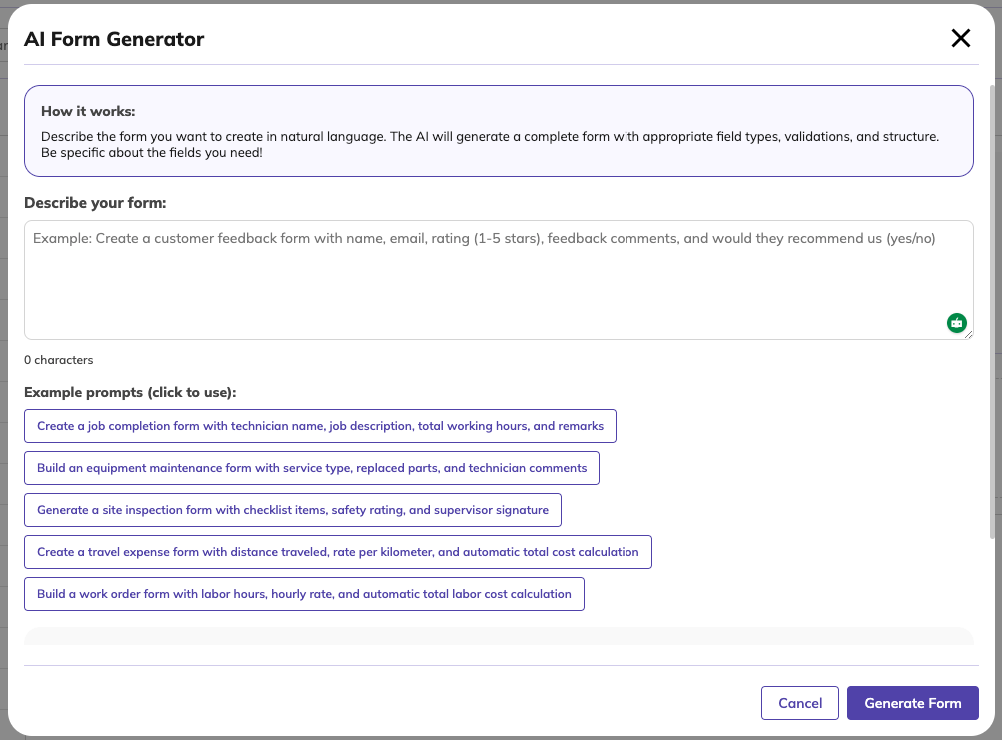
The AI Form Generator window opens with guidance, examples, and a description box.
Enter or choose a prompt and click Generate Form.
The AI builds a form layout with suitable fields.
Fine-tune generated fields using the Properties panel.
Example prompts:
Create a job completion form with technician name, job description, total working hours, and remarks.
Build a travel expense form with distance traveled, rate per kilometer, and automatic total cost calculation.
Importing a Google Form
You can convert an existing Google Form into an Upvoit form.
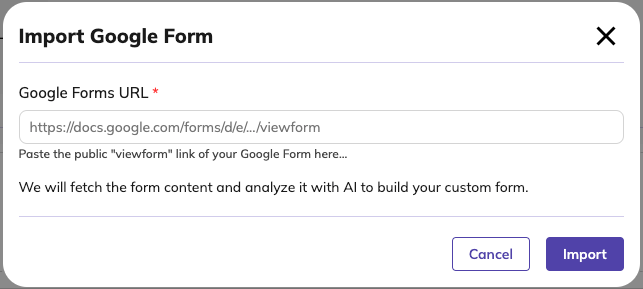
In the builder, click Import Google Form.
Paste the public viewform URL into the Google Forms URL field.
Click Import to fetch and generate an equivalent Upvoit form.
Edit the generated form as needed.
If available in your environment, you can also use Import from File (AI) to generate forms from supported file formats.
Saving and Publishing Forms
Click Save in the top-right corner of the builder.
The form is created in Draft status by default (depending on configuration).
From the Forms list, edit and publish the form when it is ready.
Published forms can be used with share links, embeds, or other Upvoit modules (depending on setup).
The Status column (Draft / Published) indicates whether a form is live and ready for submissions.
Editing and Deleting Forms
Edit a Form
Open the Forms list.
Click the Edit (pencil) icon in the Action column.
Adjust fields, settings, or AI-generated sections.
Click Save to update the form.
Delete a Form
In the Forms list, click the Delete (trash) icon.
Confirm the prompt to permanently remove the form and configuration.
Submission handling behavior after deletion depends on your organization’s data retention policy.
Monitoring Form Submissions
In the Forms list, the Form Submission column shows how many responses each form has received.
Typical workflow:
Click the submission count to view or export responses (depending on configuration).
Use this for inspection logs, payroll forms, job reports, or other structured records.
Best Practices
Use clear form names so users can quickly identify the correct form.
Use AI Generate for complex forms, then refine fields manually.
Use Login Required for internal forms and disable it for public or client-facing forms.
Use Import Google Form for migration instead of rebuilding from scratch.
Review submission counts regularly and archive or delete old forms.
The Forms module provides an AI-enhanced way to build and manage operational forms in Upvoit while keeping data structured and easy to report on.
Did this answer your question?


