Overview
The Client module in Upvoit is where every customer relationship begins. It allows you to create, manage, and track clients, their contacts, properties, schedules, invoices, and all related activities in one place.
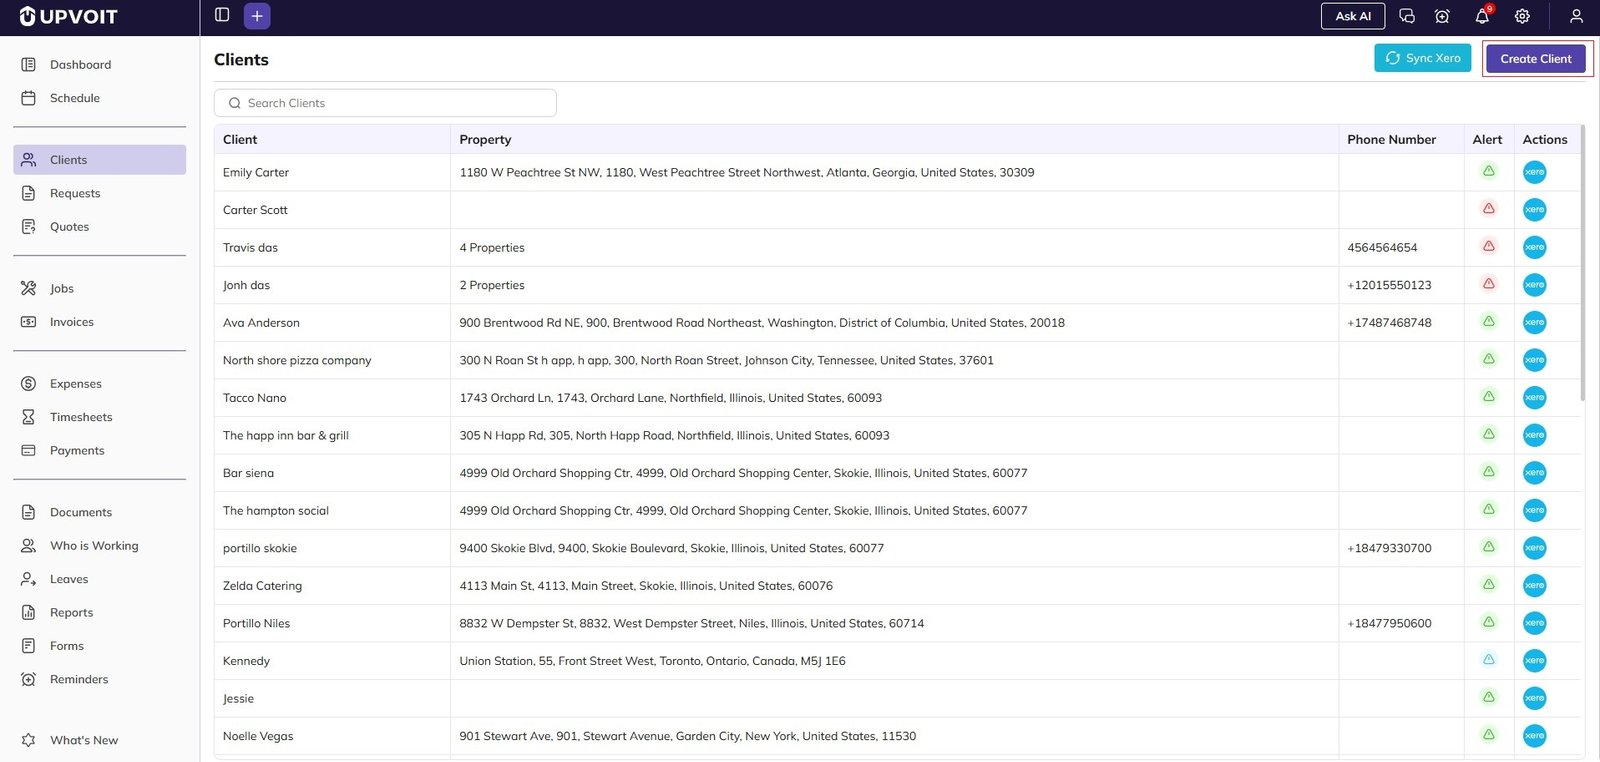
Client List Screen Features
Search & Filter
Use the Search Clients field at the top to quickly filter clients by name.
The list updates instantly as you type, making it easy to locate specific customers.
Client List Columns
Client
Property
Phone Number
Alert
Actions
Sync with Xero
Click Sync Xero in the top-right corner to synchronize client data with Xero.
This ensures consistency between Upvoit and your accounting records.
Synced information will display in the Alert.
Create Client
Click Create Client to add a new customer to the system.
How to Create a New Client?
Click Create Client in the top-right corner.
The client form may look long, but you only need to start with the information you have. All details can be updated later.
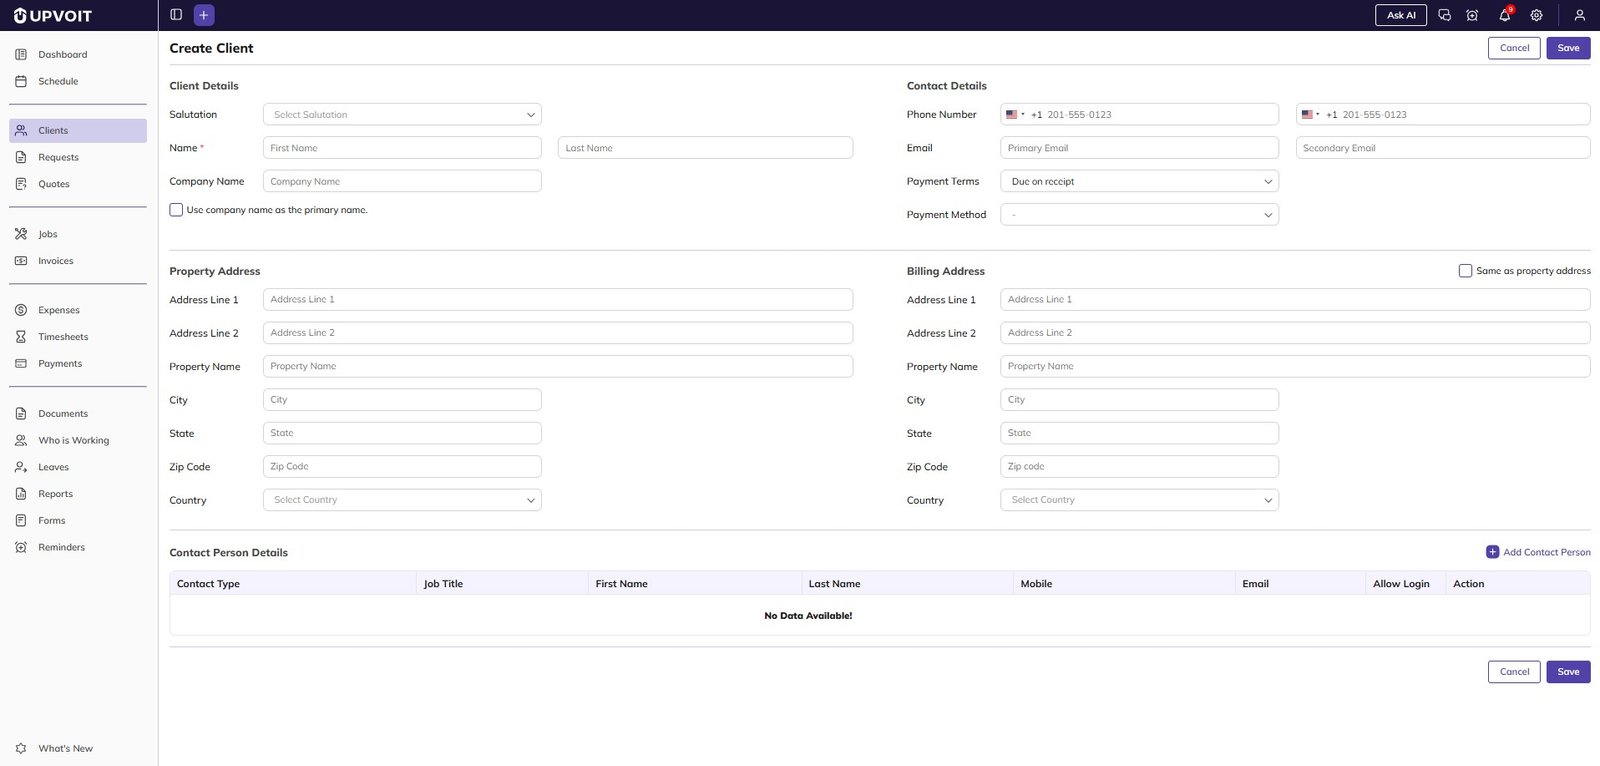
Step 1: Client Identity
Company Client
Enter the Company Name.
Enable Use company name as the primary name.
This ensures the company name appears consistently throughout the system.
Individual Client
Enter the First Name and Last Name.
Step 2: Contact Information
Add the primary phone number and email address.
Optionally, add secondary contact details if available.
Step 3: Billing Preferences
Select the client’s Payment Terms.
Choose the Preferred Payment Method to keep billing consistent.
Step 4: Property Address
Enter the Property Address where work is performed.
This supports:
Scheduling
Routing
On-site field operations
Billing Address
If invoices go to the same address, keep Same as Property Address enabled.
If billing goes to a different location (e.g., head office):
Disable the option.
Enter a separate Billing Address.
Step 5: Client Contacts
Most clients involve multiple people.
You can add contacts such as:
On-site contact
Work approver
Payment handler
For each contact, enter:
Name, Phone number, Email address, Role
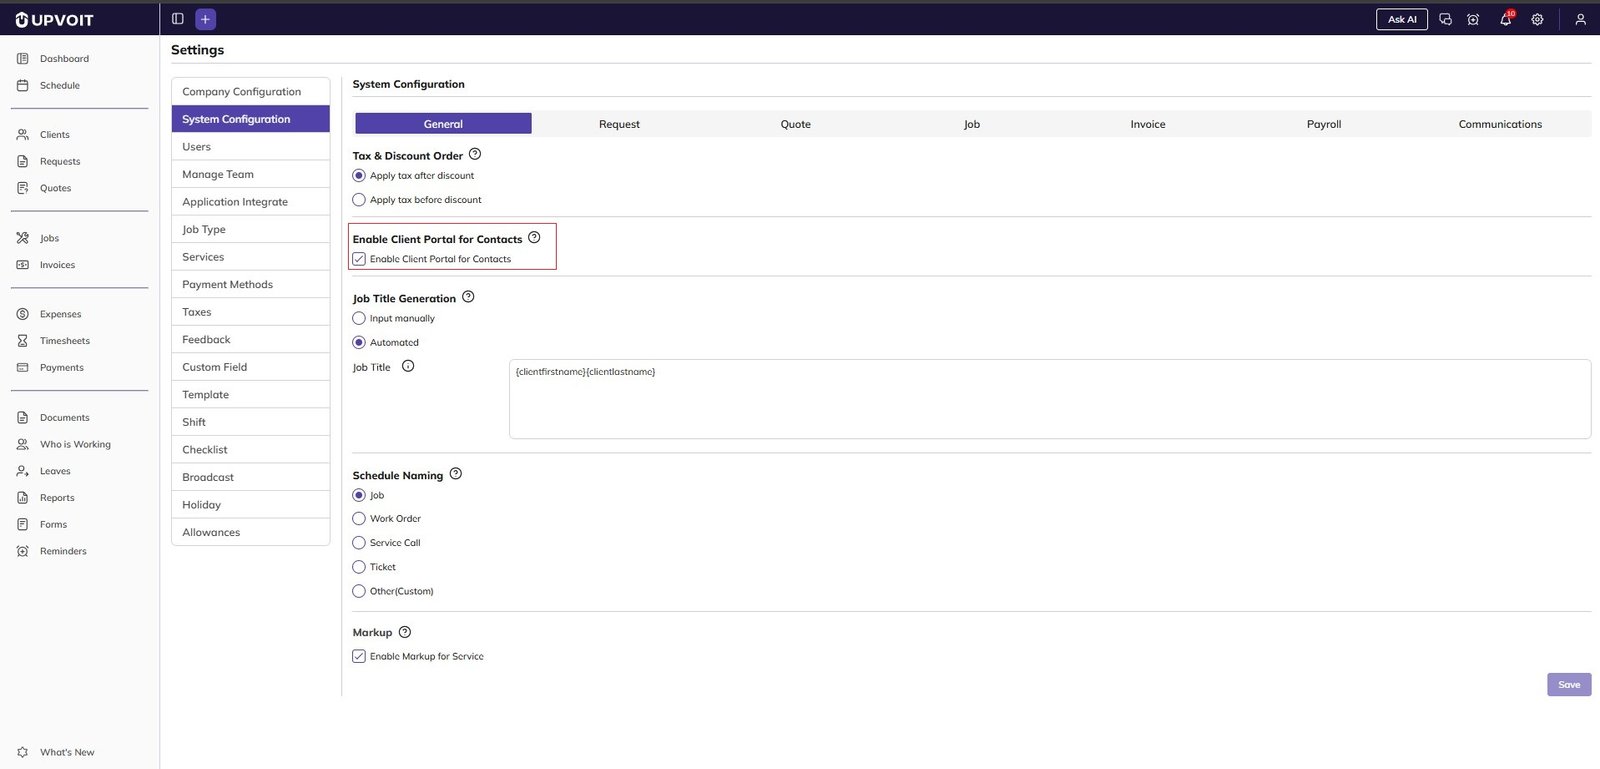
How to Access Client Portal?
You can allow clients and contacts to access the Client Portal.
Enable Client Portal for Contacts
Go to Settings → System Configurations → General.
Enable Client Portal for Contacts.
Create Client Portal Login
The Create Client Portal Login option appears only after a valid email address is entered.
When enabled, the client receives an invitation email to:
Set their password
Log in to the Client Portal
Access their information directly in Upvoit
Managing Client & Contact Access
Go to Settings → Users.
Use the filter to find the client or contact.
Click Edit.
Update permissions as needed and click Save.
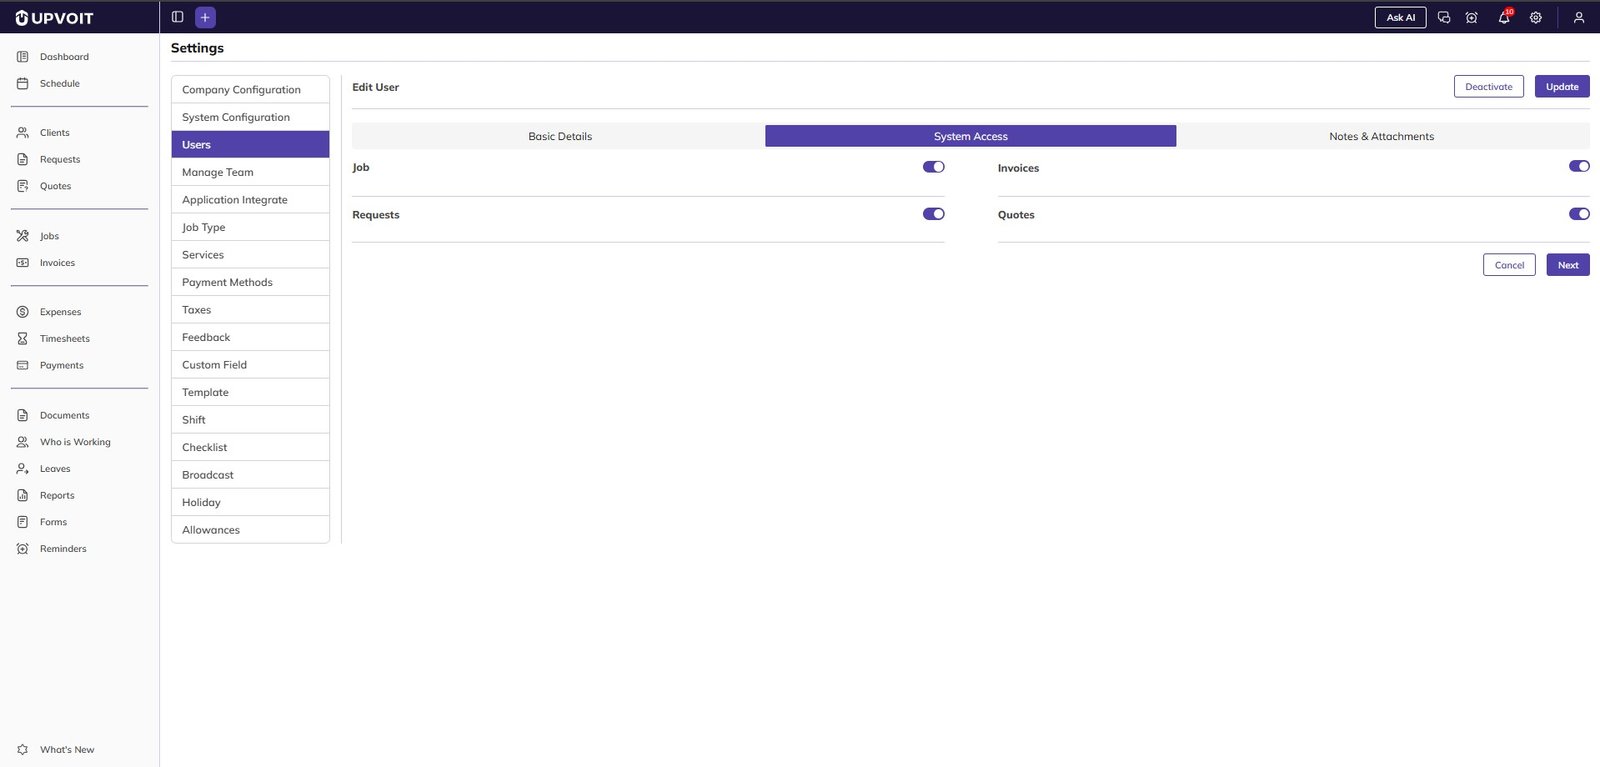
Each user record also includes:
Email – Send or re-send invitation email
Set Password – Set or reset the password on behalf of the user
User Status Toggle – Instantly activate or deactivate access
Saving the Client
Click Save to complete the setup.
Your new client is now ready to use.
Client View
Once a client is created, the Client view contains four main sections:
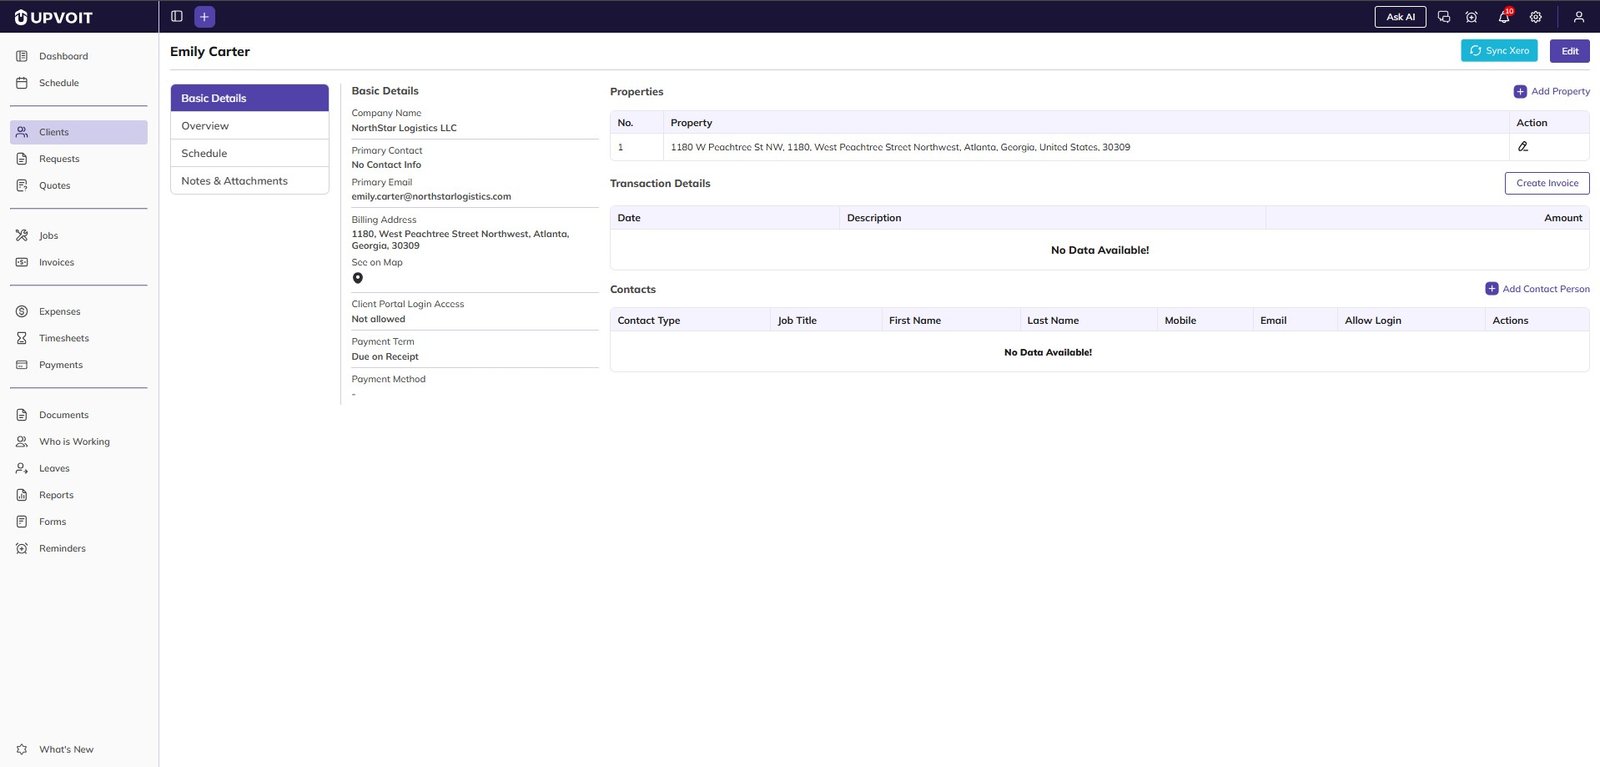
1. Basic Details
Provides a quick snapshot of key information:
Contact details
Properties
Recent invoices
Outstanding balance
Managing Properties
Click Add Property to add additional locations.
Enter the property details and save.
Edit or update existing details directly from this section.
2. Overview
The Overview tab is where most day-to-day work happens.
From here, you can:
Create new Requests
Generate Quotes
Create Jobs
Issue Invoices
Below, you can track all activity across:
Requests
Quotes
Jobs
Invoices
Everything stays organized and easy to access.
3. Schedule
The Schedule tab shows all time-based activities, including:
One-off visits
Recurring services
Invoice reminders
Upcoming and past work
Click any entry to open the full details instantly.
4. Notes & Attachments
This section stores:
Internal notes
Important documents and files
It ensures your team always has the right information when working with the client.
Did this answer your question?


